Key Takeaways:
- Screen recorders are the fastest way to capture streaming video online but aren’t ideal for recording your own livestreams.
- Use dedicated recording software if you want high-quality audio and video recordings for clips, tutorials, and social content.
- On both desktop and mobile, Riverside records professional-quality audio and video locally for easy editing and repurposing across platforms.
The easiest way to record streaming video online is with a screen recorder.
But if you want to record your own streams for repurposing, you'll need dedicated recording software to capture the highest quality.
This guide shows you how to record streaming video in both scenarios, with the best tools for each method.
Quick overview: Best software for recording streaming video
Here are the best tools for recording streaming video, depending on what you're trying to capture:
We specifically recommend:
- Riverside for creators who want high-quality stream recordings with minimal setup, including local 4K video, separate audio tracks, and built-in editing tools
- OBS Studio for users who need full control over recording settings, advanced configurations, and a completely free, customizable setup
- Streamlabs for streamers who want a simpler OBS-style experience with built-in overlays and integrations for platforms like Twitch and YouTube
- Native screen recorders for quick, no-setup screen recordings, especially when you just need to capture something fast and don’t require editing flexibility or high production quality
How to record your own live stream with Riverside (Mac and Windows)
If you’re recording your own livestream to repurpose later, we suggest using a dedicated recording platform like Riverside rather than a standard screen recorder. This is because Riverside prioritizes high-quality local recordings at up to 4K resolution.
Plus, you can repurpose your recording in the same workflow with a full suite editor and AI tools for automatic clips, summaries, and more.
Here’s how to record your livestream in Riverside:
Step 1: Open Riverside in your browser and sign in to your account. This takes you to your dashboard.
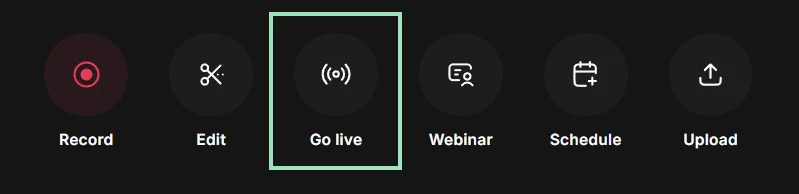
Step 2: From your dashboard, click on the “Go live” button to create a new livestreaming studio.
Step 3: In the lobby, select your microphone, speaker, and camera from the dropdown menus. Once ready, click “Join studio.”

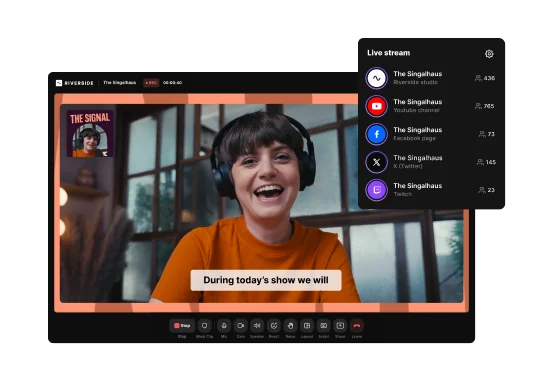
Step 4: To set up streaming channels, click the “Live stream” tab at the top of the studio. Here you can link your streaming destinations and choose where you want to stream.

You can also click on the “Brand” button in the right toolbar to style your live stream layout with lower thirds, a background, and logo.

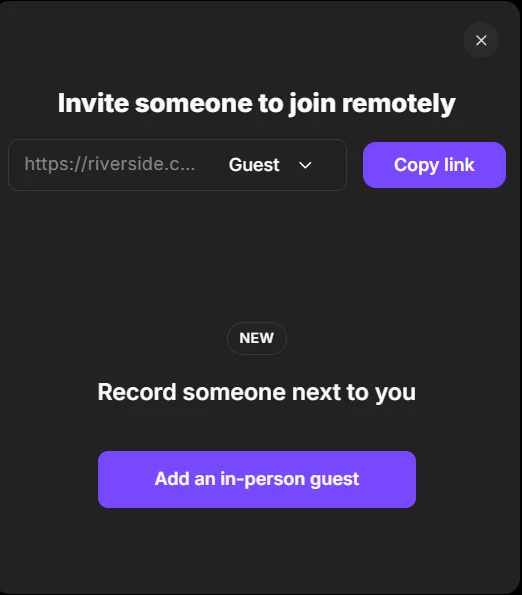
And if you want to invite guests, click “Copy link” in the "Invite someone to join remotely" panel.
Step 5: When you’re ready, click the red “Go live” button from the bottom toolbar. This will automatically start your stream and your stream recording.

During the live stream you can:
- Open the comments panel on the right side of the studio to monitor and respond to audience messages from connected platforms without switching tabs.
- Accept live call-in requests from audience members.
- Share videos and play sound effects using the media board.

Step 7: When you’re finished streaming, click the red “Stop” button. Keep your browser window open while Riverside automatically processes your files.
Step 8: Click “Go to project” to return to the dashboard and view your stream recording. Here you can click “Edit” under your recording preview to go to the editor.
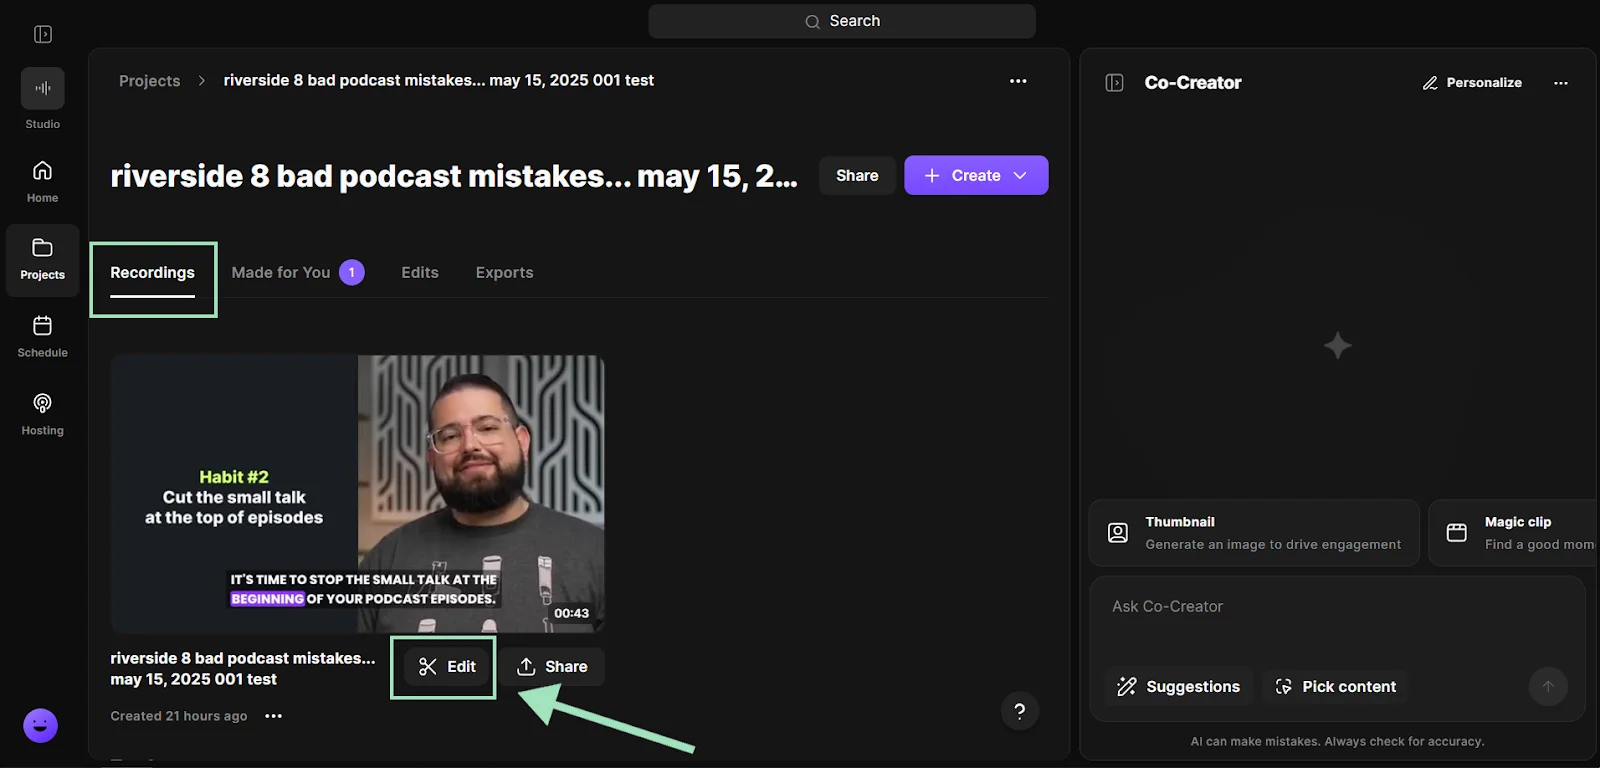
In the editor, you can:
- Trim your recording with text-based editing.
- Add stylized captions and lower thirds.
- Enhance your audio
- Add text, music, or visual overlays.
And more. You can also ask the “Co-creator” chat-based editor to turn your stream recording into clips of key moments, a promo trailer, a blog post, and more.
.webp)
How to record your own livestream using a hardware encoder
A hardware encoder is a dedicated device that converts your camera and audio feed into a live-stream-ready format without relying on a computer.
Your hardware encoder’s exact setup process depends on its model. However, most setups have a similar workflow:
- Connect your camera and audio sources to the encoder
- Connect the encoder to the internet
- Add your streaming destination or RTMP settings
- Record or stream directly from the device
Popular hardware encoders include the Blackmagic Design ATEM mini pro, AJA Helo Plus, and the LiveU Solo Pro.

Hardware encoders are common in production settings where reliability is critical, such as live events and sports broadcasts. Because it encodes on the device itself, a hardware encoder can reduce processing strain on a computer and provide a stable performance during a long, complex livestream.
This makes them also useful for multi-camera productions and on-location livestreaming. But they also come with tradeoffs.
Most hardware encoder setups:
- Cost more than software-based livestreaming tools
- Require more technical setup
- Offer less flexibility for editing workflows
- Depend on device-specific controls and interfaces
- Don’t separate audio and video tracks in the same way many software tools do
That’s why creators looking for a simpler setup and easier editing workflow often choose software-based livestreaming tools like Riverside or OBS Studio.
How to record your own livestream on mobile
If you want to livestream on the go while capturing clean, high-quality recordings, use the Riverside mobile app to record top-notch audio and video directly from your phone.
As with the desktop version, Riverside mobile records separate video and audio tracks directly to your device, making editing and repurposing content easier later.
Here’s how to record your livestream on Riverside mobile:
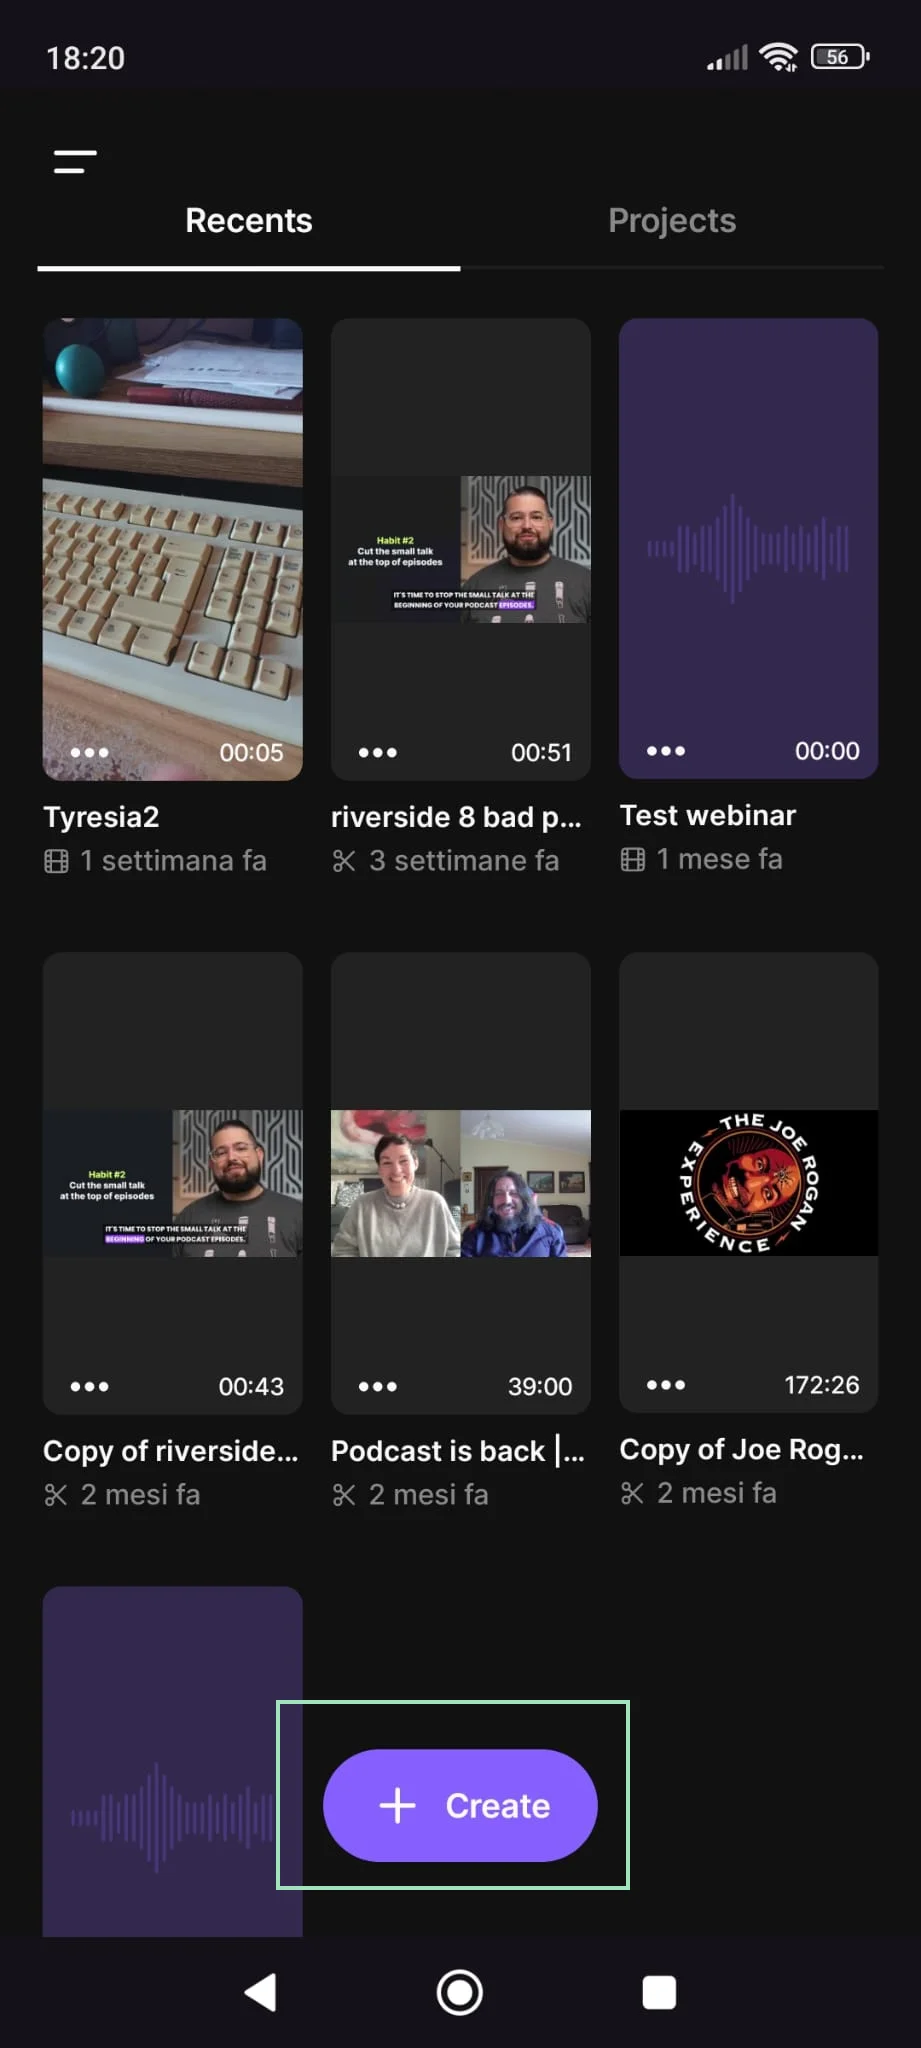
Step 1: Install the Riverside app from the Apple App Store or Google Play Store. Open the Riverside app and sign in to your account.
Step 2: From your dashboard, click on “+ Create studio” or select an existing studio from your list of recordings and sessions.
Step 4: Select on what platforms you want to stream to. Just like on desktop, you can turn on the toggle to stream to Riverside, or you can connect your stream to social media platforms.
Step 5: When you’re ready to start your session, press the red “Record” button, to begin streaming to your enabled platforms. Everything records automatically.
Step 6: When you’re finished, tap the red Stop button, then “End now” to stop streaming. Keep the app running while Riverside automatically uploads your recording.
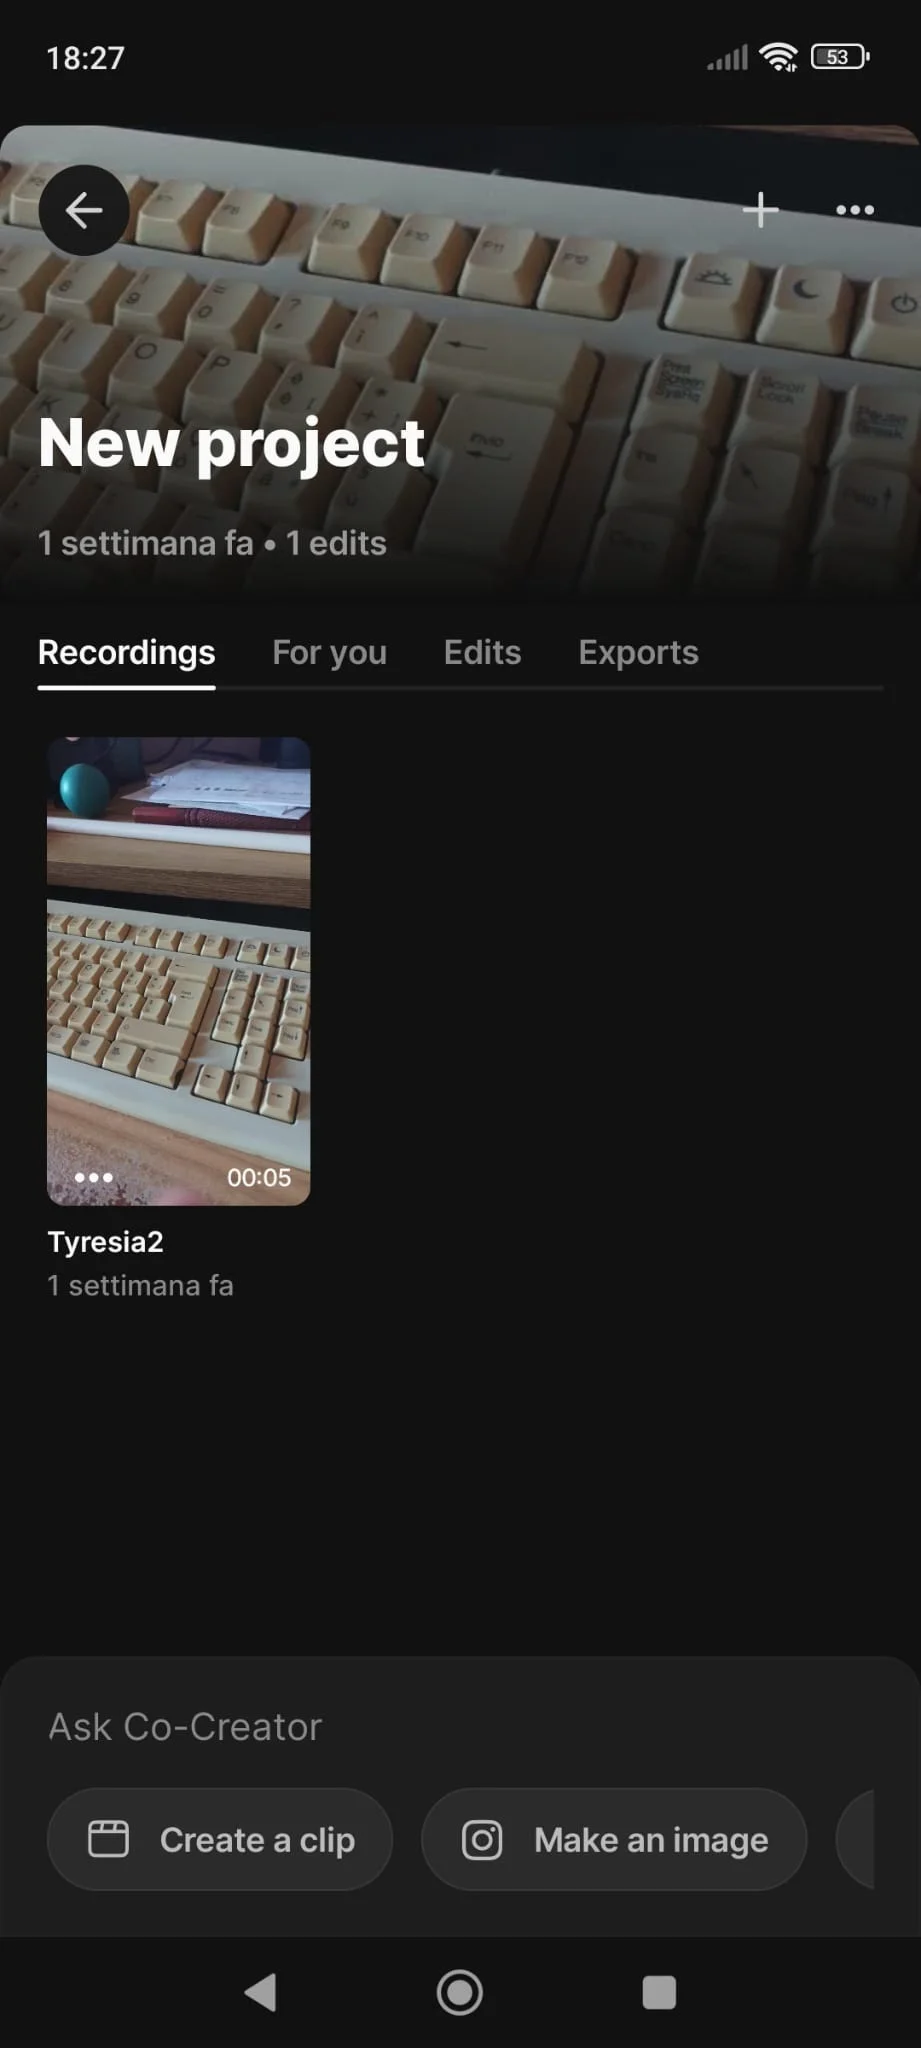
Step 9: After your upload is complete, you can access your recording in the Riverside mobile dashboard. Tap “Edit” to trim, make clips, add captions, and export to other platforms.
How to record someone else’s livestream using Riverside’s screen recorder
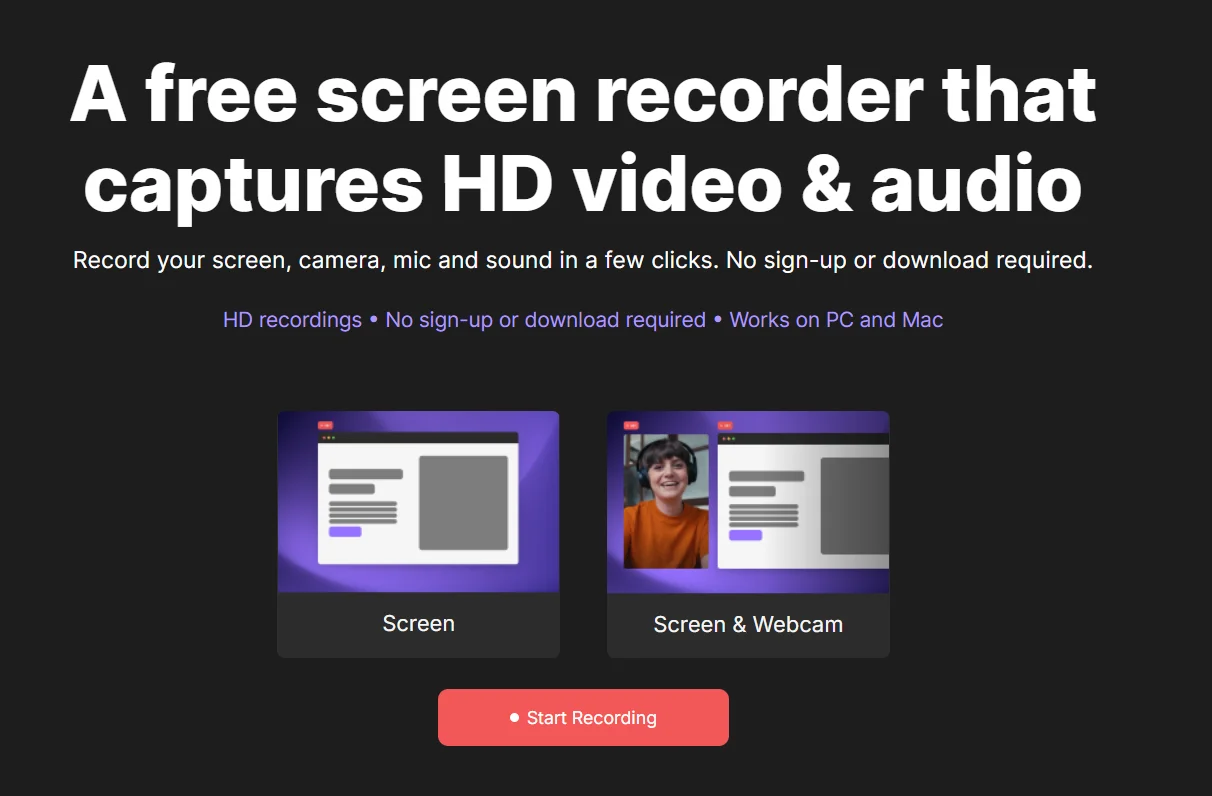
If you want to save a webinar, online event, tutorial, or another livestream for later, Riverside’s free screen recorder lets you capture your screen and audio from your browser.
But remember: Just because it’s possible to record a live stream doesn’t mean it’s legal. Always check a platform’s terms of service and get the appropriate permissions before recording or sharing to avoid copyright infringement issues.
Step 1: Open Riverside’s screen recorder. Choose whether you want to record onlyyour screen, or your screen and webcam simultaneously. Cick “Start recording” to launch the recorder.
Step 2: Select whether you want to record your entire screen, a specific window, or a browser tap. To capture livestream audio, enable the audio-sharing option, then click “Share” to confirm.
Step 3: Click the red “Record” button in Riverside, then open the livestream you want to capture.
Step 4: When you’re ready to stop recording, return to Riverside and click the red “Stop” button to allow Riverside to begin automatically processing the recording.
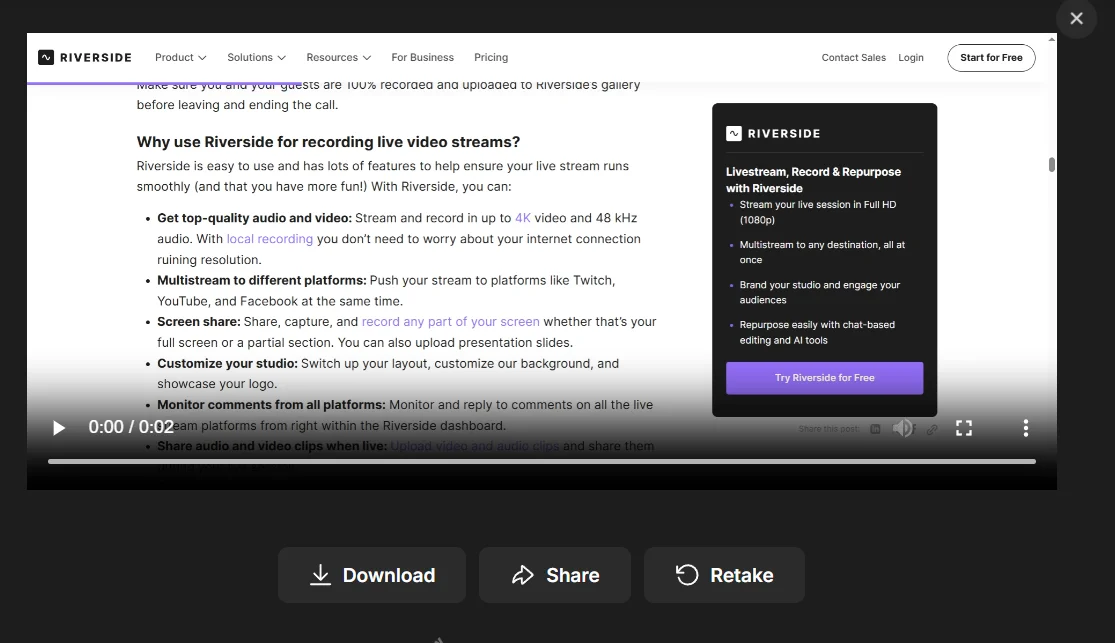
Step 5: After processing ends, click “Download” to save the recording to your device, or press “Share” to share your video on social media.
Note that if you want to save your screen recordings and edit them in one place, you can record your screen directly in your Riverside studio. Just:
- From your dashboard click "Record" to start a new recording.
- Check your equipment in the lobby, then click "Join studio".
- Click “Share” from the bottom toolbar and then “Share Screen”.
- Choose whether to share your entire screen, a specific application window, or a browser tab.
- Click the “Record” button to start recording, and the "Stop" button when you’re done.
Note: When sharing your screen with audio, enable “Share audio” before you begin sharing your screen.
All screen shares record as a separate track from your audio and video so you get more flexibility editing.
Best practices for live stream recording
Taking time to ensure an efficient streaming setup and making small optimizations before going live can make a big difference in overall results.
Record locally when possible
Local recording prevents quality loss from lag, dropped frames or compression during the stream. This is because it captures video and audio directly on your device, rather than relying on an internet connection.
Choose the right resolution and frame rate
For most streams, 1080p at 30fps is a solid baseline, but if you need higher production quality, record in 4K or increase to 60fps for smoother motion. Just remember that higher settings require more processing power and storage.
Prioritize audio quality
Adding an external microphone to your setup and testing sound levels before going live can make a tremendous difference in your stream quality. Poor audio quality can make an otherwise compelling stream unwatchable.
Record separate tracks
It takes a little more time upfront, but recording separate audio and video tracks for each participant makes editing much easier. This practice allows you to adjust levels, remove background noise, and fix issues without affecting the entire recording.
Close apps and background processes
Close unnecessary programs and browser tabs to reduce the risk of lag or dropped frames. Running too many applications at once can slow down your system and cause recording issues.
Save recordings to a fast drive
Recording directly to a solid-state drive (SSD) improves performance and reduces the chances of buffering or file corruption during longer streaming sessions.
Control lighting and camera setup
Good lighting can dramatically improve video quality. Use natural light or a simple lighting setup, and position your camera at eye level to get a more professional look.
Do a test recording before going live
Always run a short test recording before your stream starts. This gives you the chance to catch issues with audio, video, or settings and fix them in advance.
Troubleshooting: Common recording problems
Even with the best streaming setup, recording issues can happen. Here are some of the most common recording problems that arise during streaming, and how to fix them quickly.
Black screen when recording
If your recording shows a black or blank screen, it’s usually caused by permission settings or hardware conflicts.
Quick fixes:
- Turn off hardware acceleration in your browser or app settings.
- Restart your browser or recording software.
- Check screen recording permissions (especially on Mac and mobile).
- Make sure you’re capturing the correct window or display.
Audio not recording
Missing audio is often due to incorrect input settings or blocked permissions.
Quick fixes:
- Make sure the correct microphone is selected.
- Check system or browser permissions for microphone access.
- Test your audio levels before recording.
- In tools like OBS, confirm the correct audio source is added.
Recording lagging or dropping frames
Laggy recordings are usually caused by limited system resources or high recording settings.
Quick fixes:
- Lower your resolution or frame rate.
- Close unnecessary apps and browser tabs.
- Use hardware encoding if your system supports it.
- Save recordings to a fast drive (SSD instead of HDD).
FAQs about recording a streaming video
Is it legal to record streaming videos?
Yes, it’s legal to record streaming videos for personal, non-commercial use or when you own the content or have permission. It is not legal to distribute, share, republish, or monetize copyrighted content without the creator's explicit permission.
Fair use may apply in limited cases, but it depends on the purpose and market impact. Platform terms can also restrict recording, even when copyright law is less clear. When in doubt, get permission before recording or republishing someone else’s stream and check the terms of service of the platform you are recording to.
What equipment do you need to record a streaming video?
To record a streaming video, you need a camera, microphone, recording software, and a stable internet connection.
For a basic setup, your live streaming equipment may consist of just your smartphone or laptop’s camera and built-in mic can work. For better quality, use an external camera, USB or XLR microphone, headphones, and simple lighting.
What are the differences between hardware and software for recording?
The main difference between hardware and software for recording is that hardware uses physical equipment and software is a program on the computer.
Hardware encoders are physical devices that capture and process video independently, which takes the processing burden off your computer but costs significantly more.
Software encoders are downloadable programs that are cheaper and easier to set up, but they rely heavily on your computer's CPU and memory to record the footage.
Do streaming services allow you to record?
Several streaming services allow you to record with built-in DVR or cloud recording features. However, most streaming platforms restrict screen recording, especially for copyrighted content. While some tools make it technically possible to capture streams, doing so may violate the platform’s terms of service. Always check the rules before recording.
Can I use OBS to record live streaming video?
Yes, you can use OBS to record live streaming video, including your own live streams and content on your screen. It’s a free, open-source tool that offers advanced customization, but it requires more setup compared to simpler recording tools.
Can I record my own live stream for free?
Yes, you can record your own live stream for free with several tools, including OBS and built-in screen recorders. Most open-source broadcasting software allow you to save a local copy of your stream to your hard drive at no cost.


.webp)