.webp)


Want to record video interviews remotely?
Maybe you’re trying to land your dream job or creating compelling content for your audience. Whether it’s a podcast, job interview, or customer testimonial, recording a great interview comes down to solid prep, smart questions, and the right tools.
In this guide, I’ll walk you through the best ways to record remote video interviews and provide you with lots of tips to help you look polished and sound great.
Preparing for your interview recording
Successful recordings start well before you press record. The right preparations will make your interview less stressful and more professional.
Let’s start with some basic steps to set yourself up for a winning interview.
Step 1: Choose your equipment
You don’t need much to record a good video interview. Even a simple setup can go a long way, but the right basic gear makes a huge difference.
- Camera: Your laptop camera works fine to start, but if you’ve got a modern smartphone, using your phone as a webcam is the simplest way to level up your video quality.
- Microphone: Clear audio makes all the difference. An external mic can give you that crisp, professional sound without breaking the bank.
- Headphones: Even a basic pair of headphones will help you monitor sound, improve mic technique, and avoid annoying echoes and audio bleeds.
- Lighting: No need for studio lights. Just sit in a bright room and face a window if you can. That alone makes your video look sharper. If natural light isn’t an option, place an LED ring light behind your camera (they are relatively inexpensive on sites like Amazon).

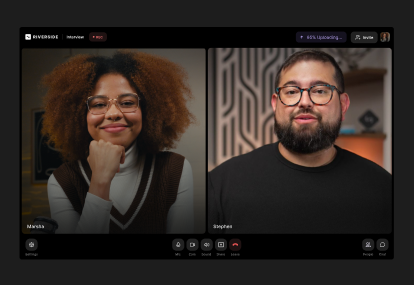
Step 2: Select the right remote recording software
Your recording platform is the virtual space where your interview happens and it handles the tech so you can focus on the conversation.
A popular, but less-than-optimal, solution for recording a remote video interview is to conduct it as a regular Zoom or Teams call. However, the quality of conferencing tools depends on your internet connection. If your (or your guest’s) Wi-Fi is unstable, your video and audio will be compressed.
Recording a phone call is an alternative, but audio quality will be very, very low and generally unsuitable for a professional production.
If you don't want to worry about glitchy internet, dropped calls, or diminished quality, remote recording software like Riverside is the easiest and most practical solution.
Guests can hop in with just a link, no downloads or install needed. Unlike on Zoom, each participant's audio and video is captured locally on their own device before syncing to the cloud. This ensures up to 4K video and uncompressed audio quality, even if your internet connection has a few hiccups.
All these features are designed to allow you to focus on the important part: creating a great video interview.

Step 3: Set up your recording space
You’ll need to set up a suitable recording environment for your interview.
Keep the following in mind:
- Record in a quiet environment to ensure clean audio and turn off noisy devices nearby (e.g., phones, fans, notifications).
- Record in a room with soft furnishings to absorb echo. If you record often, invest in sound-absorbing panels for even better results.
- Choose a plain, non-distracting background. Simple props like plants or warm lighting can help set the tone.
- Check your lighting; natural light is great, but a basic softbox or ring light can elevate your appearance.
Step 4: Test your setup
Avoid technical hiccups and check that your setup works as intended before your actual recording session. Test your camera and microphone beforehand, check out different lighting sources and familiarize yourself with the platform you’re recording on.
Based on availability, you could also ask your guest to record a mockup session a few days before the interview (you can even use this practice session to record a promotional teaser, which I’ll touch upon later).
Step 5: If you have guests, prep them
If you are interviewing someone, send out your invites and set the date as early as possible. This way, you can prep your guests ahead of time to make sure everything is smooth on the day of the interview.
Start by talking them through the recording process (i.e., timing, topics, etc.) and what you expect of them (e.g., camera, mic, lighting setup).
If you’ve the budget, consider sending your guest a recording equipment kit to maintain consistent quality on both ends.
If not, then share tips on how they can improve results based on what they have. Even using a phone as a webcam can still get you up to 4K quality.
Free checklist: Download your full checklist on prepping interview guests.

Step 6: Prepare what you’ll say during the interview
The more prepared you are for the interview, the more professional your recording will be. If you’re interviewing a guest, read up on their background, their area of expertise, and their experiences. Then, go through some previous interviews they’ve done to make sure you’re bringing a fresh perspective to the table.
If you’re recording solo, outline your key points ahead of time so you stay on track. It’s important to hold your viewers’ attention; you don’t want to fumble with data or statistics halfway through the conversation.
And if you’re worried about forgetting your lines, Riverside’s built-in teleprompter can help. You can keep notes or a script right on screen so you maintain eye contact with the camera and come across naturally.
Recording the interview
Ready to record? A few simple habits can make your session smoother and save you headaches during editing.
Here’s what to keep in mind once you’re on camera.
Step 1: Give yourself more than enough time
If you’ve got time to mentally prepare, a calm and collected presence always translates better on camera.
Whether you’re recording yourself or with a guest, block out more time than you think you’ll need. There’s nothing worse than cutting off your guests or looking flustered because you don’t have enough time to cover everything.
Also, budgeting ample time will ensure you can deal with any unforeseen logistical or technical issues.
Step 2: Get straight to the topic
Don’t make your listeners wait too long before diving into the main conversation. If they have to sit through 20 minutes of chatter before the real interview begins, chances are they’ll leave much earlier.
A little small talk or a short intro at the start is okay, but make sure you start tackling the main topic as soon as possible.
As the host, try to control the pace and don’t let guests talk too much (or too little). Follow the flow of the conversation, though. Sticking too rigidly to your script can mean you miss out on organic moments or exciting snippets.
Step 3: Opt for local recording for better quality
Local recording means everyone records directly on their devices. This is better than relying on your internet for recording, as connectivity issues can ruin your audio and video quality. Together with progressive uploading, local recording also saves you from losing everything you’ve recorded if there’s an internet issue or failure.
If you’re using Riverside, this is an automatic part of the recording process. Everything records directly to your device for maximum quality, then instantly uploads to the cloud so you won’t run out of storage space.
Step 4: Record separate tracks for each participant
Make sure you’re recording a separate audio and video track for each guest ( this isn’t possible on Zoom and many other conferencing platforms). You’ll thank yourself during editing because you’ll have more flexibility: with separate tracks, you can cut crosstalk and adjust one track without affecting any of the others.
And if you’re not sure how, we’ve got a full guide on recording separate tracks. The easiest way is with a platform like Riverside. You record as usual, and you’ll get separate tracks automatically.

Step 5 (optional): Hire a recording producer
Depending on the scale of your operation, hiring a producer who can toggle the settings and monitor your recording during your interview can make a huge difference.
Using Riverside, you can give your producer all the recording controls behind the scenes using Producer Mode. They’ll join your sessions, but their audio and video won't be part of the recording.
Want to learn more? Check our video on producing remote guest interviews:
Polishing your interview recording
Do your interview (and your guests) justice by properly editing your recording.
A few simple edits can transform your raw footage into a professional video. In the past, this required time and effort, but with an AI-powered platform like Riverside, you can wrap up post-production in minutes instead of hours.
Step 1: Trim the fluff and set pace
Make sure your remote interview moves at an engaging pace and doesn’t drag. Cut out the fluff, trim the tangents, get rid of the small talk, and keep the flow tight.
If you’re using Riverside, text-based editing makes everything much simpler: to edit your video, you simply edit the text. And with traditional timeline editing, you can easily rearrange sections to shape related ideas into a story.
Even better, the AI Producer can help you set the pace by removing filler words, speech pauses, and long silences with a single click.
Step 2: Clean up audio
One easy way to polish your recording is to mute audio tracks where people aren’t speaking. Like I suggested above, you’ll need to record each guest on a separate track to do this easily.
In interviews, it's common to hear background taps, overlapping laughs, quick ‘yeahs’, or people talking over each other. Instead of manually hunting for these distractions, on Riverside you can automatically silence anyone not talking.
Even with a good microphone, your audio might pick up some background noise or have inconsistent volume levels. Riverside’s Magic Audio automatically removes background noise, levels the volume of all speakers, and enhances your audio for a rich, studio-quality sound.

Tip #16 Focus on the story, not the sequence
Don’t feel tied to the exact order of the conversation.
If you and your guest jumped around between topics, that’s totally normal. But in post-production, you have the power to shape it into a story.
Rearrange sections so related ideas flow together—a compelling narrative beats a strict timeline every time.
Step 3: Add an intro and outro
Start your interview by adding a solid intro to hook your audience right away, then finish it with a strong outro that makes it memorable.
Just upload your music and sound effects, drag them into the Riverside editor, and instantly give your interview the polished feel of a high-production show.
Step 4: Add media and overlays
Layer in B-roll, overlays, and sound to make your content look and sound more engaging. With Co-Creator, you’ve got a built-in content team just one prompt away. Type what you need and AI will edit and repurpose your content for you, just by chatting.
Step 5: Add captions
Most people scroll on social media and other platforms with the sound muted. Captions make your video accessible and keep viewers engaged.
Riverside automatically generates captions for your video. You can style them and tweak the look to match your brand before embedding them directly into your final video.
Step 6: Brand it right
Don’t just toss a logo into the corner of the recording; put your brand front and center. Use your colors, fonts, and backgrounds to create a branded look that’s unmistakably you.

If you've recorded an interview for a job application, your polished video is now ready to send. If you need more tips, check out our video on how to edit a recording with Riverside:
Publishing and promoting your remote interview
If you’re a content creator, the work doesn’t end with post-production polish. To get your interview seen, you need to share it.
Here are a few simple ways to promote your interview and reach more people with your show.
Step 1: Spread the word
Build hype by sharing teaser clips on social media to give your audience a taste of what you discuss in the interview. It’s one of the easiest ways to boost reach and engagement.
Use Riverside’s Magic Clips to instantly turn standout moments into shareable, scroll-stopping content with just a few clicks.
Step 2: Tap into your guests’ networks
Your guest isn’t just bringing their voice, they’re bringing their audience, too. After the interview, encourage them to share the episode with their followers.
Make it easy by sending your guests a few ready-to-post clips or quotes they can drop on social media. It’s a simple way to boost your reach and get your content in front of a whole new crowd.

Step 3: Design your cover art around your guest
On social media, people do judge a book by its cover. If you want clicks, your content needs to look the part.
Design your thumbnails, snippets, and previews around your guest; they’re the star of the show and the main reason people will stop scrolling. Make it eye-catching but clear, and consider adding a quote from your guest that will make viewers want to hit play.
Step 4: Mark chapters and time stamps
Make your interview easier to hit play on by adding time stamps for key topics or questions.
It’s a small touch that makes a big difference for viewers who want to jump around, and it makes your content feel more polished and professional.
With Riverside, you can generate timestamped chapters as well as short takeaways, show notes and SEO keywords automatically.

FAQs on best ways to record video interviews
Still looking for information? Here are the answers to some frequently asked questions.
How do you introduce yourself in a recorded video interview?
Keep your intro short and confident. If you’re applying for a job, say your full name, mention the role you’re applying for, and add a quick line (15–20 seconds max) about why you’re excited for the interview.
Smile while you look at the camera, and try to keep your tone natural without feeling rehearsed. Short sentences like “with 5 years of marketing experience” give context without diving into your full resume.
Something like: “Hi, my name is John Doe, and I’m applying for the Senior Marketing Manager position. I’m excited to share how my 5 years of marketing experience can help your team create campaigns that drive results.”
How can I record a remote interview on my phone?
If you’re looking to record a remote interview on your phone, you can easily do that with the Riverside app. It captures everything locally in up to 4K resolution, so you don’t have to worry about glitches or poor quality. And everything is automatically uploaded to the cloud, so you can easily edit the recording on the browser-based app from your desktop pc.
Can you legally record an interview?
Yes, but the legality varies by region: some places require all parties to consent (two-party consent), while others only need your permission (one-party consent). As a rule of thumb, it’s always better to get explicit permission from your interviewee before recording.


%20(1).webp)
.webp)