


Key takeaways:
- Zoom doesn’t natively record separate video tracks. It only records mixed layouts like speaker or gallery view.
- You can use live production tools like ZoomISO (Mac) or vMix (Windows) to capture separate Zoom outputs, but setup is complex.
- Asking each of your participants to record locally works, but leaves room for human error.
- Recording-first platforms like Riverside make multitrack video much easier by capturing separate audio and video automatically.
Want to record separate video tracks on Zoom? You can, but it isn’t a simple built-in feature.
Zoom doesn’t natively support multitrack video, which makes editing clunky and limited. There are workarounds, though.
Here’s how to do it, as well as some other tools that make multitrack video recording easier.
How to record separate tracks on Zoom: 3 Methods
In Zoom, you can record separate audio tracks, but not video.
If you need to record each participant's video feed separately, you'll need to use live production and routing tools, like ZoomISO (Mac) and vMix (Windows.) Or, you can ask each person to record their own video locally and send it to you afterward.
We’ll walk you through these options, but be prepared for some technical steps. (If you want an easier Zoom alternative, we’ll show you how to record separate video tracks with Riverside later on.)
Option 1: Use ZoomISO to record individual video outputs (Mac only)
If you're on macOS, you can use ZoomISO to record separate video feeds from your Zoom meetings or webinars and export each participant’s feed individually.
ZoomISO works well, but it requires a fair bit of technical expertise to get it working right.
Here's a step-by-step guide.
What you’ll need:
- A macOS computer with an Apple silicon chip.
- A Zoom account.
- Recording permissions. (You can record Zoom meetings as a host/co-host or if a host has specifically granted you recording permissions.)
- Video recording software (like OBS) or a hardware recorder.
Step 1: Install and launch ZoomISO.
Find ZoomISO in the Zoom App Marketplace. Click “Sign in with Zoom,” then give ZoomISO access to your Zoom account when prompted. This step is necessary to link ZoomISO with your Zoom meetings.

Step 2: Join or start a Zoom meeting as usual. Remember to sign in with the same account you’re using in ZoomISO.

Step 3: Head to the “Outputs” tab in ZoomISO’s settings and set the number of outputs to match how many separate feeds you want to capture.

Set up each participant as a separate output.
Note: ZoomISO’s entry level plan only allows 4 outputs.

Then, for each participant, you can configure each of the following:
- Output Mode: This determines the source of the participant’s video feed. You can set it to “Participant” to capture the specific participant’s active feed. But there are also options to assign it to the active speaker, a specific spotlighted participant, a screenshare, or the active screen share.

- Output Type: This specifies the output protocol or device. Options here include NDI, Syphon, Display Output, and Black Magic. If you’re capturing and recording your stream to video recording software like OBS, you will choose NDI or Syphon.

Step 4: Go to the top bar and click the “Capture Mode” dropdown to select “Record”.

Step 5: Start the data stream for each output by setting “Output Engine” to “Enabled.” When you do this, you should see a “custom streaming notification” bar appear at the top of your Zoom screen.

Step 6: Next, head to OBS. ZoomISO handles feed separation, but OBS is what actually records and saves the video files.
Open OBS and go to the “Sources” panel. For each ZoomISO output (each participant) click “+” and then “Source.” Select the corresponding ZoomISO output from the list. You can rename each source to match the participant.
Once you’ve added and configured all your sources, you can start recording to get separate video tracks for each participant.

Step 7: Check each feed with the “Preview” button, but keep an eye on your system performance by using the “Activity Monitor” that’s native to the macOS. If your CPU usage goes over 80% or bandwidth exceeds 100Mbps, your video quality may take a hit.
For more detailed instructions, check out the ZoomISO user guide.
Option 2: Use vMix to record individual video outputs (Windows only)
If you’re on Windows, vMix lets you bring in Zoom participants as individual video inputs and records each one as its own file using a feature called MultiCorder.
This gives you true ISO video files for every guest. Before you get started, be aware that vMix is designed for production teams and is pretty complex to set up and use.
Here’s how to do it.
What you’ll need:
- A Windows PC.
- A paid vMix account (free and Basic versions of vMix don’t support Zoom inputs or ISO recording).
- A Zoom account.
- Recording permissions (host, co-host, or granted permission).
Step 1: Enable Zoom inside vMix. This lets vMix host or join Zoom meetings directly.
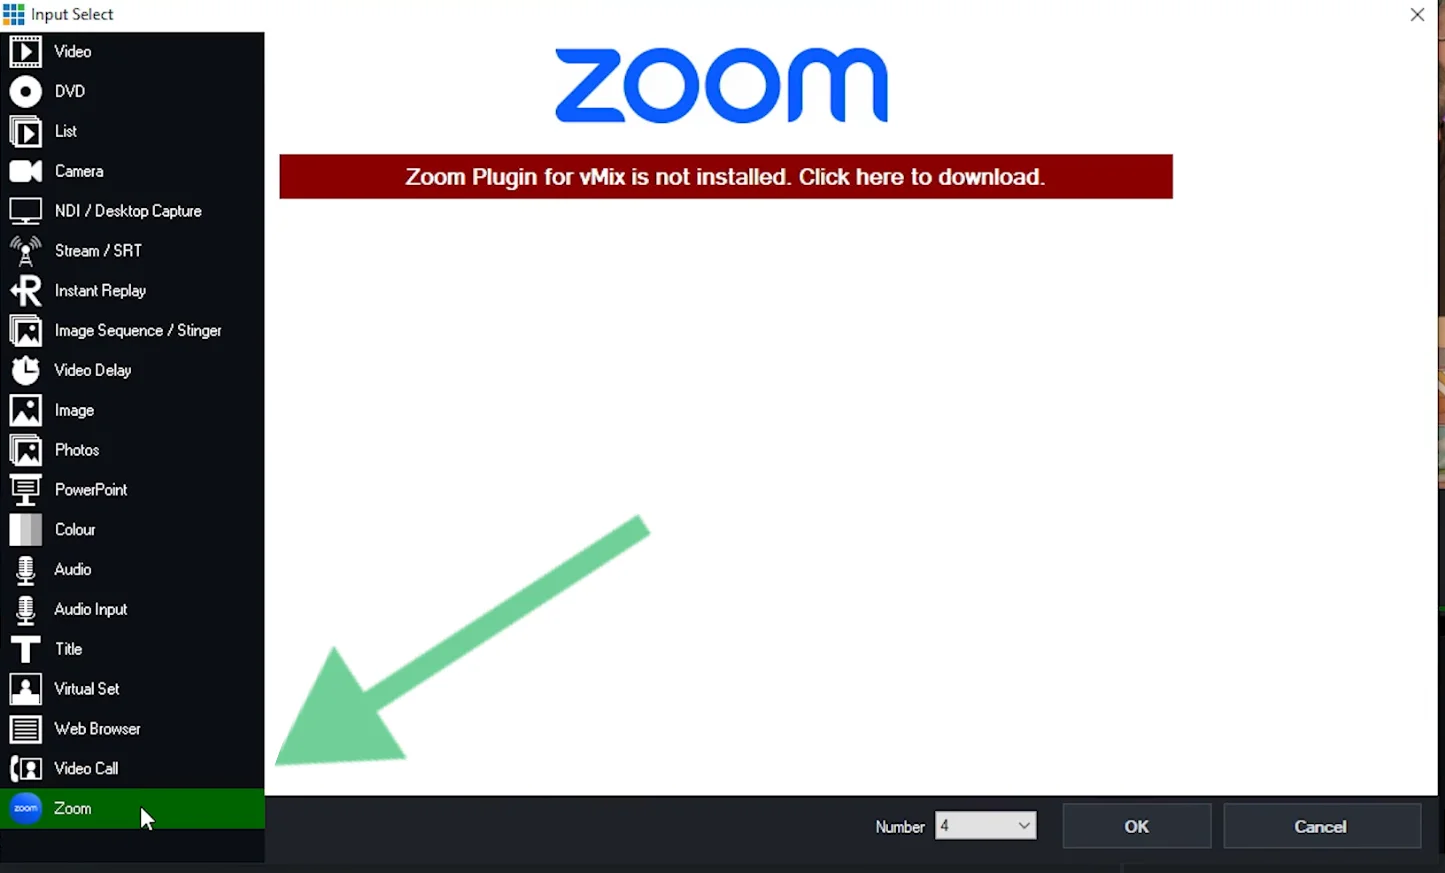
First, open vMix and click “Add Input” and then select “Zoom.” Next, sign in with your Zoom account and allow vMix to connect.
If it’s your first time using vMix with Zoom, you’ll need to click the link to download the plugin, then install it. When you’re done, go back to vMix to add the Zoom input again.
Step 2: Create or join a Zoom meeting.
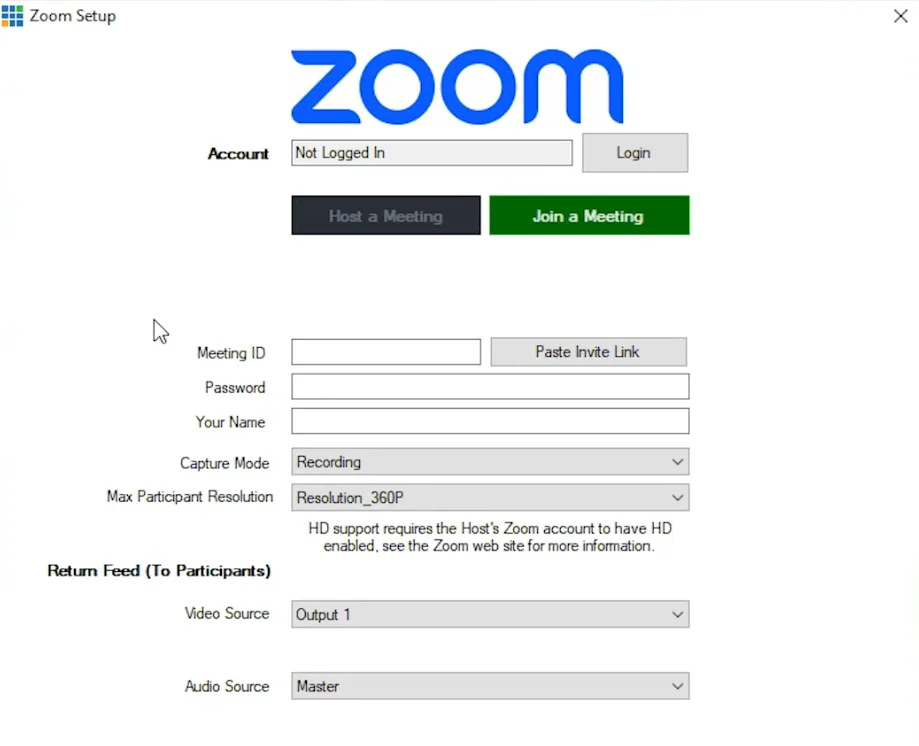
Inside vMmix, click on the Zoom input on your main screen to start (or join) a Zoom meeting. The Zoom interface will open, and you will be prompted to log in to your Zoom account.
Now, you can opt to either join or host a meeting. You can also set your max resolution for the feeds. When you’re done, click “Connect.”
As participants join the meeting through Zoom, each person appears as a separate input in vMix, just like individual cameras.
Step 3: Enable ISO recording (MultiCorder).
Open vMix “Settings” and then select “MultiCorder.” Enable MultiCorder and select each Zoom participant input. You can also set a recording destination and format.
Now, vMix will record each participant to their own video file.
Step 4: Start recording.
Click “Record” in vMix. vMix will start recording one file per Zoom participant. When the meeting ends, you’ll have perfectly synced, separate video tracks ready for editing.
Option 3: Ask each participant to record their video locally
The third option to get separate video tracks for each Zoom participant involves asking each participant to record their own feed. This is less technical, but involves some logistics. Here’s how.
What you’ll need:
- The Zoom desktop app (mobile and browser-based versions can’t record locally). Ensure that each participant has it installed.
- Permission to record from the host of the Zoom meeting. Every participant will need this.
- Clear instructions for each participant on how to set up the recording.
Step 1: Enable local recording.
Sign in to your Zoom account from the browser-based app (the Zoom web portal). From your account homepage, click on “Settings” from the left sidebar, then select “Recordings.”

Make sure the “Record to computer files” toggle is enabled. Note that every participant of the recording must follow this step (and the next one).
Step 2: Designate the recording destination folder.
Now open your Zoom desktop app (not the web client). Click on your profile picture in the upper-right corner, then click “Settings.”

Under the “Recording” tab, you can choose the folder to save your local files in. While you’re here, you can also enable “Record a separate audio file for each participant” to record separate audio tracks.
Step 3: Assign recording privileges to all participants.
Start your Zoom meeting or webinar.
Once all participants have joined, click on the “Participants” icon at the bottom to open the right-hand side bar.
From here, click on the 3 dots icon [...] near each participant, then “Allow to record to computer” to grant them permissions. Do this for each person who needs to record.

Step 4: Start the recording.
Click on the “More” button on the bottom bar, then “Record” to start the recording.

Zoom will record what each participant sees, so you’ll need to ask each participant to pin their own video to ensure their video file is full screen. They can do this by clicking the 3 dots on the top-right of their video tile and clicking “Pin.”
Step 5: Process the recording files.
When the meeting ends, each participant will need to click “Stop Recording.” Zoom will process the recording, then save the video, audio, and chat files in the folder that was selected earlier.
Step 6: Ask each participant to upload their audio and video files to a shared Google Drive or Dropbox folder.
We recommend providing a file naming convention (like "FirstName_LastName_Date") to keep everything organized.
Now you have the files, you can polish them up with the video editing software of your choice.
Alternative software to record a call with separate video tracks
Recording separate video tracks in Zoom isn’t exactly straightforward. Fortunately, there are other tools that make it much easier, and work much like Zoom. Like Riverside:
Riverside
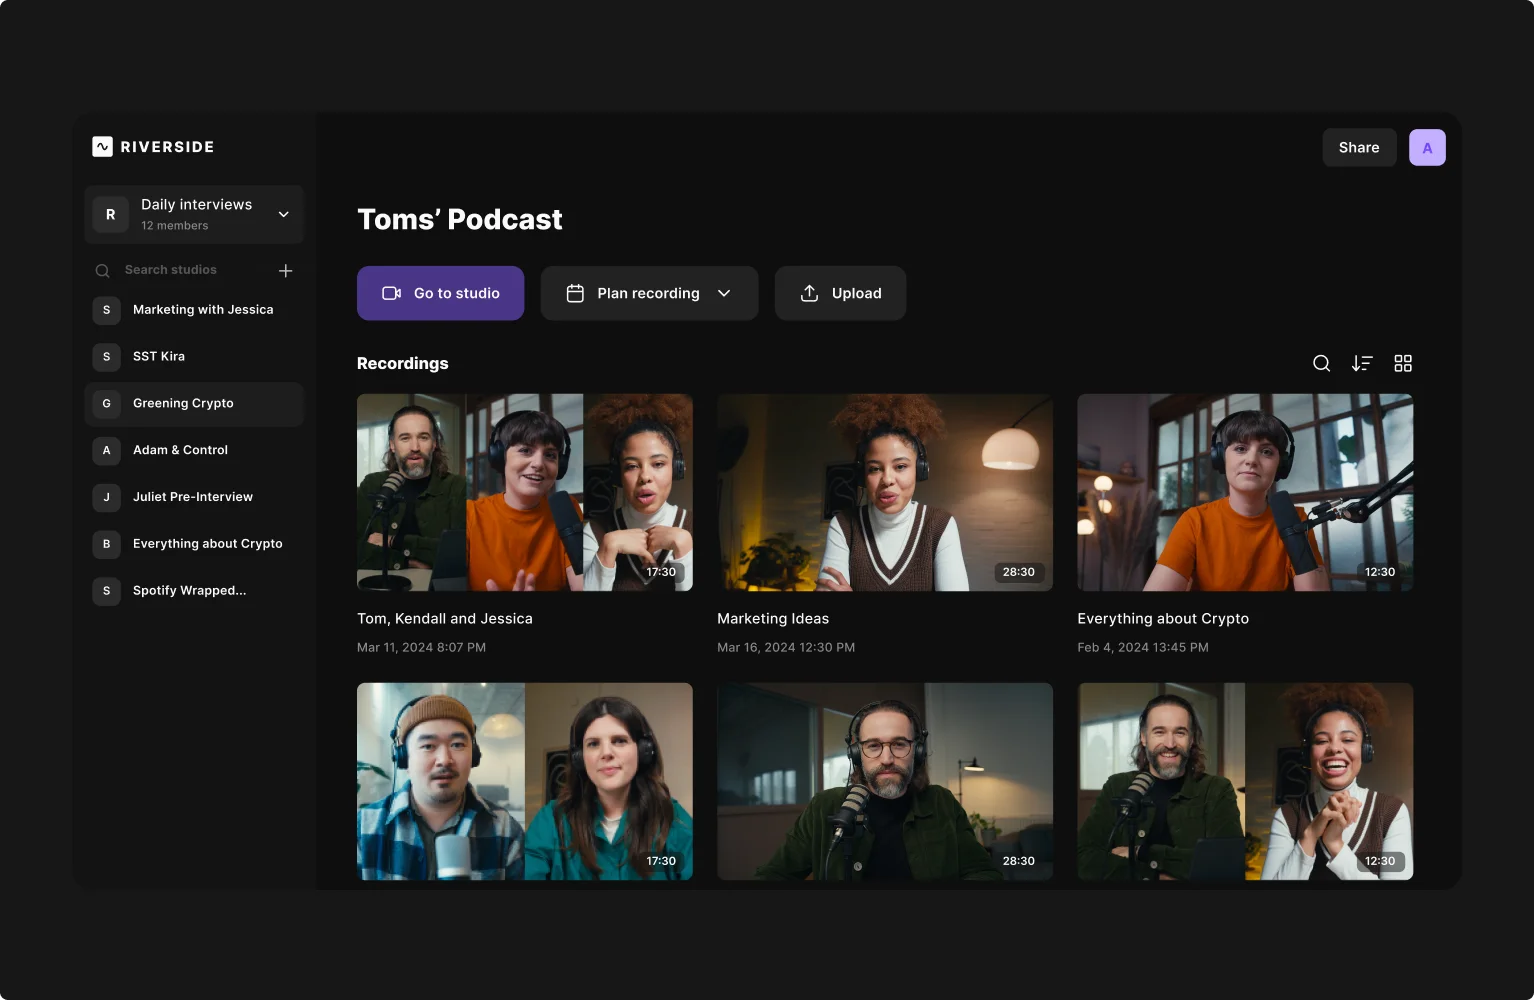
Zoom is designed for meetings, not recording. If you want better recording quality and separate audio and video tracks, try Riverside.
Riverside is an all-in-one video recording and editing platform that works a lot like Zoom, but with much better recording capabilities. It can record separate audio and video tracks for up to 10 participants. It’s browser-based, so participants can log on with a shared link (no downloads!).
Best of all, it records in high quality with up to 4K video and 48 kHz audio. When you’re done recording, you can also use Riverside to edit your content. The simple AI-powered tools can help you clean up your audio with a click, and easily add captions, music, and overlays.
Key features:
- High quality, local recording: Local recording means your video stays crisp, even when your internet connection wobbles. (Zoom’s local recording compresses streams and mixes them together for lower-quality results.)
- Automatic transcription: Get automatic transcriptions with speaker labeling. Riverside transcribes in 100+ languages and is 99% accurate. (Zoom doesn’t have speaker labeling, and offers limited language support.)
- AI audio enhancement: In one click, remove background noise, balance levels, and improve audio quality to sound like you recorded in a professional studio. (Zoom uses aggressive noise suppression that often degrades voice quality and offers no post-recording enhancement tools.)
- Eye contact correction: Fix eye gaze so you appear to look directly at the camera, even if you were reading notes. (Zoom does not provide eye contact correction tools.)
- Filler word and silence removal: Automatically detect and delete pauses, silences, and filler words to tighten the pacing of your episode. (Zoom requires you to manually find and cut silences in external software.)
- Text-based editing: Easily edit your video by deleting words from your transcript. (Zoom’s simple trimming tool only allows you to trim the beginning or end of a recording.)
- Chat-based editing: Speed up editing with Co-Creator. Our AI agent can apply edits, polish audio and video, and even repurpose your recording into blog posts and emails just by prompting it. (Beyond trimming, Zoom does not offer editing tools.)
- Captions: Quickly add and customize captions using your transcript. (Zoom can produce a VTT or TXT transcript file, but you can’t add or customize captions in Zoom.)
- Studio branding: Add logos and adjust colors to align your video with your branding. (Zoom does not provide branding beyond virtual backgrounds.)
- Screen share recording: Share and record your screen in a separate track. (Zoom only records screen sharing as part of the main feed, not as a separate track.)
- Livestreaming: Livestream to multiple platforms while you record. (Zoom’s livestreaming is lower quality, and you’ll have less control over settings and layout.)
Compare: Riverside vs. Zoom
Troubleshooting tips for recording separate video tracks in Zoom
Recording separate video tracks with Zoom almost always involves workarounds. Here’s how to spot (and fix) common problems.
Participants recorded the wrong camera
Why it happens: Zoom defaults to the system’s last-used camera. If a participant has multiple cameras (e.g., external webcam, DSLR, virtual camera), Zoom may grab the wrong one. This also happens when people plug in a camera after launching Zoom.
How to fix it: Before recording, have each participant:
- Open Zoom’s video settings.
- Explicitly select the correct camera.
You can also ask guests to plug in cameras before joining and turn off virtual cameras they aren’t using.
Someone forgot to start recording
Why it happens: With Zoom workarounds, recording is often manual. If each person is responsible for their own recording, human error is inevitable.
How to fix it: If everyone is recording their own local track, add a verbal roll call, like “Recording started, everyone confirm.”
Video resolution is low
Why it happens: Zoom dynamically lowers resolution to preserve call stability. Tools like ZoomISO only record Zoom outputs, not participants’ cameras (like Riverside does.)
How to fix it: Ask participants to use a wired internet connection whenever possible and close other windows and apps. You can also enable HD video in Zoom’s settings. (Go to “Settings,” then “Recording.”)
Audio and video go out of sync
Why it happens: This can happen when people start recording at different times or CPU load spikes during recording.
How to fix it: Have a participant clap once on camera, then manually align your tracks using video editing software. (Or use Riverside, it records separate audio and video tracks and keeps everything in sync automatically.)
Someone’s file is missing
Why it happens: This can happen if someone’s recording stopped early, disk space ran out, or the file upload failed.
How to fix it: Before recording, ask guests to confirm at least 10-20GB of free disk space on their computers. You can also use a backup strategy where the host records a composite feed.
ZoomISO crashes
Why it happens: ZoomISO sits between Zoom and your recording software. Crashes usually stem from high CPU or bandwidth usage, too many outputs, or unsupported hardware.
How to fix it: Limit the number of outputs and monitor system resources while recording. Also be sure to do a test run before the real session to ensure your computer can handle the load.
FAQs about recording separate video tracks in Zoom
Can you do two separate recordings in one Zoom meeting?
You can record multiple recordings in one Zoom meeting, but you cannot record separate video tracks for each participant.
In Zoom, you can record multiple views of the same session. For example, recording active speaker view, gallery view, and a separate screen-share video. You can even run a cloud recording and a local recording simultaneously.
But, all of these recordings are still mixed Zoom outputs showing the same meeting from different layouts.
Zoom cannot record each participant’s camera feed as a separate video file, and it can’t produce true separate tracks. If you need separate, editable video recordings for each person, you need to use add-on tools like vMix or ZoomISO, or use a recording-first platform like Riverside.
Can you record part of a Zoom meeting?
Yes, you can record part of a Zoom meeting, but only in a basic way. In Zoom, recording starts when you click “Record” and stops when you click “Stop,” so anything that happens outside that window doesn’t save.
Zoom doesn’t let you mark or split sections during the meeting itself, and it can’t selectively record only certain speakers or segments automatically. If you need just a specific portion, you either start and stop the recording manually at the right time, or record the full meeting and trim it afterward using external editing software (like Riverside.)
Learn more in our full guide on how to record Zoom meetings.
How do I split a Zoom recording?
Zoom can only trim the start and end of cloud recordings. It can’t split videos into separate clips.
If you used cloud recording, you can trim unwanted sections in Zoom’s web portal, but you won’t be able to create multiple segments. For true splits, you’ll need to download the file and use a video editor (like Riverside) to cut and export each clip separately.
Can you record separate breakout rooms on Zoom?
In Zoom, only the main room can be recorded by the host. If you want to record breakout rooms, someone inside each room has to start a local recording on their own computer.
Each breakout room recording is saved separately. Zoom doesn’t offer a way to automatically record every room to the cloud or capture separate participant tracks.
Will a Zoom recording show all participants?
Zoom doesn’t automatically record every participant at all times. It records the layout that’s selected.
In Zoom, if the recording uses Gallery view, everyone visible on screen at that moment will appear in the recording, up to Zoom’s gallery limit. If it uses Active Speaker view, only the person speaking will appear, even though others are in the meeting.
How to split the screen on a Zoom recording?
In Zoom, the only way to get a split-screen style recording (for example, 2 or more people visible at once) is to record in gallery view or speaker view with multiple participants visible, depending on your settings.
If the recording was already made and only shows one speaker at a time, Zoom doesn’t offer tools to rearrange or split the screen afterward. To create a custom split screen from an existing Zoom recording, you’ll need to download the file and use a video editor to place participants side by side manually.
This is where individual video tracks come in really handy! Learn more in our piece on how to make a split screen video.


