


Key takeaways:
- You can record remote video testimonials in 3 ways: live interviews, async self-recording, or livestreams.
- While each method varies, you’ll generally set up a digital studio, send a recording link or invite to your guest, check camera and mic settings, and record the testimonial.
- For traditional and asynchronously recorded testimonial interviews, you’ll need to download and edit the video before sharing it.
- While you can use conferencing apps, like Google Meet and Zoom, to record testimonials, quality and control are severely limited.
- An all-in-one platform, like Riverside, can help you create an efficient, cost-effective testimonial workflow from invite and recording through to editing and sharing.
Remote video testimonials are short videos that feature customers sharing their real-life experience with a product or service. They are one of the easiest ways to capture authentic customer stories and turn them into marketing assets.
By replacing your claims with the real customer or client voices, you can make your brand and message far more trustworthy.
Ready to give remote video testimonials a try? Below, we’ll walk through 3 simple ways to record them, along with tips to help you get the best results.
3 key ways to record video testimonials remotely
Instead of bringing customers into the studio (or going to them), you can record remote video testimonials simply by providing your customer with a link. So what does that look like? Here are the 3 key ways it can work.
Remote recorded video testimonials
Using video recording software like Riverside is the easiest way to create high-quality remote video testimonials. You simply schedule a call, send your customer a recording link, and interview them like a normal video chat.
When you’re done, you can trim and polish the footage so it presents both the customer and your product in the best possible light. This approach gives you strong quality control with very little setup.
Pros:
- In-person interviews are more natural and engaging. Guests tend to be more relaxed, and the interviewer can guide the conversation.
- You can guide the discussion and edit it to perfection.
- Because you’ll be in the studio with the guest, you’ll have more control over video quality.
Cons:
- Scheduling and coordinating with customers is tricky depending on timezones, availability, etc.
- Must rely on a stable connection to record in high quality (unless you’re using local recording software like Riverside).
Asynchronous, self-recorded video testimonials
Asynchronous recording is the simplest way to collect video testimonials at scale. Instead of scheduling a call, you send your customer a link where they can record their testimonial on their own time.
They answer a few guided prompts, record short clips, and submit them when ready. You can then review, select, and edit the best responses into polished testimonial videos. This approach removes scheduling friction and makes it easy to collect testimonials from busy customers.
Pros:
- Very convenient since you can just send a link, some instructions, and wait.
- Easily scales, enabling you to gather more testimonials faster.
Cons:
- No real-time interaction with your customer during the recording means limited quality control over the final testimonial.
- You have to rely on your customer’s environment, equipment, and technical competence.
Live interview testimonial recording
Live interview testimonials combine the energy of a real conversation with the reach of a live audience. You interview your customer in real time while streaming the session to viewers, creating social proof as it happens. At the same time, the recording captures the conversation so you can edit and reuse the best moments later.
This approach works especially well for product launches, webinars, and community events where you want both engagement and long-term marketing content.
Pros:
- Since you’re already having a conversation, this can create more natural and engaging testimonials.
- You can guide the customer and discussion in real time.
- The live audience provides energy and talking points.
Cons:
- Requires scheduling and coordination.
- Because your session is live, you’ll need to ensure that you and your guest are prepared and your equipment setup is perfect.
You probably already have an idea of which option is the best fit for your brand. In the next section, we’ll cover how to do each one step by step.
If you’re new to video testimonials, you might want to see what effective ones look like. Check out our video testimonials 101 guide for examples.
How to record remote video testimonials using video recording software
One of the most efficient ways to capture a remote testimonial is by using Riverside, an all-in-one remote recording platform. Riverside records each participant locally in crystal-clear quality, so it’s perfect for professional-level testimonial interviews.
Here’s how to use it to record a remote video testimonial step by step.
What you’ll need
To record a remote testimonial on Riverside, make sure you have the following ready:
- Riverside account: Sign up for Riverside (you can try it for free) and create a studio for your recording. The person giving the testimonial doesn’t need an account; they’ll join via a link you send.
- Computer, webcam, and mic (or smartphone) with a stable internet connection: A built-in laptop webcam works, though a high-quality external webcam can improve video clarity. For audio, built-in mics are OK, but even basic earbud headphones with a mic (or a USB microphone if available) will produce much clearer sound.
- Quiet, well-lit environment: Both you and your guest should be in a quiet room with minimal background noise. Ask your guest to sit facing a light source (like a window or lamp) so they are well lit.
Once you set up these basics, you’re ready to record. Here’s how to do it.
Step 1: Set up your Riverside studio
Log in to Riverside and click “Record” to set up a studio. You can also click “Plan” to schedule a recording for a later date.

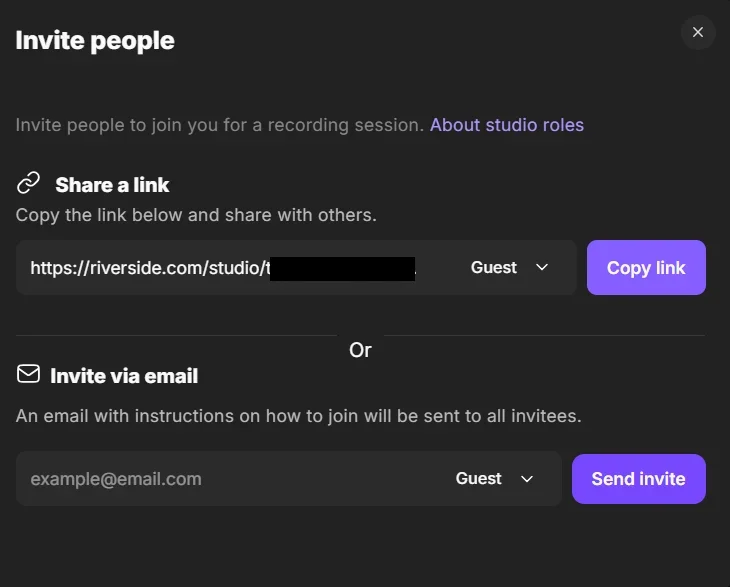
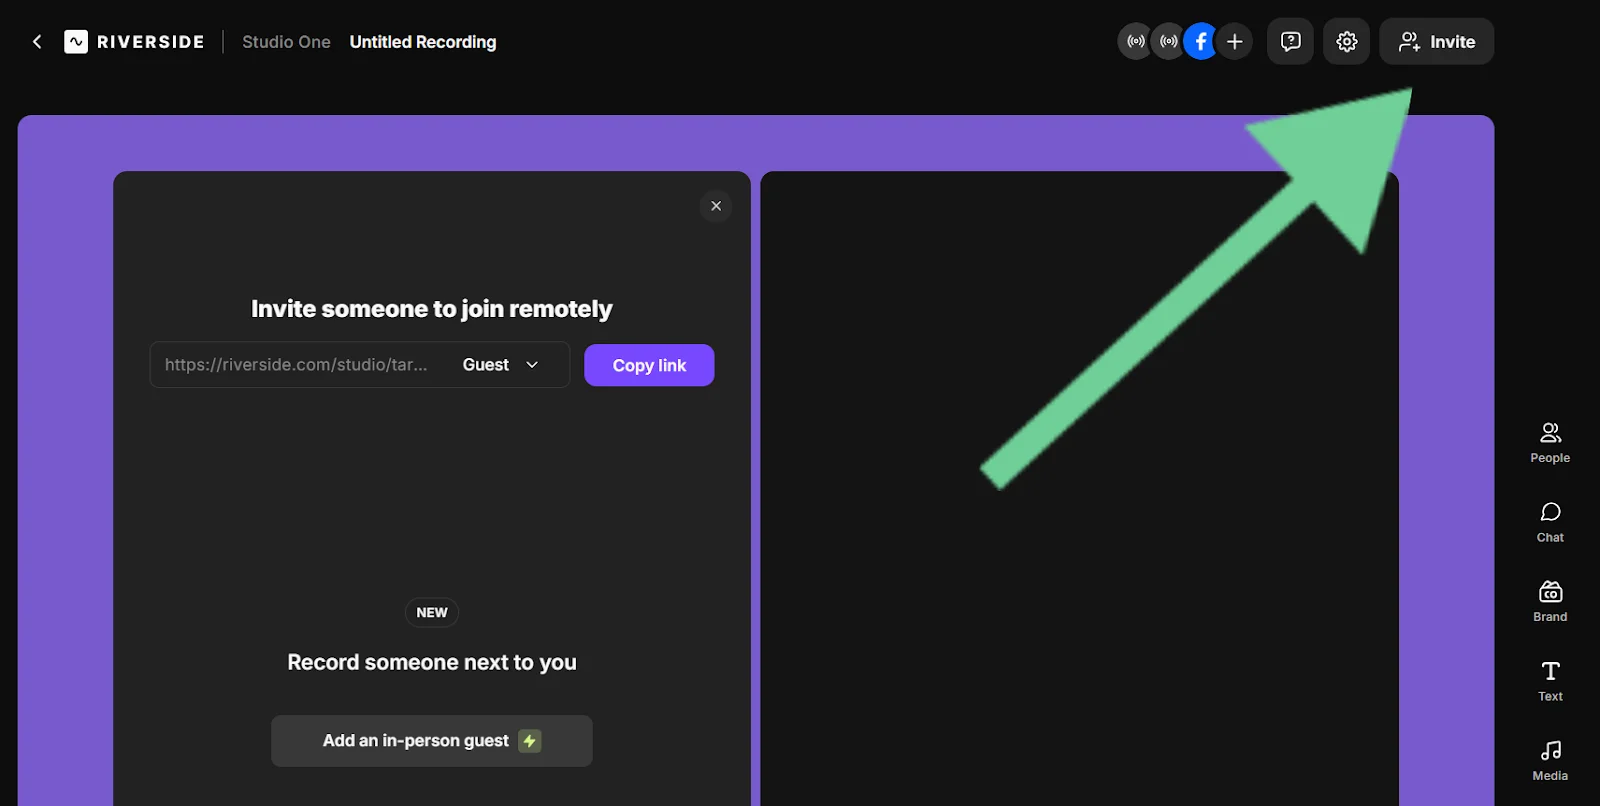
Step 2: Invite your guest
Invite your guest by sending them a link to your studio or inviting them via email. There’s no installation or account creation required on their part. When it’s time for the call, all your guest has to do is click the link and they’ll be in the studio, ready for recording.
Pro tip: Include a friendly note with the link explaining that this will be a casual, on-camera chat. And, reminding them of any preparation tips like using headphones and sitting in a quiet spot.
Step 3: Finalize your setup
When your guest clicks the link to enter your Riverside studio, they’ll be prompted to allow camera and mic access. Once inside, you’ll see each other in the Riverside interface.
Take a minute to check technical settings before getting started. Ask the guest to adjust their camera angle if needed. You can also ensure their sound is coming through clearly. Little tweaks like these make a big difference.
Step 4: Conduct a brief warmup
Before hitting record, chat with the guest to put them at ease. Explain how the session will go, and let them know that they can always answer a second time if they want to rephrase (you can patch things up during editing.) This reassurance often relaxes guests.
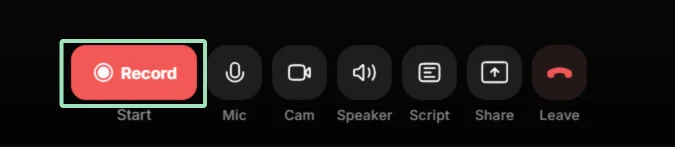
Step 5: Start recording
When you’re both ready, hit the “Record” button. Riverside will begin recording both streams in high quality. Proceed with your interview questions as you normally would. Listen actively and let the conversation flow naturally.
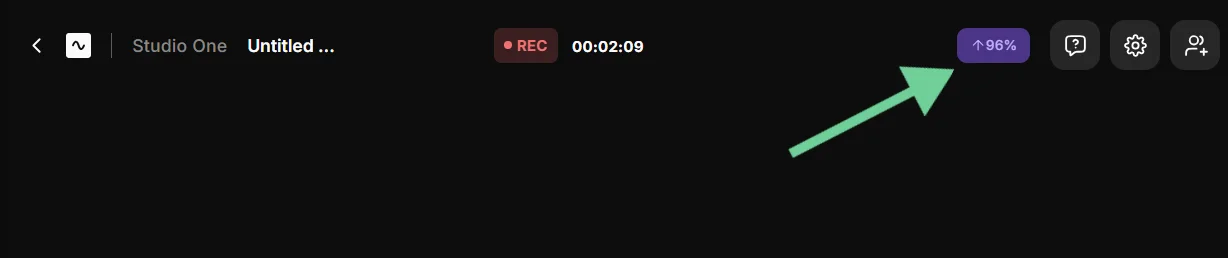
During the recording, you’ll see each person’s local recording being uploaded to the cloud as you record. This appears on the right of the screen, beneath each participant’s name.
Note: If the internet lags momentarily, just ignore it and keep going; the local files will be fine.
Step 6: Wrap up recording
After you’ve gone through all your questions and the guest has said everything they wanted to, click “Stop.” Riverside will automatically start uploading the locally recorded files from your (and your guest’s) device to the cloud. This only takes a few minutes.

Step 7: Edit and polish your testimonial
Now that you have the content you need, it’s time to head over to Riverside’s editor. You can get there by clicking “Go to project.” You’ll also find your recording under “Projects.”

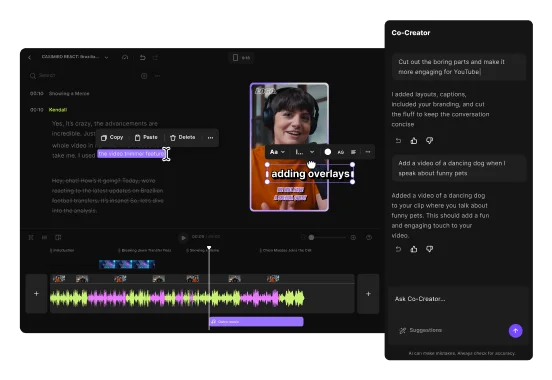
Riverside’s built-in editor makes it easy to go from raw footage to compelling testimonial. Cut out awkward pauses using text-based editing, add music and video overlays, or automatically enhance your audio with a click using Magic Audio. Since testimonials tend to be short, this part should be pretty quick!
Step 8: Export your final video
Once you’re happy with the edits, export the video. Riverside lets you export in various formats or aspect ratios.
For instance, you might download a 16:9 HD version for YouTube or your website. You can also export a vertical 9:16 version if you plan to share snippets on Instagram Stories or TikTok.
Pro tip: Use Riverside’s Magic Clips feature to automatically create short highlight videos you can share on social media.
How to record a remote video testimonial asynchronously
If scheduling is difficult or you simply want to let your customer record their testimonial at their leisure, Riverside’s async recording feature is the ideal solution. Asynchronous recording means you don’t have to be present at the same time as your customer. Instead, you send the person a recording link and they record themselves when it’s convenient.
In this section, we’ll guide you through how to collect a video testimonial asynchronously using Riverside.
What you’ll need
Setting up an asynchronous testimonial recording is quite simple. Here’s what you need:
- Riverside account with async enabled: The async recording feature is available on Riverside Business plans. Make sure you have access to this feature in your account.
- Testimonial prompts or questions: Prepare a brief prompt for your participant(s). This could be a question like, “Please tell us who you are and how our product helped you.” Think of this prompt as the interviewer stand-in. It will guide the person on what to talk about when they’re recording alone.
Once you set up these essentials, you’re ready to record. Here’s how.
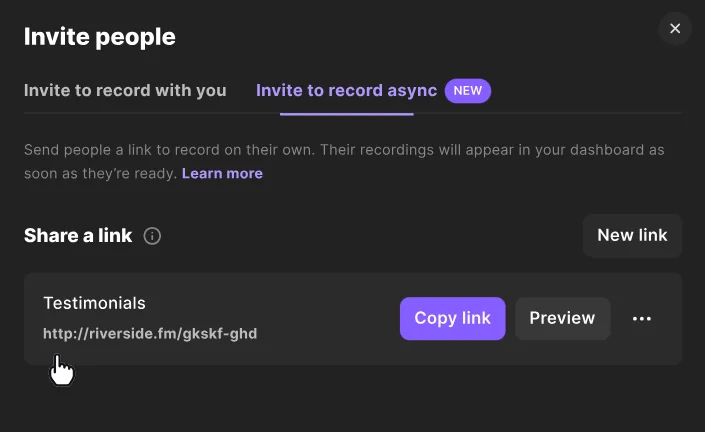
Step 1: Create an asynchronous recording link
Log in to Riverside and navigate to the studio you want to use. Click “Invite,” then select “Invite to record async.” You can copy the link and even create multiple links in the same studio for different guests.
Step 2: Write a clear prompt
Riverside lets you add a prompt or instructions when you create the asynchronous recording link. This is crucial since you won’t be there to ask questions.
Write a friendly prompt that reminds customers what to cover. For instance: “Please introduce yourself [name, company] and describe your experience with [Product].”
You could also ask questions like:
- What problem were you trying to solve?
- How did our product help you?
- What results or benefits did you experience?
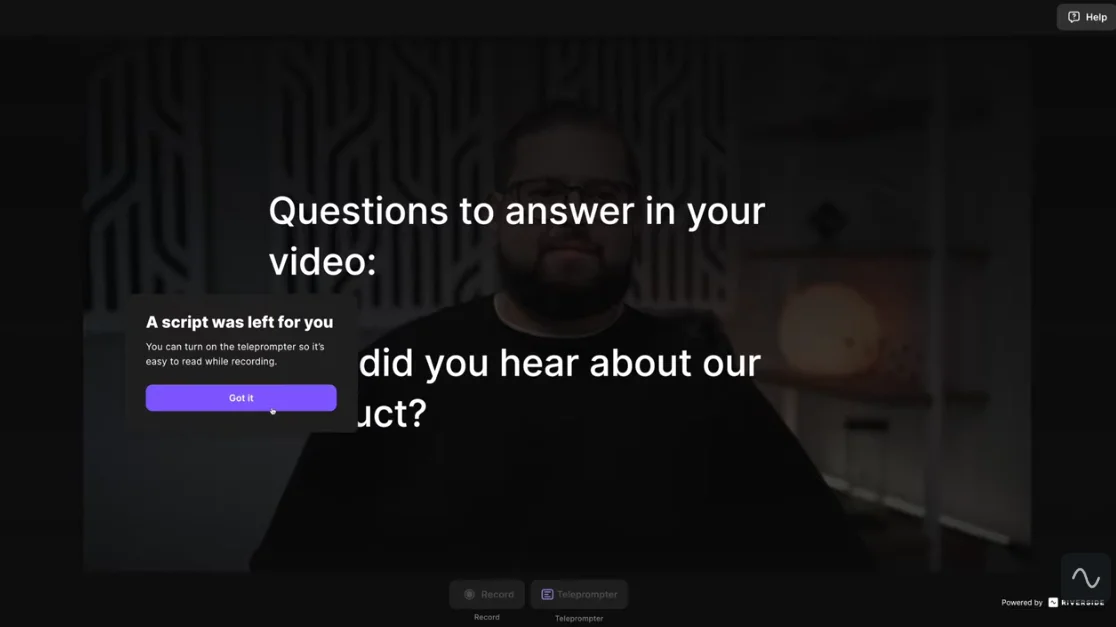
These prompts will appear in the recording studio for your customers (they can even add them to the teleprompter while recording).
Step 3: Share the invite link
Once you create the async session, Riverside will generate a special link that you can send out. Copy that URL and send it to the person providing the testimonial. In your message, explain what it’s for and include any relevant guidance.
Pro tip: Make sure your guest knows how long the interview might be. Let them know how much time they should set aside and that they can do multiple takes.
Step 4: Participant records their video
Your customer will click the link and be taken to Riverside’s async recording interface. It will ask them to allow camera and mic access, then they’ll see your prompt(s) on screen.
When they’re ready, they hit the “Record” button and start talking. They can pause or restart the recording if they messed up. While recording, the prompt text will be visible so they can reference your questions and tips.
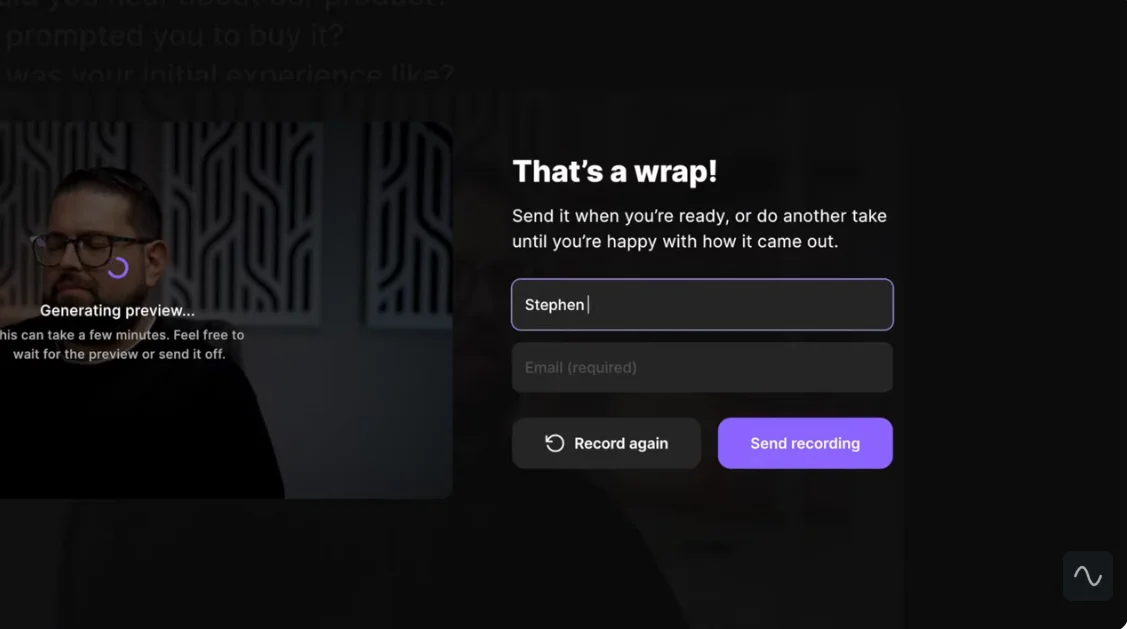
Step 5: Participant submits their recording
After the participant finishes recording, they get the option to immediately review it. Then, they can opt to record again or submit the recording.
Step 6: Review and edit the testimonial
To review your async recordings, click on the recording in your Riverside dashboard. From here, Riverside’s editor makes it easy to polish your footage. You can trim the video using text-based editing, clean up audio, and add branding or captions.
Step 7: Download or export the final video
Once you’re happy with the content, export the video from Riverside. If you’d like to export in different formats for platforms like YouTube vs. TikTok, you can adjust the aspect ratio and save them as separate files.
Pro tip: When recording asynchronously, remember that you’re not there to guide the conversation, so descriptive prompts and instructions are crucial.
How to record a livestream video testimonial
Livestreamed testimonials let you capture real customer stories and simultaneously share them with a live audience. This is ideal for product launches, webinars, live demos, and community events where you want both engagement and high-quality, repurposable footage.
Riverside lets you livestream and record locally at the same time, so you don’t have to sacrifice quality for reach. Here’s how to set it up.
What you’ll need
Before you go live, make sure you have:
- A Riverside account with livestreaming enabled: Livestreaming is available on Riverside’s Live and Business plans.
- A destination to stream to: This could be YouTube, LinkedIn, Facebook, Twitch, or Riverside’s own live page.
- A short testimonial question list: Since it’s live, you’ll want to keep the dialogue focused and flowing.
And just like with normal remote testimonials, your guest should have a webcam (or phone camera), a microphone or headphones, and a quiet, well-lit space to record in.
Step 1: Create a livestreaming studio
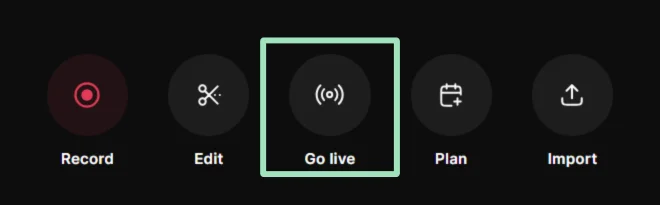
Log into Riverside and click “Go live.” To enter your studio, confirm your camera and mic as well as whether you are using headphones.
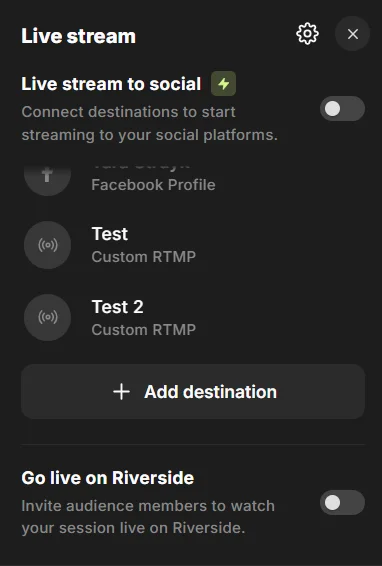
Step 2: Choose your destination platform(s)
In the studio settings, choose whether you want to stream to Riverside’s public broadcast page or to external platforms (e.g., YouTube, Facebook, LinkedIn, Twitch). You can also multistream to several destination platforms simultaneously.
If you’re streaming to a social platform, Riverside will ask you to connect your account or paste in the stream key.
You can also set your layout, branding, and lower-thirds here, so your testimonial looks professional when it goes live.
Step 2: Invite your guest
Click the “Invite” icon and send your guest the studio link, just like you would for a regular Riverside recording. They don’t need a Riverside account; guests can just click the link and join.
In your invite message, let participants know:
- This will be recorded and streamed live.
- It will be a casual conversation.
- They can relax and be themselves.
This helps them feel prepared and confident, which usually translates to better testimonials.
Step 3: Check audio, video, and layout
When your guest joins, take a minute before going live to check:
- Microphone levels
- Camera framing
- Lighting
- Layout (side-by-side, picture-in-picture, etc)
This is your last chance to fix things before the audience sees it. Once everything looks good, you’re ready to go live.
Step 4: Start the livestream
Click “Go Live” in Riverside.

Your session is now streaming to your chosen platform(s) and recording locally in high quality on each participant’s device. This is Riverside’s key advantage. Even if the stream has lag or compression, your final recording will still be clean and sharp.
Step 5: Run the testimonial interview
Interview your customer just like you would in a normal testimonial: Ask about their situation before using your product, what problem they had, what changed after using it, and what they’d say to people who are undecided.
Because there’s a live audience, the energy is usually higher and the answers feel more spontaneous and authentic. If your audience is watching on YouTube or another platform, you can even read a few live comments or questions to make it feel interactive.
Step 6: End the stream and let Riverside upload
When you’re finished, click “Stop.” Riverside will automatically upload the locally recorded tracks from all participants.
Even though it was live, you’ll now have:
- Separate video and audio tracks.
- Full-quality recordings.
- A project ready to edit/repurpose.
Step 7: Edit and repurpose the testimonial
Click “Got to project” to enter Riverside’s editor. Here, you can trim awkward pauses, cut the interview down, and add captions, branding, and music. You can also save and export horizontal or vertical versions for different platforms.
Pro tip: Run a quick practice session before going live. It can help keep you and your guest from feel confident and work out any kinks before the live event.
How to choose software for recording remote video testimonials
Depending on your budget and workflows, there could be many types of software you could use to record your video testimonials.
Here’s are some considerations before committing to one (hint: Riverside ticks all the boxes):
Recording quality: Prioritize local recording to capture HD (if not 4K) video so your customer’s testimonial will come out crisp and clear even when connection is slow.
Ease for participants: A testimonial won’t happen if your customer can’t figure out how to join the recording! Look for browser-based solutions that don’t require downloads and are easy to use.
Support for live recording and/or async recording: Some people prefer live interviews, while others asynchronous recordings. Having a flexible platform that covers both provides more options for your guests.
Built-in AI editing: Editing can be the most time-consuming part of creating a testimonial. Riverside offers a full suite of paid and free AI editing tools that will help you polish your audio and video in minutes instead of hours.
Intuitive interface: You shouldn’t need to be a tech wizard to operate the platform. Controls for recording, inviting guests, and downloading files should be straightforward.
Repurposing tools: A customer testimonial can be turned into short clips, social posts, blog articles, newsletters, and other marketing assets. Use Riverside’s Co-Creator to repurpose your content by just chatting with AI.
Captions and transcription: Accurate transcription can help your discoverability on platforms like YouTube, while captions can make your testimonial more accessible.
End-to-end workflows: The best platforms simplify the entire workflow. On Riverside, you can get from recording to publishing all from the same dashboard.
Pricing options: One major reason to record testimonials remotely yourself is to save money compared to outsourcing to a production company. Find software that provides the features you need and combine functionality to get better value than paying for separate tools.
Remote video testimonials tips and common mistakes to avoid
Recording a testimonial is only half the task. You also want to ensure the content of the testimonial is compelling and the experience is smooth for everyone.
Here are some best practices as well as pitfalls to avoid so that you can get the best possible remote video testimonials:
Prepare your interviewee(s) and provide questions/prompts beforehand
Before the recording, whether live or async, conduct a quick prep call or email your guests to help get them camera-ready.
Provide your questions/prompts in advance, along with some tips on how to answer them. This helps them focus on useful details.
Prioritize live interviews when possible
A live conversation often beats a solitary async recording. People tend to give more complete and heartfelt answers when they’re talking to someone. As an interviewer, you can also guide the narrative and dig deeper into interesting points.
Encourage natural speech over scripts
Authenticity is the whole point of a testimonial. Advise your guests not to write out a word-for-word script to read on camera. Delivery should be conversational. A little humor or a heartfelt anecdote don’t hurt either!
Record more than you think you’ll need
When in doubt, keep the camera rolling. You can always trim down the content later, but you can’t go back in time if you don’t end up with enough footage to work with.
Read more: How to Record Video Testimonials
Get permission and clear consent
Always ensure you have the interviewee’s consent to use their video publicly. A simple release form is the best option.This protects you and makes everything clear for your guests.
Edit for clarity and pacing
When editing, your job is to make the testimonial as clear and impactful as possible.
Tim down rambling parts, and remove ‘ums and’ long pauses. Start the video with one of the strongest statements, and keep the final length between 1-3 minutes.
Promote your testimonial widely
After all the work of creating a great testimonial, make sure it actually gets seen! Post the full testimonial on your website, incorporate it into email campaigns, and share it on social media.
Follow recording best practices
In addition to the testimonial-specific tips above, remember to follow these standard recording best practices for the most professional results:
- Optimize lighting and background: Ask your guests to face a window or put a lamp behind their webcam so they’re evenly lit. Have them tidy up their background or use a virtual background.
- Use headphones and a decent mic: Ask your guests to wear headphones during live calls to prevent echo and use an external mic for better quality audio.
- Remove as much friction as possible for your guests: Schedule the interview at a time that’s convenient for them, send clear instructions and a simple invite link, and offer to handle any additional setup.
FAQs about remote video testimonial capture
What are the benefits of using video testimonials?
The main benefit of video testimonials is that they offer powerful social proof for your business. They can highlight specific benefits or results in a relatable way and show prospective customers that real people endorse your product or service. This builds trust much faster than text alone.
Video also tends to be more engaging and memorable, which can help you build trust faster than text alone.
What are the best platforms for recording video testimonials?
The best platforms for remote video testimonials offer high-quality recording and are easy for both the host and the guest.
Dedicated remote recording platforms like Riverside are top choices because they are designed for this scenario. Riverside records in up to 4K video and 48 kHz audio, doesn’t require guests to create an account or download an app, and provides tools that make editing faster and easier.
What are the costs associated with hiring a remote video production team?
If you decide to hire an external team or service to produce remote video testimonials for you, the cost can be significant, averaging around $5,000 per video. Hiring a professional video production team (even for remote work) means you’re paying for their expertise, time, and equipment.
That’s why many businesses opt to create testimonials in-house using affordable tools. It’s much more economical if you need to produce multiple videos over time.
Do video testimonials work?
Yes, video testimonials do work. Studies have found that video testimonials can significantly boost conversion rates. Video testimonials are often associated with significant conversion lifts, and have been found to boost conversions by 34%.
How much does a testimonial video cost?
The cost of producing testimonial videos can range from almost nothing if you do it yourself with equipment you own, to thousands of dollars for a top-notch agency. Let’s break down the scenarios:
- DIY or in-house cost: If you own a decent camera and a microphone, and you use a platform like Riverside, then the cost for one testimonial video is basically negligible. It’s just your time.
- Hiring freelancers or a production company: A single professionally-produced testimonial video averages somewhere from $1,500 to $5,000. This can increase if the project is complex up to $10,000.
- Other costs to consider: If travel is involved for an in-person shoot, costs can skyrocket fast. Remote video testimonials might still incur small costs, like sending a good webcam or mic to a customer.
What makes a good video testimonial?
A good video testimonial is authentic, specific, and story-driven. Here are the elements that usually make a testimonial stand out:
- Authenticity: The person on camera appears genuine and credible. They speak naturally, not like they’re reading a script or delivering a paid advertisement.
- A clear narrative: The testimonial should tell a mini-story (typically a problem), a solution (your product/service), and the result. This helps viewers relate and see the tangible benefit.
- Specifics and concrete results: A good testimonial includes detailed outcomes, like numbers, time saved, money earned or saved, improvements seen.
- Good production quality: While some imperfections can make a testimonial feel authentic, the technical quality of the recording should be high.
- Relatability: The best testimonials feature people your audience can relate to. Choose customers whose role or situation mirrors your ideal buyers.
Can I use my smartphone to record a video testimonial?
Yes, you can use a smartphone to record video testimonials since modern ones have very capable cameras. For a high-quality phone recording, stabilize your device with a tripod or stand, use the rear camera, and choose the highest available resolution. Finally, choose your orientation based on where the video will be used. You’ll need landscape for YouTube or websites, and portrait for platforms like TikTok or Instagram.
How do I promote video testimonials on social media?
Promoting your video testimonials on social media is a smart way to squeeze maximum value from them. Riverside makes this easy. Simply:
- Create a short clip: Upload your recording to Riverside and use our AI clip maker to instantly turn your testimonial into a 15–30 second highlight.
- Add captions and branding: Use Riverside’s editor to add captions, titles, and your logo. You can also quickly resize your video for each platform (vertical for TikTok/Reels, horizontal for YouTube/LinkedIn.)
- Export and post: Download your clip and post it on the platforms where your audience is most active.
- Write a strong caption: Write a brief intro that highlights the benefit or story. For example: “‘We doubled our output in 3 months using [your product]. Hear how our client Jane from Acme Co achieved this result!”


.webp)


