Key takeaways:
- You can record video testimonials in 4 ways: live remote interviews, remote asynchronous self-recording, in-person DIY recording, or in-person recording with a crew.
- Prepare your customer before recording and share expectations and light talking points so they feel confident and sound natural on camera.
- Record remotely or asynchronously to let customers join live or record on their own schedule.
- Guide the testimonial with a clear structure by asking them to explain who they are, the problem they faced, and what changed.
Video testimonials are recordings of real customers sharing their positive experiences with your business. These reviews build trust by showing that actual people use your product and genuinely find value in it.
In this step-by-step guide, we’ll walk you through how to record a video testimonial online, asynchronously, or right from your phone.
How to record a testimonial video (4 methods)
A remote video testimonial is a customer review filmed from a distance using web-based software. You can record these either live or asynchronously. Alternatively, you can capture in-person testimonials using a traditional on-site camera crew or a simpler DIY setup like a smartphone.
Step 1: Get recording equipment
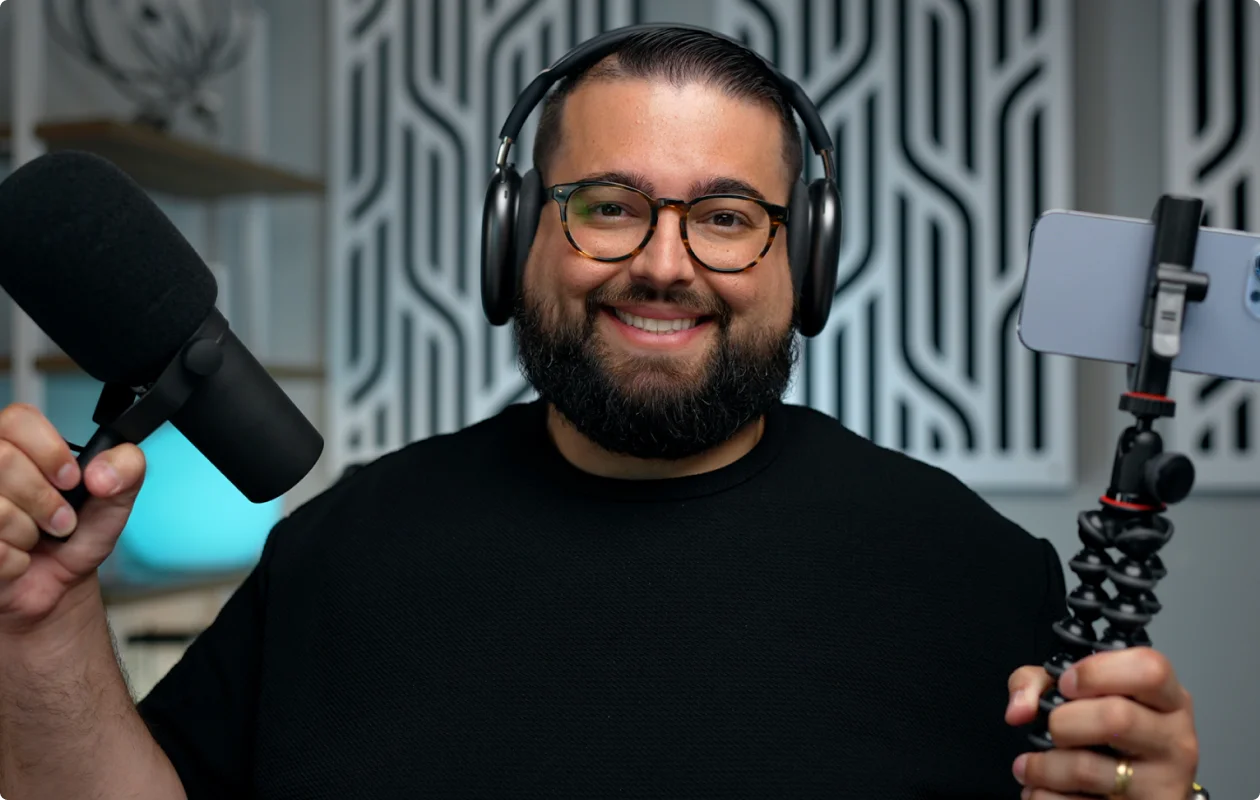
Before you get started, make sure you have the right equipment to record your video testimonials. This includes:
- Camera: A high-quality webcam works great. For async or DIY recordings, a modern smartphone can deliver excellent results, too, especially if you record with the back camera.
- Microphone: Clear audio matters more than perfect video. An external mic is best, and even a basic USB microphone will noticeably improve sound quality.
- Headphones: Wearing headphones helps you catch audio issues in real time and prevents echo in the final recording.
- Recording software: For a livestreamed online interview, use a remote recording or video conferencing platform. For async testimonials, choose software that lets customers open a link, follow prompts, and submit their recording. DIY participants can instead use their phone’s built-in camera app and transfer the file afterward.
- Lighting: Natural light is ideal. Face a window or place a simple ring light in front of you. If you can, use a basic 3-point lighting setup.
- Tripod or stable support: Keep webcams and phones at eye level and prevent handheld footage from shaking. A small phone tripod is ideal, but any secure stand can work.
- Production crew: If you record in-person with a professional crew, you do not need to source any equipment. The agency or videographer will supply the cameras, boom mics, and lighting needed for the shoot.
Once you have all that together, you’re ready to get started.
Step 2: Prepare your client/customer
Send your customer a short preparation email a few days before you record your video testimonial.
A little upfront guidance goes a long way toward relaxed, natural responses on camera. Before you record, make sure they know:
- How long it will take: Let them know how long they should plan to speak and how much time the full recording process will take.
- Where the video testimonial will be used: Be clear about where the testimonial will appear, whether it’s your website, ads, or social media.
- The tone to aim for: Casual and conversational works best. They don’t need to sound scripted or polished.
- Simple talking points: Share prompts rather than exact lines, such as “What problem were you trying to solve?”, “Why did you choose this product or service?”, and “What changed after you started using it?”
- How to prepare their recording space: Ask them to sit in a quiet room, face a window or light source, choose a clean background, and position the camera at eye level.
I also recommend inviting them into your online recording studio a few minutes early. This gives you time to check their camera and microphone, make small adjustments, and chat briefly before the recording. This should help them feel more comfortable and confident on camera, too.
Getting permission and clear consent
You must get written consent before you record and publish a customer's video testimonial. Never rely on a verbal agreement. A video release form protects your business and gives you legal permission to use the footage.
Your release form does not need to be complex, but it should cover:
- Who is involved: Identify the customer and the company receiving permission.
- Permission to record: Confirm that the customer agrees to the video and audio recording.
- Permitted uses: List where the testimonial may appear, such as your website, social media, email campaigns, sales materials, or paid advertising.
- Editing and repurposing: Explain whether you may shorten the recording, add captions, crop or reformat the video, and create clips, provided the edits do not misrepresent what the customer said.
- Usage terms: State any limits involving duration, geographic territory, specific campaigns, or the customer’s ability to withdraw permission.
- Compensation: Record whether the customer received payment, a discount, a free product, or another incentive.
- Signatures and dates: Have the customer and an authorized company representative sign and date the agreement. Use e-signature tools to make the process frictionless.
Recording and publicity laws vary by location, so use a release form reviewed for the jurisdictions where you and the customer operate.
Step 3: Record the testimonial
Choose a recording method based on your customers’ availability and the level of control you need. Here’s a full comparison of each:
The recording process now depends on the method you chose. Follow the workflows below for your specific method.
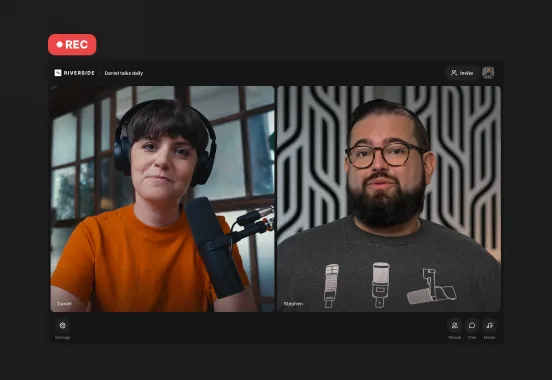
Recording a remote live interview
Step 1: Configure your setup
Choose a recording platform that records locally on each participant's device to avoid quality drops caused by weak internet connections.
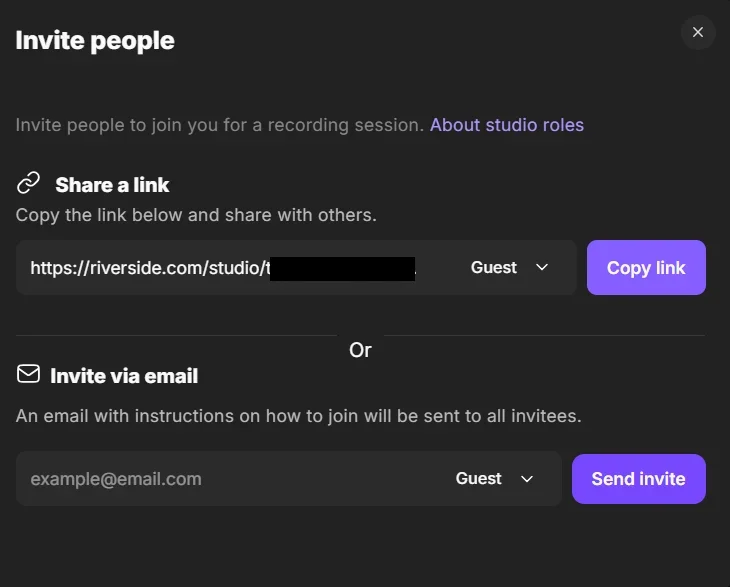
Step 2: Share the joining link
Invite your customer via email or a direct studio link. You can minimize friction by using a browser-based tool like Riverside, so your guest does not need to install third-party software or create an account.
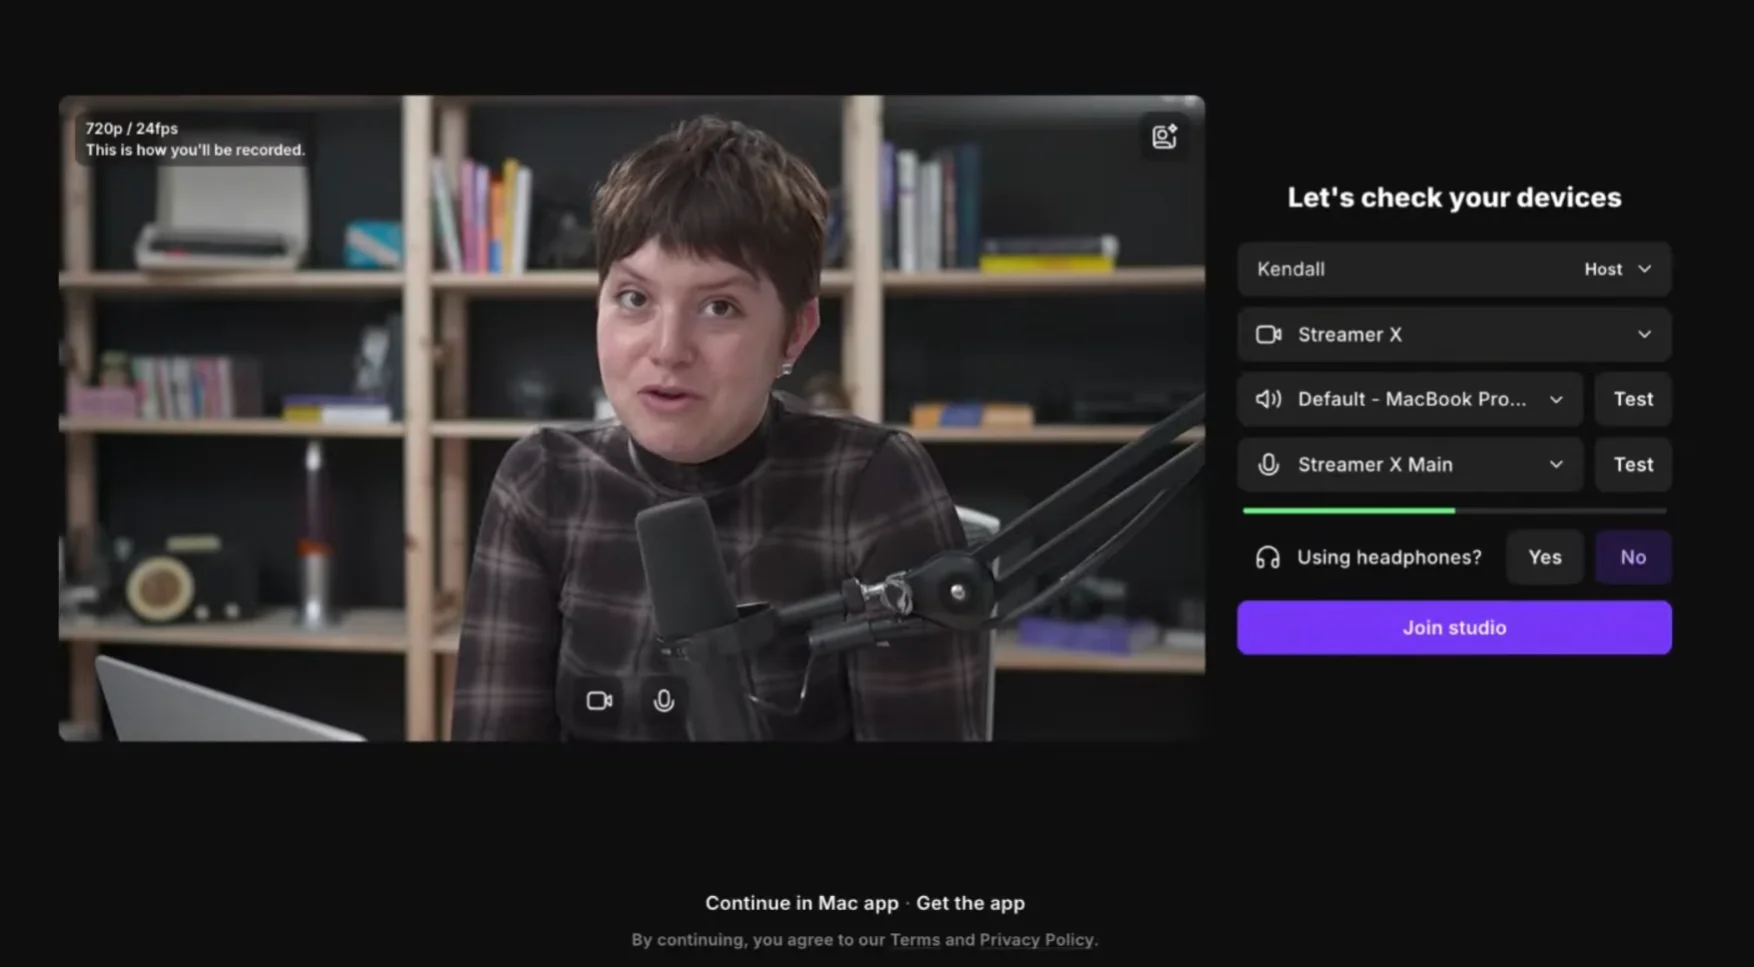
Step 3: Conduct a quick tech check
Confirm that the customer's camera is at eye level, their face is lit from the front, and their microphone is close enough to capture clear audio. You can also start with an informal conversation to help them settle in and identify technical problems before recording.
Step 4: Record the interview
Record the interview as a conversation by asking open-ended questions. Prioritize natural answers over a perfectly polished performance. You can remove pauses and unsuccessful takes when you edit.
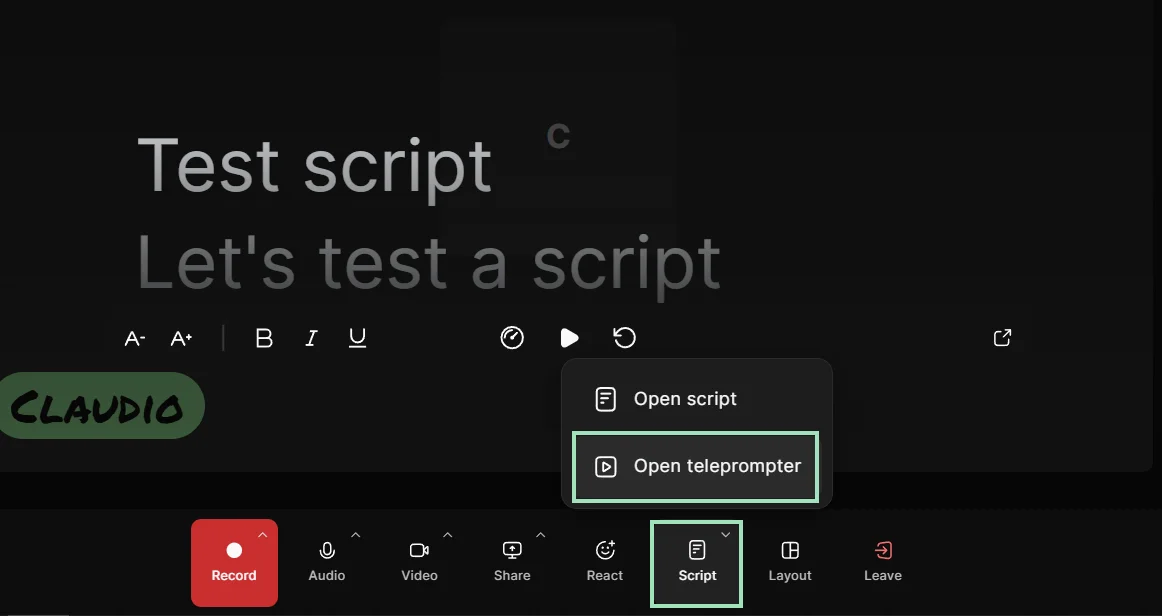
Software like Riverside lets you use a teleprompter to keep the questions and talking points in front of your eyes during the conversation.
Step 5: Wait for files to upload
Ask your guest to stay in the studio until your recording has been processed to ensure it is fully uploaded to the cloud and safely stored.
Recording a remote asynchronous recording
Step 1: Write a recording brief
Prepare a few focused questions or talking points, and set the desired length. Ask your customers to cover the original problem, why they chose your solution, how they implemented it, then show a few measurable results.
Step 2: Send clear technical guidelines
Make the setup requirements easy to follow with a short checklist. Ask the customer to record somewhere quiet, face a light source, use headphones, place the camera at eye level, and use an external microphone when available.
Step 3: Wait for your guest to record
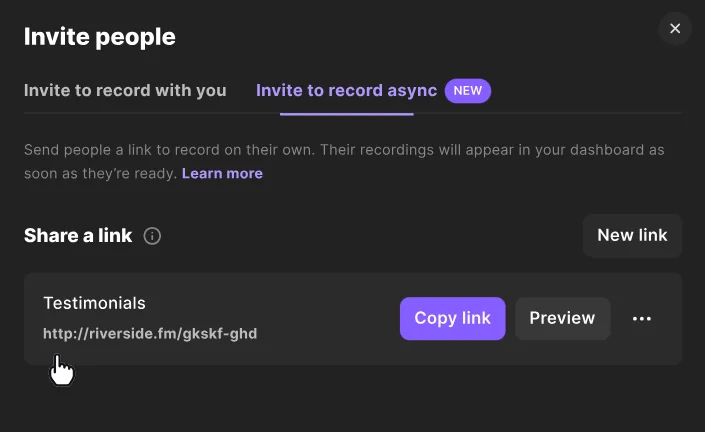
Let your guest jump in and record when they’re ready. With Riverside, you can share a link to record asyncronously so all their recording will be stored on your account for easy editing. Once they’re done, review the footage, and request another take only when an important answer is missing or technically unusable.
Recording in person with a DIY setup
Step 1: Choose your recording app
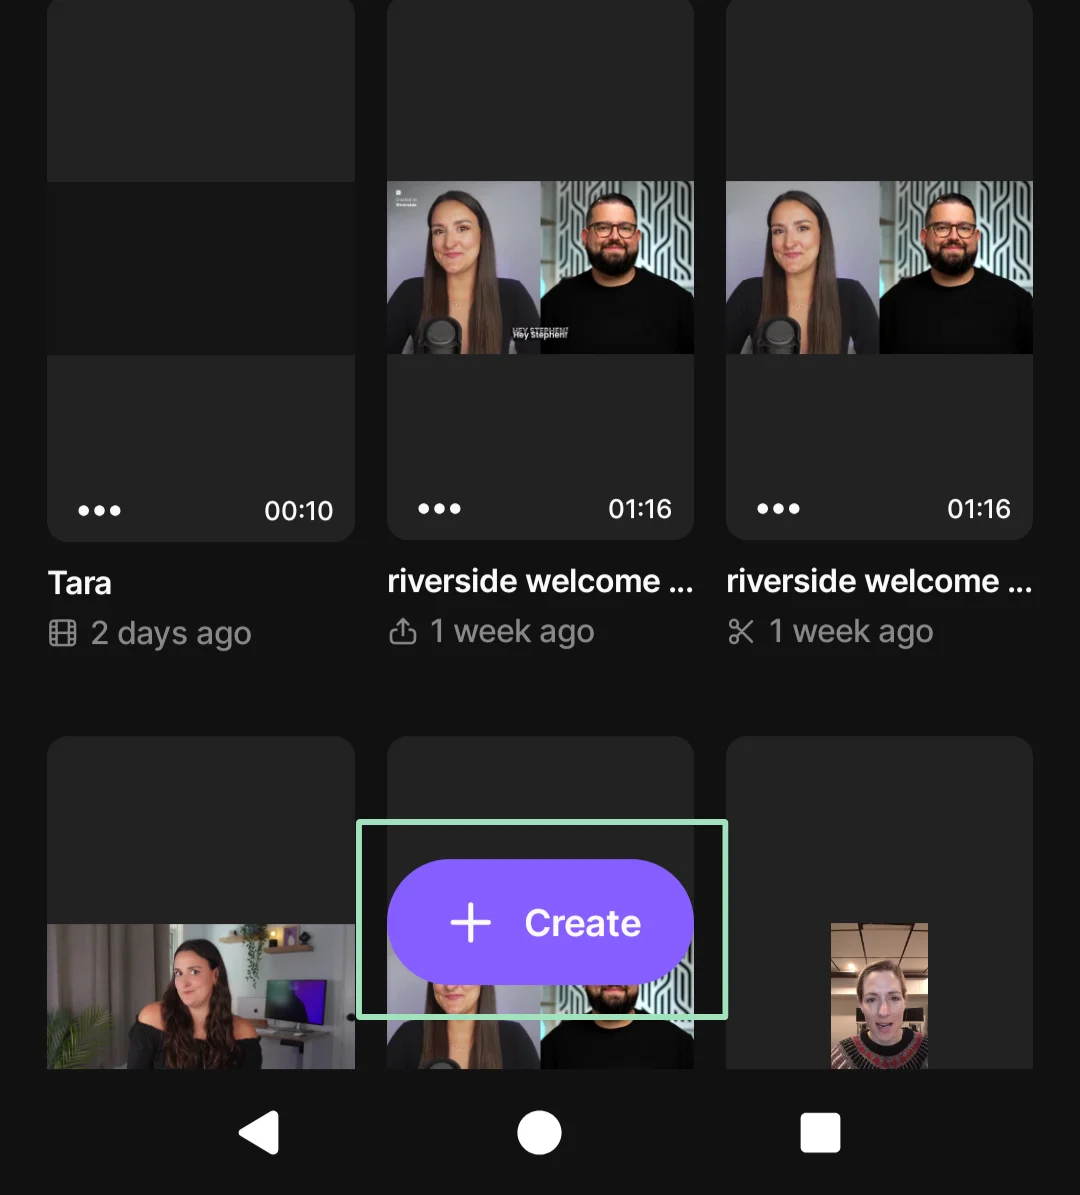
You can use a dedicated recording app such as the Riverside mobile app. With it, you can record in studio-quality on your smartphone, then edit the footage on your desktop straight away.
Step 2: Mount and frame the shot
Secure your smartphone on a tripod or another secure support at eye level. A customer recording alone may prefer the front camera so they can see their framing, while an interviewer can use the higher-quality rear camera. Choose 16:9 widescreen for website landing pages or 9:16 vertical for social platforms like Instagram Reels and TikTok.
Step 3: Attach an external microphone
Position a separate microphone for each speaker and record a short test. If you’re using a wireless lavalier mic, clip it onto the speaker's shirt, roughly 6 inches below their chin, to capture clear voice audio.
Step 4: Record multiple takes
Ask one question at a time and allow the customer to answer naturally without speaking over their response. Capture 2 to 3 takes for each important answer so you can choose the best version.
Step 5: Back up raw footage immediately
Transfer uncompressed video and audio files directly to secure cloud storage or a dedicated hard drive. Avoid using a messaging app that may compress the footage.
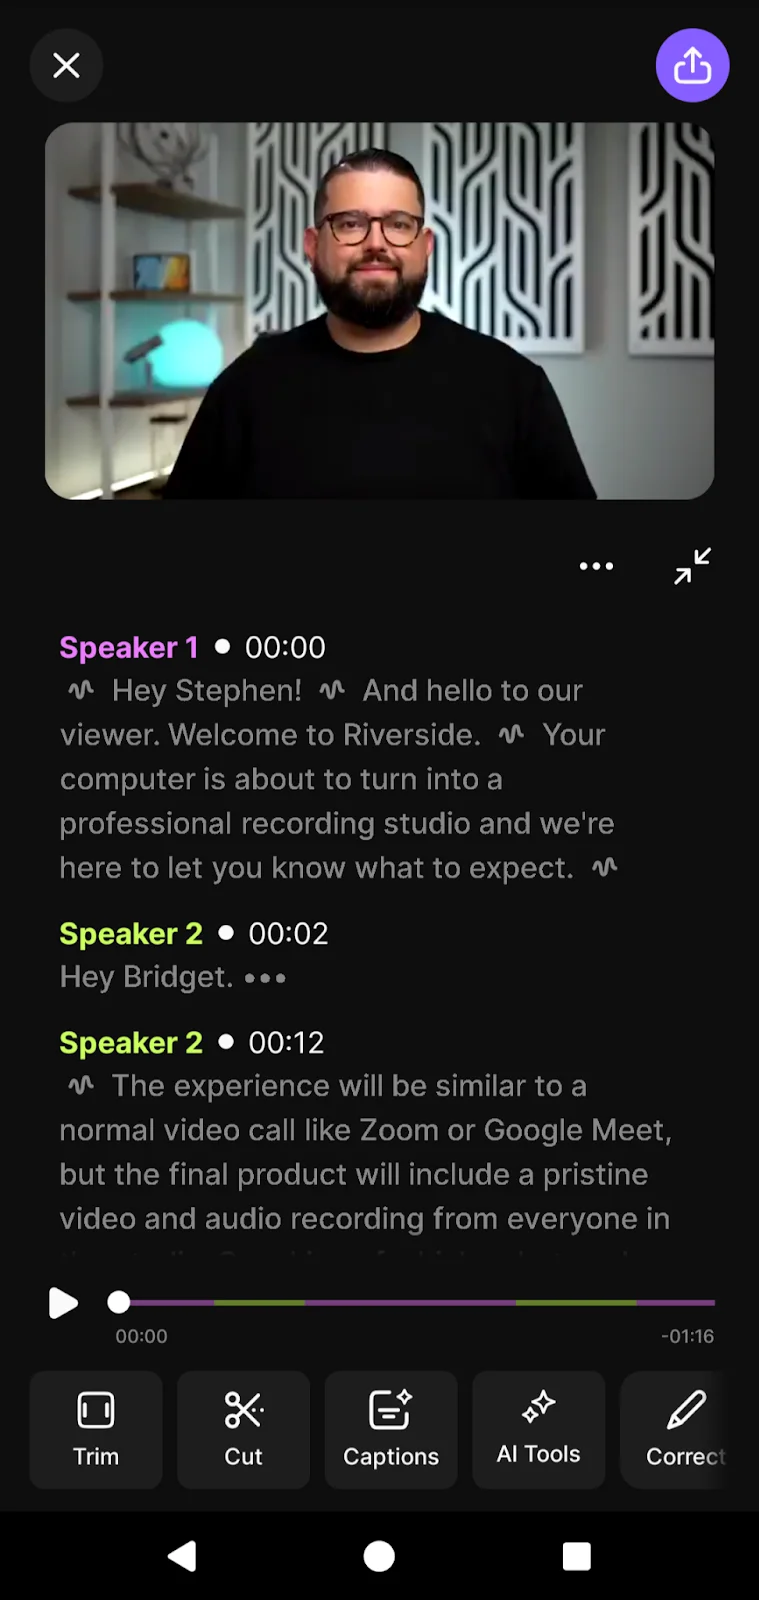
Recording in person with a production crew
Step 1: Define the production brief
Tell the crew where the testimonial will appear, who should be visible, which questions you plan to ask, and what finished formats you need.
Then coordinate schedules between your customer and the production team and choose a suitable location.
Step 2: Direct the interview
The production crew will handle all technical setup like cameras and boom microphones. Your job is to make the customer feel comfortable and ask the right questions. Focus entirely on the conversation and let the professionals manage the gear.
Step 3: Review the final edits
The agency typically handles post-production and will polish the final cut. Review the drafts and make sure the message aligns with your marketing goals before you approve the final project.
Step 5: Edit your video testimonial
Once you finish recording, edit your footage to turn it into a focused customer story.
Follow these essential editing steps before you publish:
Trim the footage: Keep the testimonial concise. Remove awkward pauses, repeated answers, and off-topic tangents and interviewer questions that viewers don’t need to hear.
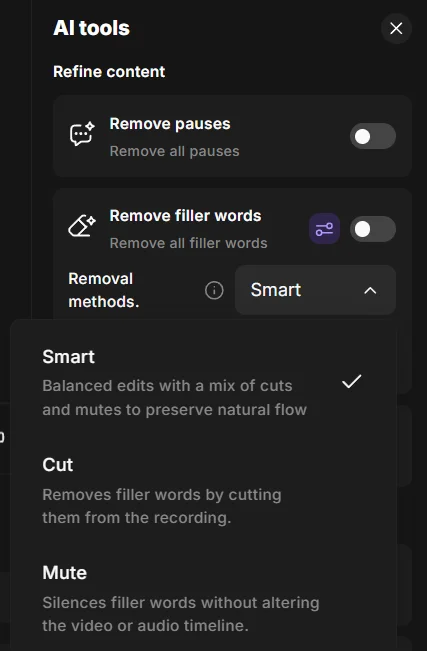
Clean up the audio: Apply automatic audio enhancement tools to remove hums, background noise, echoes, and filler words.
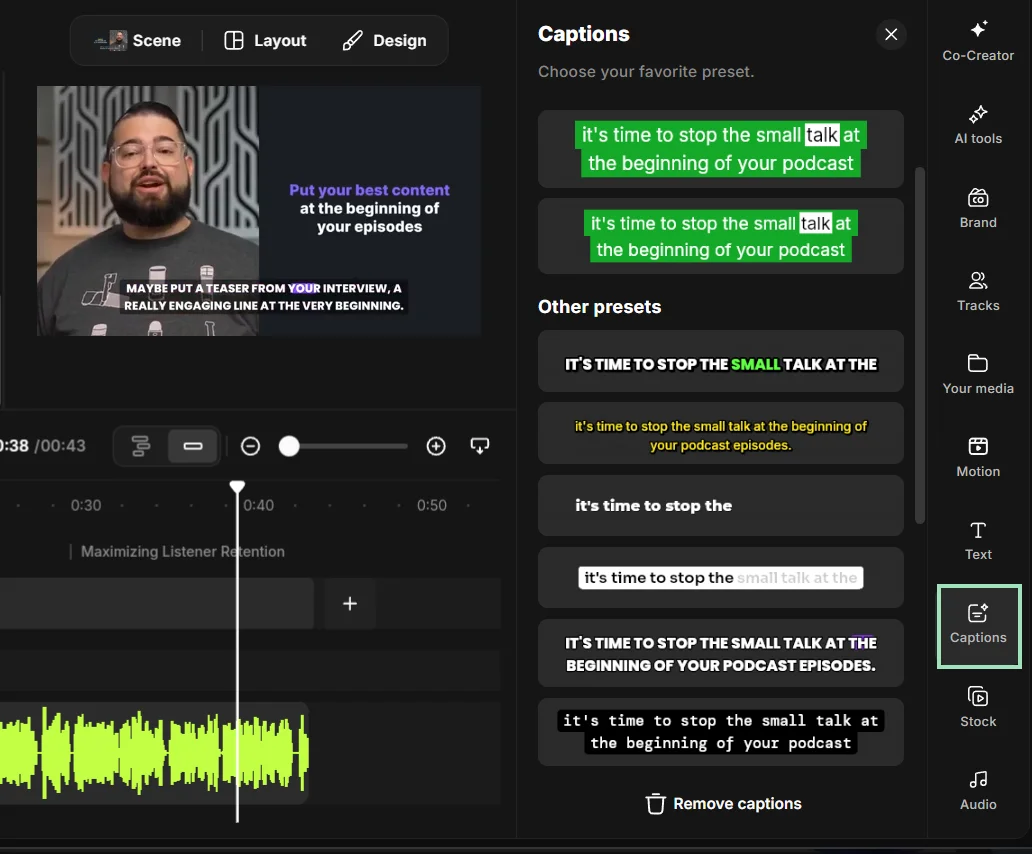
Add captions: Add automatic dynamic captions to ensure your message lands even when the sound is off. Check names, product terms, and figures manually inside the automatic transcript to ensure accuracy.
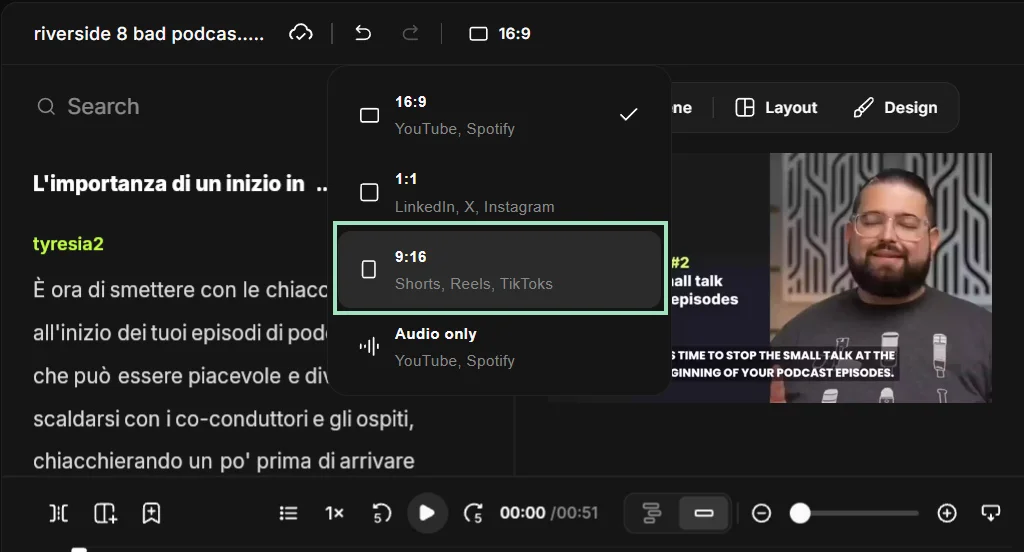
Create versions for each destination: Export in 16:9 for YouTube and most website embeds, 9:16 for TikTok, Reels, and YouTube Shorts, or 1:1 or 4:5 for social feeds.
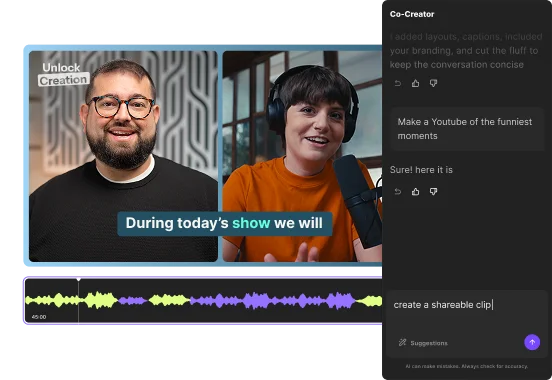
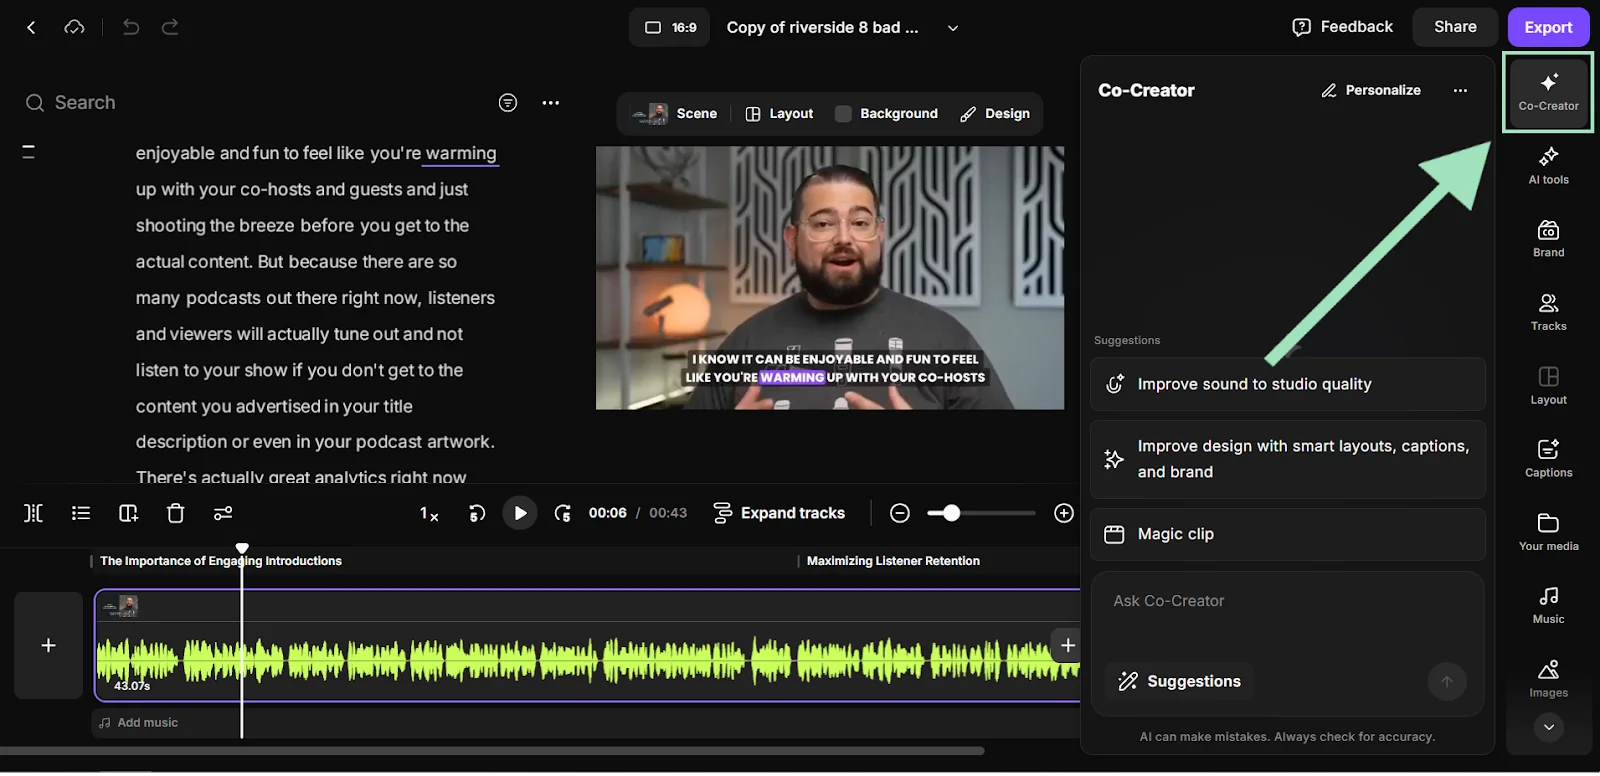
Repurpose into multiple formats: Use the auto-generated transcript or chat with AI assistants like Co-Creator to create short clips, blog articles, and social posts.
Best template for effective video testimonials
If you want customers to deliver strong video testimonials, give them a light framework to follow. The words should always be their own (real experiences sound best), but a clear structure keeps their message focused and compelling.
Ask them to cover:
- Introduction: Have the guest introduce themselves and their company (if relevant). This establishes credibility and helps viewers quickly see themselves in the story.
- The problem: Ask them to explain the challenge they were facing. This is where you hook your ideal audience of potential customers dealing with the same issue.
- The experience and results: What changed after using your product or service? How did it improve their work or day-to-day life?
- Recommendation: Who would they recommend your product or service to, and why?
This structure keeps testimonials authentic, easy to follow, and far more persuasive than an open-ended prompt.
Here’s a template you can send to your customer to guide their recording:
“Hi, my name is [name] and I am the [job title] at [company name].
Before we found [your company/product], we struggled with [main pain point] which affected [specific impact on time, money, or stress]. Once we started using [your company/product], things changed immediately. The biggest difference was [specific feature or benefit].
Thanks to them, we achieved [specific metric or result]. I highly recommend [your company/product] to any [target audience/industry] dealing with [specific problem]. It will completely change how you handle [specific tasks].”
3 examples of video testimonials (and why they work)
Want a few stellar video testimonial examples to get inspired for your own? Here are some of our favorites.
Zoom and Slack customer testimonial
In this testimonial, HubSpot’s VP of Corporate Development Andrew Lindsay breaks down how Slack and Zoom solve communication challenges at scale. Clear problem-solution framing, combined with high-quality footage of HubSpot’s offices, makes the video both informative and engaging.
Explainify customer testimonial
This video testimonial keeps things simple and gets the job done. It uses a proven introduction-problem-results structure. And, it stays engaging by pairing the talking head with product footage throughout.
Lemonlight customer testimonial
This testimonial stands out by featuring multiple decision-makers, each clearly outlining the challenge and how Lemonlight helped solve it.
FAQs about recording video testimonials
What are the benefits of using video testimonials?
The main benefit of video testimonials is that they offer powerful social proof for your business. They can highlight specific benefits or results in a relatable way and show prospective customers that real people endorse your product or service. This builds trust much faster than text alone.
How much does a testimonial video cost?
A testimonial video can cost almost nothing when a customer records it on their phone, or several thousand dollars when you hire a professional production team. Hiring a freelance videographer typically costs $1,500 to $5,000 per video, while a full-service production agency may charge $5,000 or more per project.
How can I get customers to give me testimonials?
You can get customers to give you testimonials by asking immediately after a positive milestone, such as a contract renewal or a successful onboarding. Keep the request frictionless by outlining the exact prompts in advance and offering flexible recording options, such as a short live call or an asynchronous link.
How long should a video testimonial be?
Most video testimonials perform best when they’re 30 to 90 seconds long, up to 1 to 3 minutes for in-depth case studies. This is enough time for a customer to explain the problem they faced, what changed after using your product or service, and why they recommend it.
Shorter testimonials (30 to 45 seconds) work well on social media and landing pages. Slightly longer ones (60 to 90 seconds) are better for websites, sales pages, or case studies.



.webp)