.webp)


Key Takeaways:
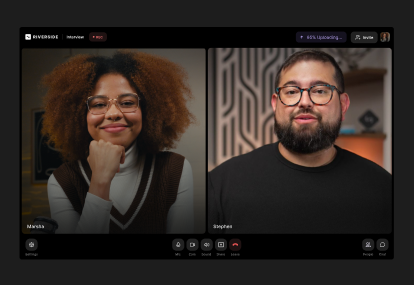
- Remote podcast software (like Riverside) gives you the best balance between quality and ease.
- Video conferencing tools like Zoom are easy and familiar, especially for quick calls, but quality is compressed and internet-dependent.
- Double-ender setups offer studio-level quality and control but require serious technical skills. And syncing is prone to mistakes.
- Phone call recording is great for low-tech guests and as a backup plan when nothing else works, but audio quality takes a serious hit.
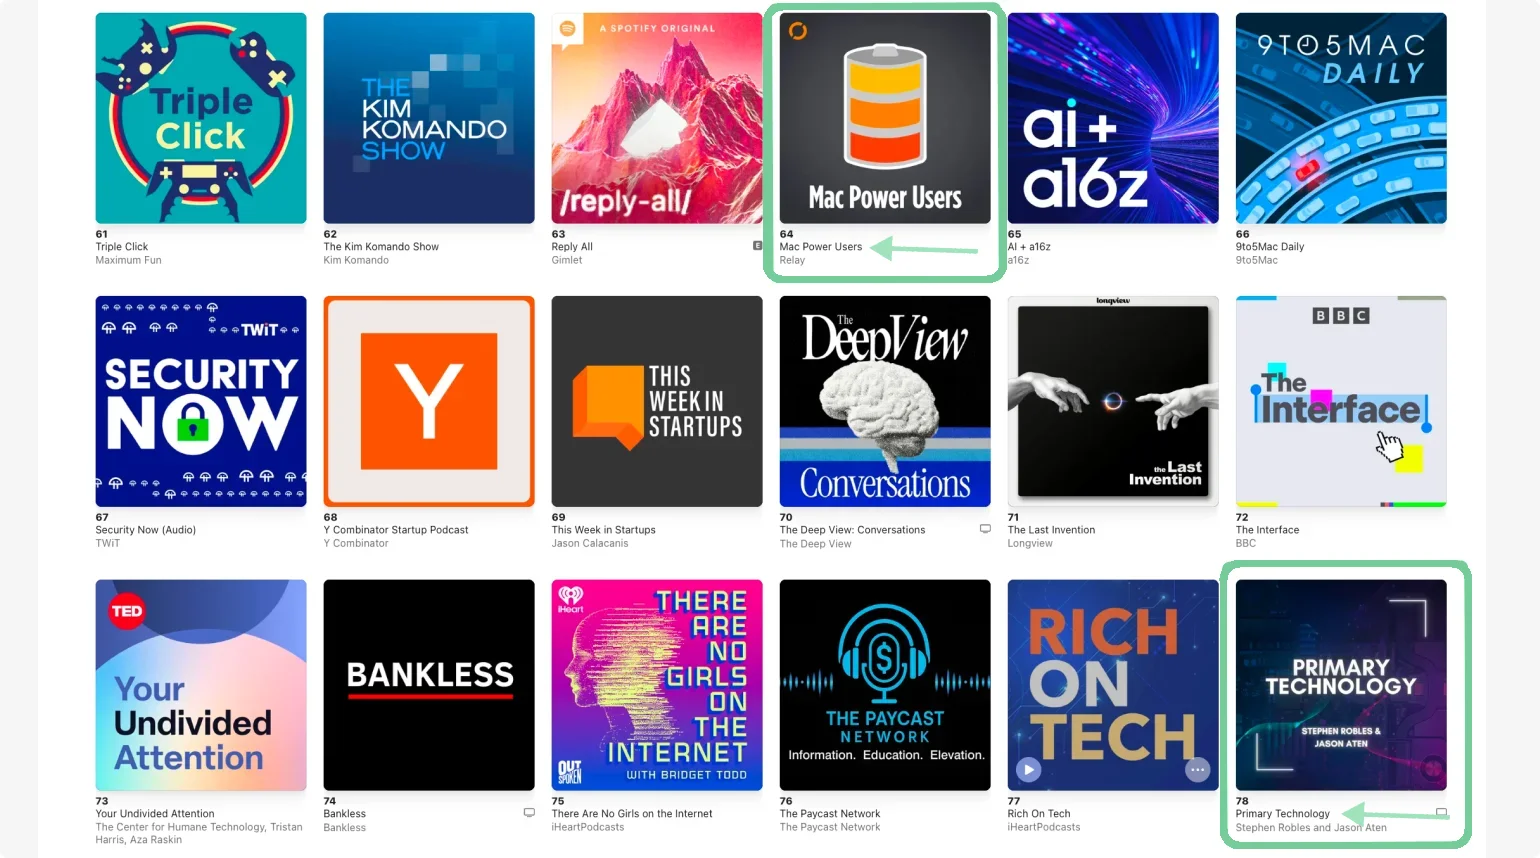
In my 15+ years of experience, I’ve recorded remote podcasts with guests across different time zones, countries, and tech setups. Right now, I co-host two remote podcasts, Primary Technology and Mac Power Users, both consistently in the top 100 tech shows on Apple Podcasts.
If you’re wondering how to record a podcast remotely with great quality and minimal fuss, I’ve got you covered. In this guide, I’ll walk you through the 4 best methods, plus tips, tools, and hard-earned lessons that’ll save you time (and headaches).
Quick comparison: 4 remote podcast recording methods
Here’s a quick overview before we dive in:
In a nutshell: If you want the best balance of quality and simplicity, use dedicated remote recording software. If your guest refuses to use anything new, use Zoom with the right audio settings or a phone call.
Read more: Check here if you’re looking for a more in-depth guide on how to record a podcast like a pro.
Method 1: Dedicated remote recording software
The best and most hassle-free option is using dedicated podcast remote recording software.
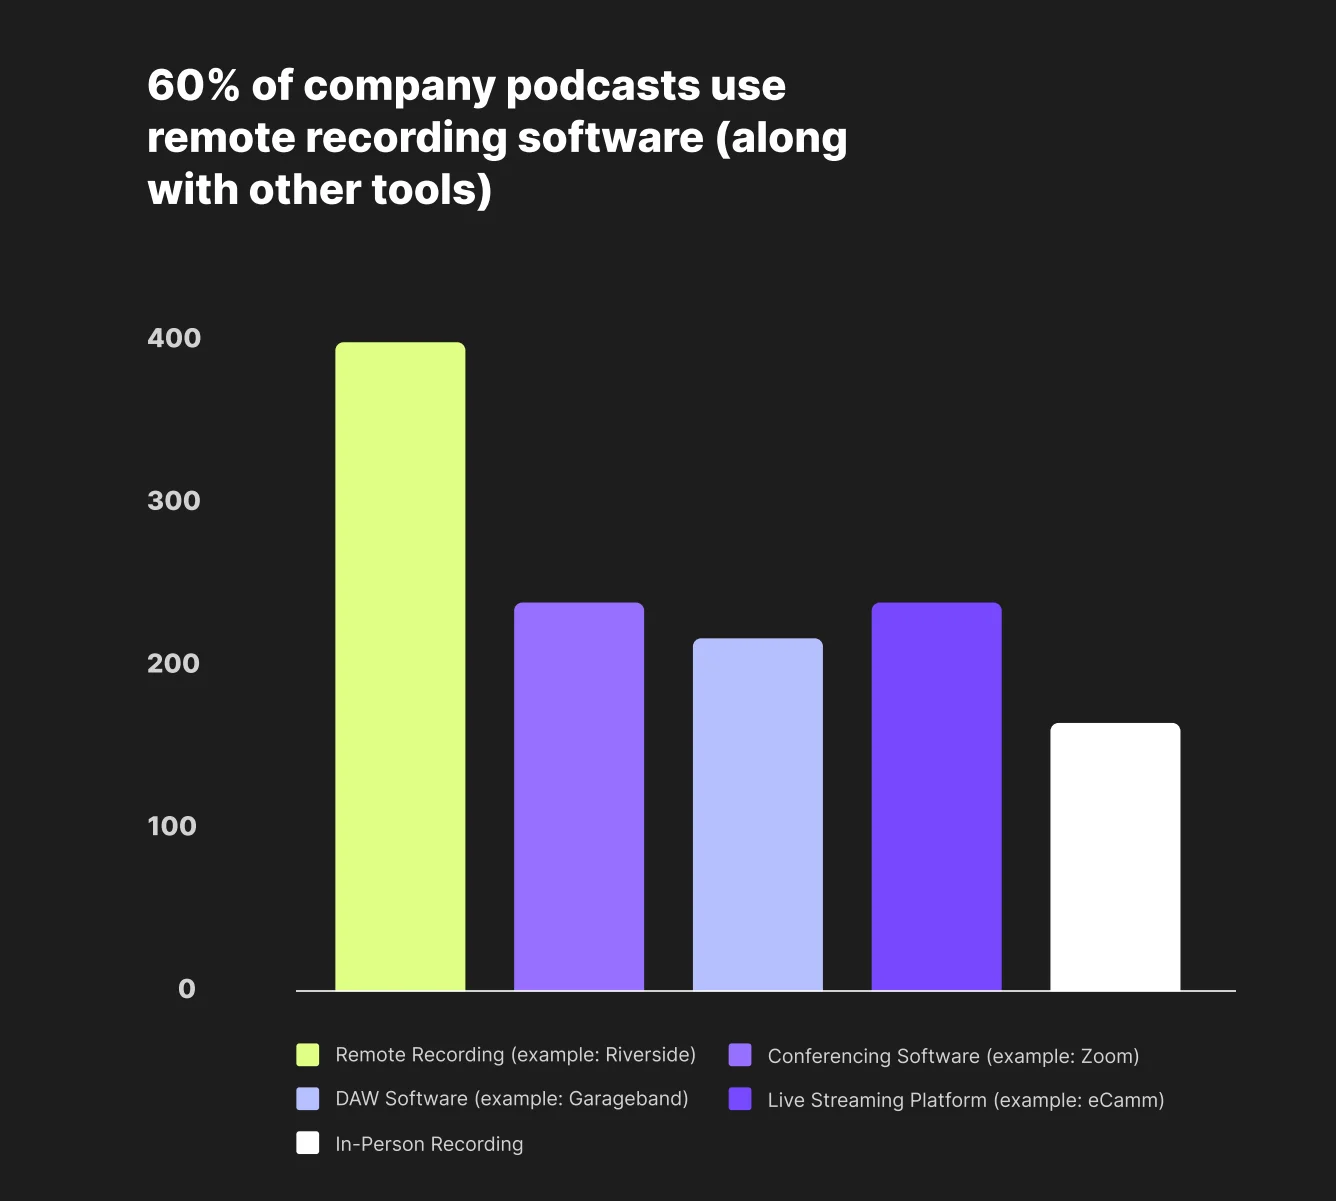
It’s my favored option, but it’s also what many podcasting pros use. Our survey report showed that 60% of company podcasts used dedicated remote software in 2023. As the tools have improved over time, adoption likely has grown from there.
What to look for in a remote recording software
When picking the right remote recording software, here’s what actually matters to me:
- Local recording: The software should record each participant on their own device. That way, internet speed won’t limit the quality of your final files.
- Reliable upload recovery: Progressive uploading goes hand in hand with local recording to protect files from crashes and disconnections.
- Separate audio and video tracks: You’ll want individual tracks for each speaker so you can edit mistakes and volume differences in post-production.
- Uncompressed audio formats: Look for software that exports WAV audio, ideally in 48kHz audio quality.
- High-resolution video: 1080p is the minimum for most video podcasts. Look for 4K support if you plan to publish on YouTube or repurpose your recording for social media.
- Browser-based guest access: Friction should be zero. Guests shouldn’t need to download software or troubleshoot setup for 20 minutes before the interview.
- Built-in editing tools: A streamlined, all-in-one workflow that lets you record, edit, and repurpose in one place will save you time and effort.
Which software you should pick
You’ve got lots of options for dedicated remote recording software. Each one is built for slightly different purposes.
Here is a quick breakdown of the most popular remote recording platforms and when you should use them:
How to record with remote podcast software
The exact steps vary slightly between platforms, but recording with dedicated remote podcast software is usually straightforward.
Most tools follow the same basic workflow: Create a session, check your audio and video settings, invite your guests, and start recording.
Here is how the process works, using Riverside as an example:
Step 1: From your Riverside’s dashboard, click “Record.”

You can also select “Plan a recording” to set up a session and invite guests in advance.
Step 2: From the lobby, select your audio and video output. Then, when you’re ready, click “Join Studio.”

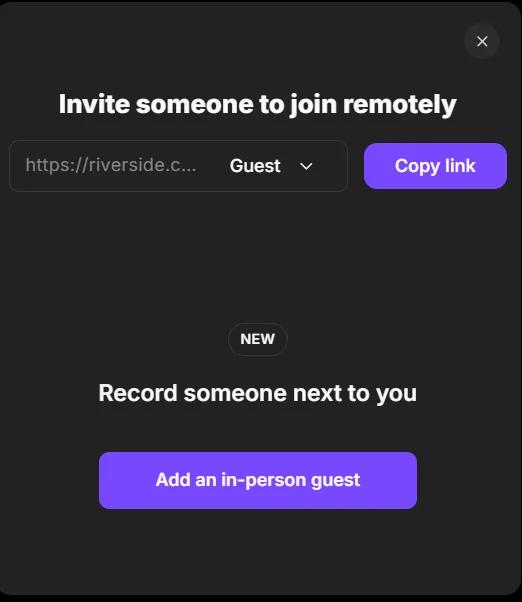
Step 3: To invite your guests to join you, you can either copy the link and share it with them or invite them via email.
Pro tip: Send your guest a checklist for recording to give them some guidance to prep ahead.
Step 4: When your guests have joined, start recording by clicking the red record button at the bottom.

Method 2: Zoom and other video conferencing tools
Many podcasters still rely on video conferencing platforms like Zoom and Google meet because they’re familiar and easy to use. But, they come with significant trade-offs when it comes to recording quality.
Why meeting tools sound worse
Platforms like Zoom and Google Meet compress audio and video in real time so the call stays stable, even when someone’s connection slows down. Meeting tools prioritize a smooth live conversation over recording quality.
You might not notice this compression during the live chat. But it shows up later as pixelated video or muddy audio.
Dedicated recording tools solve this problem using local recording. Each participant's audio and video are recorded directly from their device, in full quality, and then uploaded to the cloud. You get clean, separate and uncompressed tracks with no sync issues.
When to use a video conferencing tool
Use Zoom or another meeting tool when:
- Your guest refuses to use new or non-familiar software.
- You need a quick, casual recording.
- Quality and production value are less important than convenience.
- You want a backup recording alongside your primary dedicated recording tool.
I specifically would suggest Zoom over Google Meet or Microsoft Teams, because it gives you a little more control to improve the results.
But keep in mind, like all video conferencing software, you’ll need a stable connection during the call. The final quality of the recording still depends heavily on your internet speed.
Better Zoom settings for podcast audio
Before recording a podcast on Zoom, adjust these settings:
- Record separate audio files: Go into your recording settings and check the “Record a separate audio file for each participant” box to isolate and edit individual speakers later.
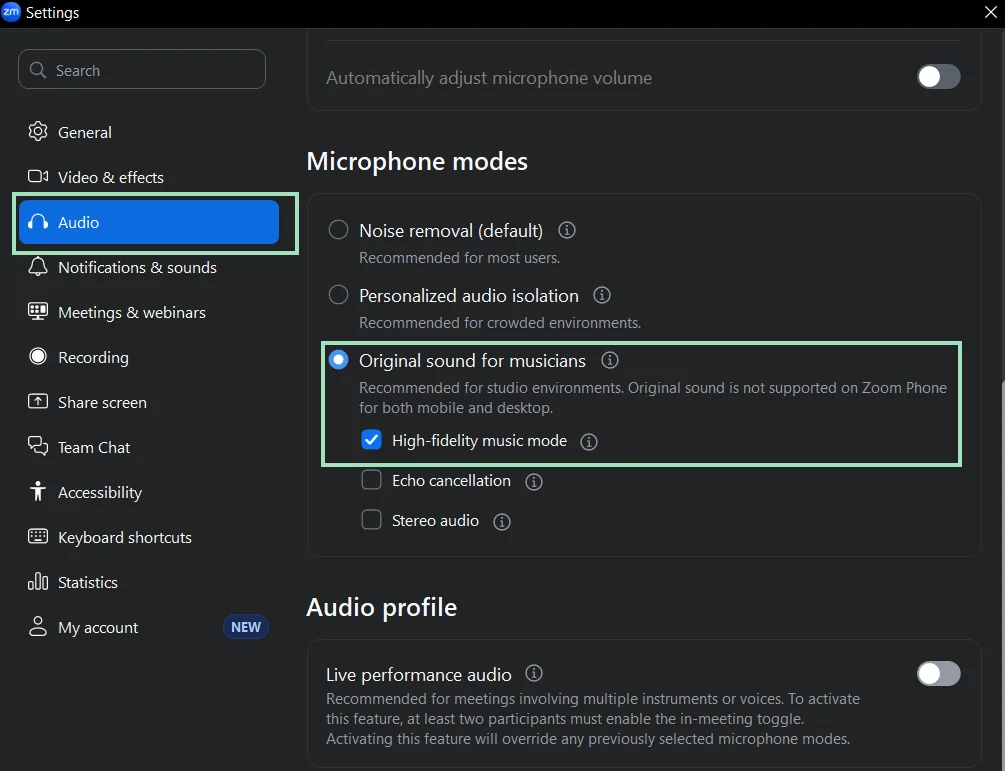
- Enable “Original Sound for Musicians”: This setting disables Zoom's aggressive noise-cancellation algorithm that clips voices and degrades audio during cross-talk.
- Turn on “High Fidelity Music Mode”: Check this box to increase the audio sample rate and preserve a better-sounding audio signal.
- Prioritize audio over video: If your internet bandwidth is struggling, turn off your video feed to ensure the audio stream remains stable.
I also suggest you always ask your guests to close all background apps to save bandwidth and processing power.
Note: Even with these settings, Zoom recordings are still compressed and internet-dependent. Use Zoom as a fallback or backup, not as your primary method for a professional remote podcast.
Method 3: Double-ender setup
Double-ender remote recording is a good option for getting pristine audio and video quality when recording remote podcasts. But it’s also the most manual and technically involved option.
What a double-ender setup is
In a double-ender setup, each person records themselves locally on their own hardware or software. Then, they need to send you the recording files afterward.
Like dedicated remote podcast software, this method lets you completely control your podcast’s quality, because you’re not dependent on anyone’s internet connection. Also, each participant’s device will record each track separately in the highest quality the device allows. And it will be fully editable (after you manually sync the tracks, though).
When to use a double-ender recording
The main reason podcasters go with a double-ender setup is that it ensures high-quality audio and video since all recording occurs locally on all ends. Getting separate tracks for each person also makes post-production easier. It’s the closest thing to sounding like you're in the same room.
On the other hand, double-ender recording is complicated and demanding. Everyone has to be tech-savvy, but the more moving pieces you introduce (gear, software, syncing, editing, etc.), the greater your chances of experiencing technical issues. High-quality files are also big, so they need lots of storage space, and they’re hard to upload and share.
This is personally why I prefer using dedicated remote recording podcast software which gets pretty close quality.
How to set up a double-ender recording
The specific steps of the double-ender recording process depend a lot on the equipment you’re using, but here’s a general outline of the process:
Step 1: Prepare the equipment. Each person needs a dedicated microphone, wired headphones to prevent audio bleed, and a reliable local recording method (such as Audacity, QuickTime, or a hardware recorder like a Zoom H1n).
Step 2: Start the conference call. Launch your video conferencing app like Zoom or Google Meet so everyone can talk naturally in real time. Make sure everyone wears headphones to avoid feedback.
Step 3: Start recording. When everyone is ready, hit the record button and start your podcast. Make sure everyone else starts recording, too. (Very important!)
Step 4: Use a marker at the start of the discussion. Before you start the conversation, do a quick countdown or clap on-camera. Sharp sounds create audio spikes that make it easier to align the audio and video tracks later in post-processing.
Step 5: Wrap up and collect files. Once the episode is done, remind your guest to send you their audio and video files right away.
Step 6: Sync and edit the recordings. After you collect the files, you’ll need to sync everything in post using advanced editing tools like Adobe Premiere Pro.
Read more: You can streamline double-ender podcast recording by adding a dedicated remote podcasting software to your tool stack. Check out this guide to see how double-ender recording works with Riverside.
Method 4: Phone call recording
If your guest is not tech-savvy enough to use a computer or app, or has no internet connection at all, recording over a phone call is an option. It's not ideal in terms of audio quality, and you won't be able to create a video podcast from the interview, but it's better to get the conversation than miss it entirely.
What a phone call recording is
With phone recording, you capture the conversation from a standard phone call or mobile calling app. This removes all the friction for the guest: They just answer the call, and all the technicalities of recording it are on you. It’s also highly reliable since it works anywhere a standard telephone signal is available.
The trade-off is quality. The audio will be heavily compressed because cellular networks drastically restrict frequency bandwidth. Even with a good mic and mixer on your end, your guest’s voice will still sound like… well, a phone call. You also won’t get video, and you may not get separate tracks unless you use additional hardware or routing.
When to use this method
Use phone recording when:
- The guest is very uncomfortable with technology.
- The guest has no access to a computer.
- A power outage knocked out your guest's internet.
- The interview matters more than audio quality.
- Your other recording methods failed.
- You need a completely independent communication line running as a backup.
How to record a phone call
There are two ways to record a podcast by phone based on the equipment you have access to and the quality you want to achieve.
Recording calls directly to your phone
This is the simplest route, but it's also the lowest quality. Apps like Google Voice and TapeACall let you record your phone call directly on your smartphone. Once you’re done, export the file to cloud storage (Google Drive, Dropbox, etc.). Then bring it into your editing software.
Note that this route records your voice and the guest’s in a single track. That limits your precision in post-production.
Recording calls using a mixer
A podcast mixer lets you use a mic to record your voice and have your phone audio (your guest’s voice) on a separate channel.
This gives you two clean, separate tracks to work with in post, just like a proper podcast setup. You’ll also record your voice locally, so the quality will be much higher than recording it on a smartphone app.
Including a mixer in your recording process takes more setup, though. Some mixers like the RØDECaster Pro let you save your recording directly on a microSD. Others require you to route audio to your computer.
Legal note
To protect your production and stay compliant, always tell guests that the call is being recorded before you start.
Recording laws vary by country, state, and jurisdiction, so get explicit verbal consent from everyone on the call before recording.
What equipment you actually need to record a podcast remotely
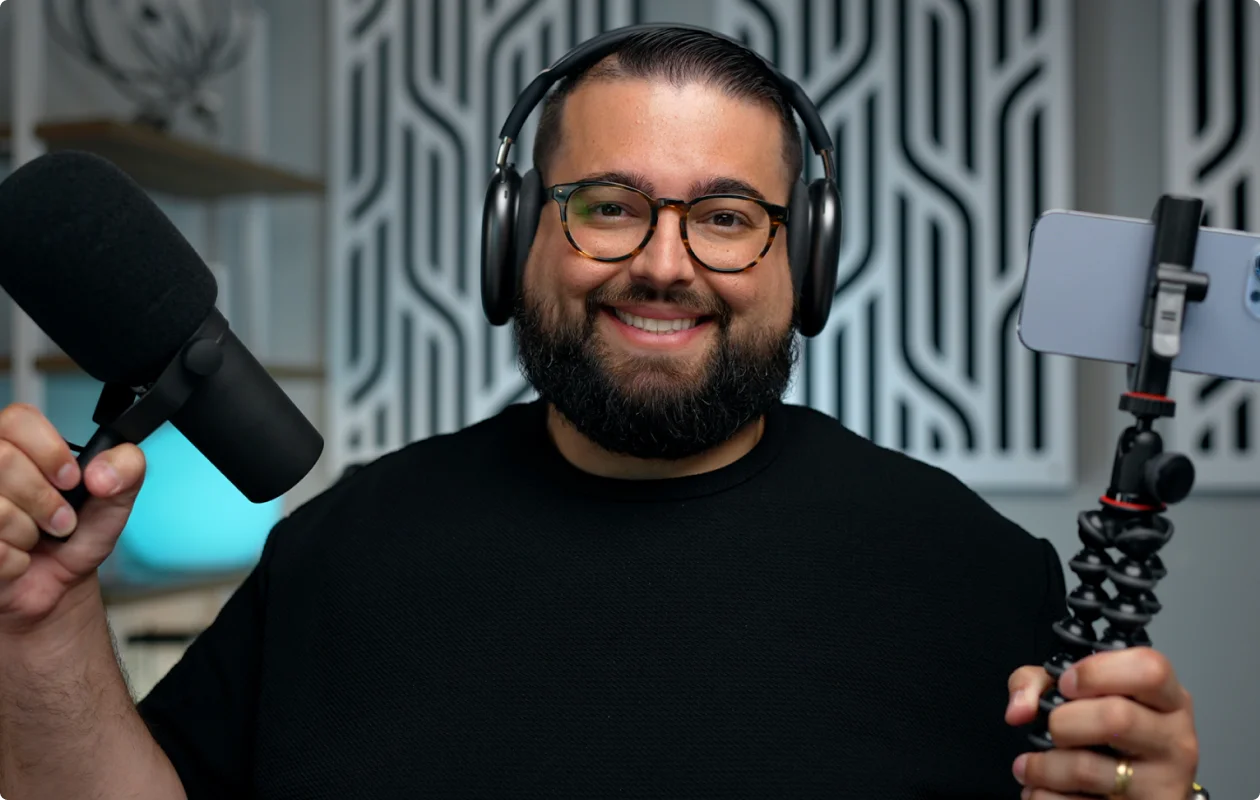
A simple, effective setup is usually sufficient to create a professional remote recording. Here’s a brief recap of what you might need:
- Microphone: Even an entry-level USB mic sounds much better than a laptop microphone. You can upgrade to a professional XLR one later. Check out our podcast microphone guide for specific model recommendations.
- Headphones: Podcast headphones help monitor sound and prevent your mic from picking up feedback. You can use anything from regular earbuds to dedicated high-tech headphones.
- Camera: If you’re on a low budget, use your phone’s camera instead of relying on your laptop’s webcam. Suggest your guests do this, too. Many phones film in up to 4K, and with a mount, you can get great results.
- Lighting: If you want to drastically improve your video quality, a $20 LED light clipped to your monitor or tripod can make a huge difference in dim rooms.
- Internet: Don’t use Wi-Fi, instead, use an ethernet cable to connect to your router to improve speed and stability during calls.
A note about room setup: Record in a soft, quiet space. Rooms with carpets, curtains, and soft furniture absorb sound waves much better than empty, echoey rooms with bare walls.
Read more: If you’re looking for a more detailed guide and more equipment suggestions, check out the best podcast equipment for every budget.
Last step: editing a podcast recorded remotely
Now that you’ve captured your conversation, you want to turn that raw footage into a polished episode.
Editing remote recordings depends on which of the 4 recording methods you chose.
If you used dedicated software
This is the most efficient workflow because you have separate tracks for each speaker. You can adjust the volume, fix crosstalk, and change each speaker’s audio and video without affecting others.
And with most dedicated remote recording software, you don’t need to chase guests for files because everything automatically saves to the cloud.
Depending on your tool, you can get AI audio enhancement, filler word removal, text-based editing, captions, transcripts, and social clips in the same workflow.
Software like Riverside, can also apply these edits just by prompting the AI-powered Co-Creator.
Read more: Check our full guide on how to edit your podcast.
If you used video conferencing software
If you record using simple video conferencing tools like Zoom or Google Meet, you’ll end up with a single file with all tracks flattened. This limits editing flexibility because you can’t adjust individual speakers without affecting others.
You can still cut and trim segments, apply noise reduction, and perform basic edits such as increasing/decreasing the overall volume. Note that on Zoom you can only trim a recording 5 times every 12 hours. Plan your cuts before you start editing!
If you used a double-ender setup
This method offers some flexibility but requires the most manual labor. First, ask every guest to send you their locally recorded files.
Once you have them, import them into a digital audio workstation (DAW) like Logic Pro or Adobe Audition. Then, sync every track manually, usually using your audio or visual cue like a clap or a countdown.
After you’ve aligned and labeled each track, you can finally edit them separately.
If you recorded your call on a phone
Repair options are extremely limited here. The heavily compressed phone audio gives you almost no room to fix background noise or equalize frequencies. You can clean it up slightly using an AI audio enhancer like Riverside's Magic Audio, but you won’t be able to make it sound like a studio recording. If you want to edit it manually, lower the frequencies between 1kHz and 4kHz to reduce the "tinny" sound, and roll off the extreme highs to cut background hiss.
Download our checklist
Download our full remote podcast recording checklist to make sure you’re always prepared. Start by choosing your recording method:
- Dedicated remote recording software (Riverside): Best for highest quality and editing flexibility (separate tracks, local recording, AI post-production).
- Video conferencing tools (Zoom/Meet): Best for convenience and simplicity (guest familiarity, ease of use, free).
- Double-ender (local + sync): Best for ultimate audio control (raw audio/video files from each participant).
- Smartphone recording (mobile apps): Best for quick convenience (guests without gear, on-the-go recording).
FAQs
What is the best way to record a podcast remotely?
Dedicated remote recording software is usually the best balance of quality and ease because it records each participant locally and gives you separate tracks for editing. Zoom works for quick or casual interviews, while a double-ender setup gives the most control if everyone is technical.
How can I remotely record a podcast for free?
You can record a podcast interview completely free with tools like Riverside or Zoom. Free plans usually have limits, so verify recording length, export quality, watermarking, and track options before publishing.
What is the difference between local recording and cloud recording?
The difference between local recording and cloud recording comes down to internet dependency and file compression. Local recording captures full-quality audio and video directly on each person's device, so a bad connection never ruins your files. Cloud recording captures the live online call, permanently baking every lag, glitch, and compression artifact right into your final episode.
Is Zoom good enough for podcast recording?
Zoom can work for casual interviews, especially if you enable separate audio tracks and higher-quality audio settings. Since it’s very easy to use, you can use it with no setup friction or learning curve. For professional podcasts, however, you need a dedicated local recording software or double-ender setup to produce quality files.
How do I record a podcast with someone in another country?
You can record a podcast with a guest in another county using dedicated remote recording software, a double-ender setup, or video conferencing tools. Remote recording is the easier method because the guest can join with a link and the platform handles local recording and file upload.
Do I need a microphone to record a podcast remotely?
You don’t strictly need a microphone to record a podcast remotely, but you should use one if you care about audio quality. Built-in microphones catch significant room echo and background noise;even a basic USB mic will sound much better. Also, use wired headphones or earbuds so your guest’s voice doesn’t bleed back into your microphone.



.webp)
.webp)
.webp)