.webp)


Key takeaways
- Start with just an external mic like the Samson Q2U, basic headphones, and your smartphone as a camera.
- USB mics like the Shure MV6 are beginner-friendly; XLR mics like the RØDE PodMic give pro-level quality.
- Good lighting and acoustics matter as much as gear.
- You can podcast on any budget, from under $150 to $1,000+.
I’ve been podcasting for 15+ years, and my tech podcasts consistently rank in the top 100. But I know what it’s like to be at the beginning, figuring out what equipment to buy.
Luckily for me, I’m obsessed with gear and have even tested many different mics, audio interfaces, cameras, and boom arms on the Riverside YouTube channel.
So, here’s my guide to help you figure out what podcast equipment to buy. This isn’t an exhaustive catalog of every podcasting product on the market. It’s the gear I’d actually buy at 3 budget levels, based on what has performed well across hundreds of recordings.
If you just want the fastest answer: get a Samson Q2U mic, a pair of headphones, and start recording. That gives you a complete beginner setup for around $100.
Best podcast equipment at a glance: My top picks
Before diving into the detailed setups, here are the absolute best equipment picks and their respective prices. If I were building a podcast setup today, these are the first products I’d look at.
Note: This section focuses on audio gear. If you’re starting a video podcast and want camera and lighting setup recommendations, jump to the video equipment section below.
Disclaimer: Please see our help site guidelines to check Riverside’s compatibility with your preferred equipment.
The best starter kit: Under $150
For a $100 budget, I’d spend the bulk of it on a good-quality external microphone.
Add a basic pop filter if you can, but don’t overthink the rest. On this budget, your focus is simple: record clean audio consistently.
Here are some of my top picks for this basic setup.
Best beginner microphone: Samson Q2U
Price: $100
Connectivity: USB, XLR
Type: Dynamic
Polar pattern: Cardioid
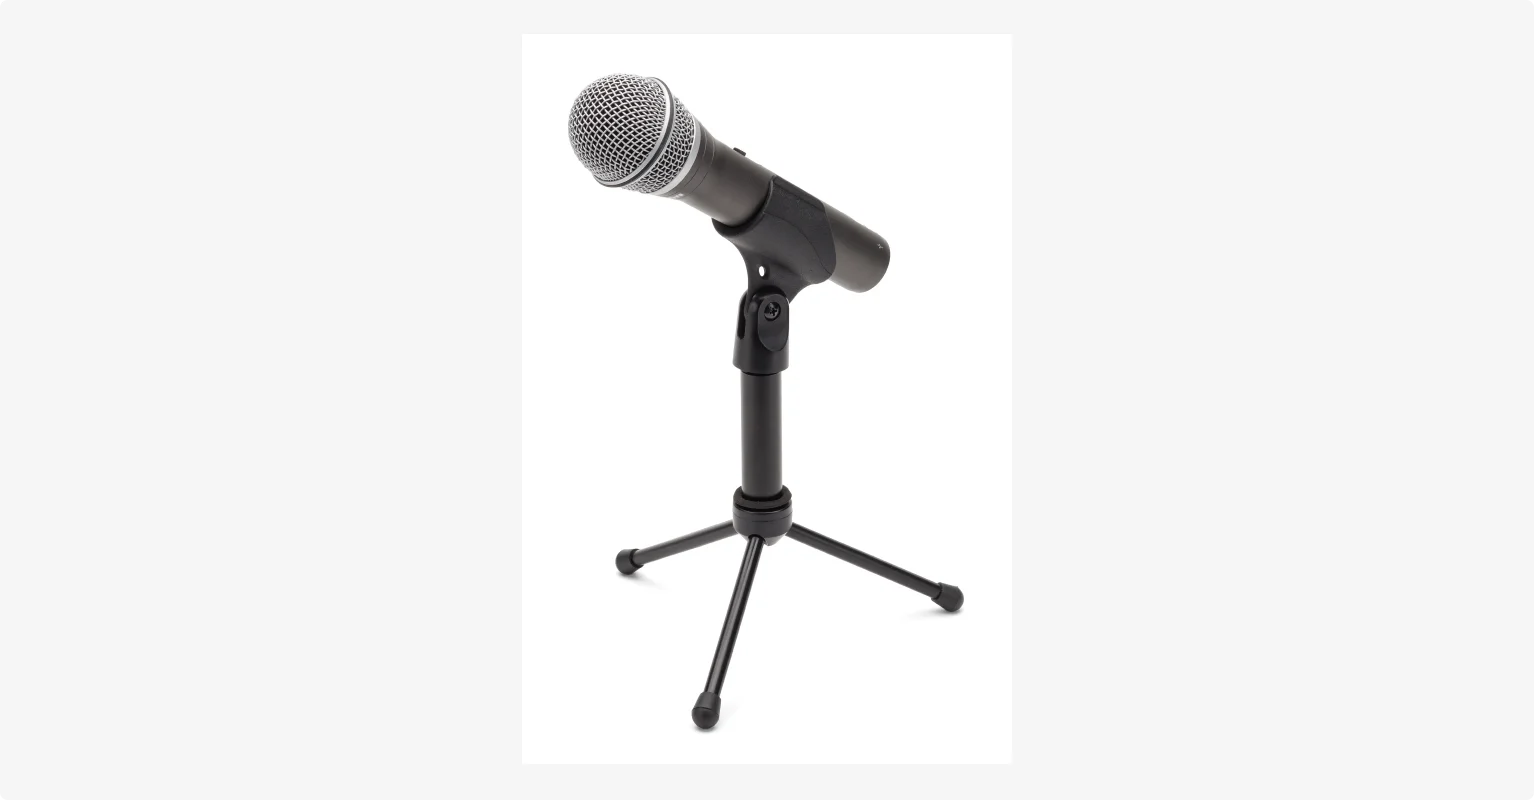
This is currently my top pick for any new podcaster. For around $100, you get a fantastic-sounding mic that’s forgiving in untreated rooms, like your typical home office or bedroom.
For beginners, a dynamic mic is the best entry point because it’s less sensitive to background noise. But what really makes the Q2U valuable in the long run is how it lets you move from a simple USB setup to an XLR setup later.
You start with the plug-and-play USB cable. Then, when you’re ready to upgrade your setup with an audio interface, you can use the XLR output. This mic literally grows with you (and your show).
That said, my least favorite thing about it is that it requires a mini-USB connection. But it comes with its own cables, and you can get a connector cable for other inputs for under $10.
Overall, it’s built to last. I’ve had one for a while, and it still delivers the same professional quality as the day I bought it.
Here’s a sample of what it sounds like:
Read more: To know every detail about polar pattern, connectivity, and more, check our full guide on podcast microphones here.
Best beginner headphones: Anything you’ve got
I always wear podcast headphones to hear exactly what my microphone is picking up in real time. This is called "monitoring" and it’s essential to catch any issues as they happen, like popping sounds or background noise.
If you're just starting out, you definitely don't need to buy expensive pro headphones and can simply use whatever you already have. Just make sure to plug in basic wired earbuds instead of wireless options like AirPods, as Bluetooth latency creates a distracting delay while you speak.
What else you need
A basic pop filter is worth adding to reduce harsh "p" and "b" plosive sounds. The Nady MPF-6 costs about $30, and you can precisely position it thanks to its stand mount clip and flexible 13-inch gooseneck.
For recording software, you have several reliable free options. You can use Riverside on its free plan, Audacity for Windows, or GarageBand for Mac. For a full breakdown, read our guide to the best podcast recording software.
Best mid-range setup: $300–$500
To upgrade your podcast gear, here’s what I recommend:
Best mid-range microphone: Shure MV6
Price: $170
Connectivity: USB
Type: Dynamic
Polar pattern: Cardioid
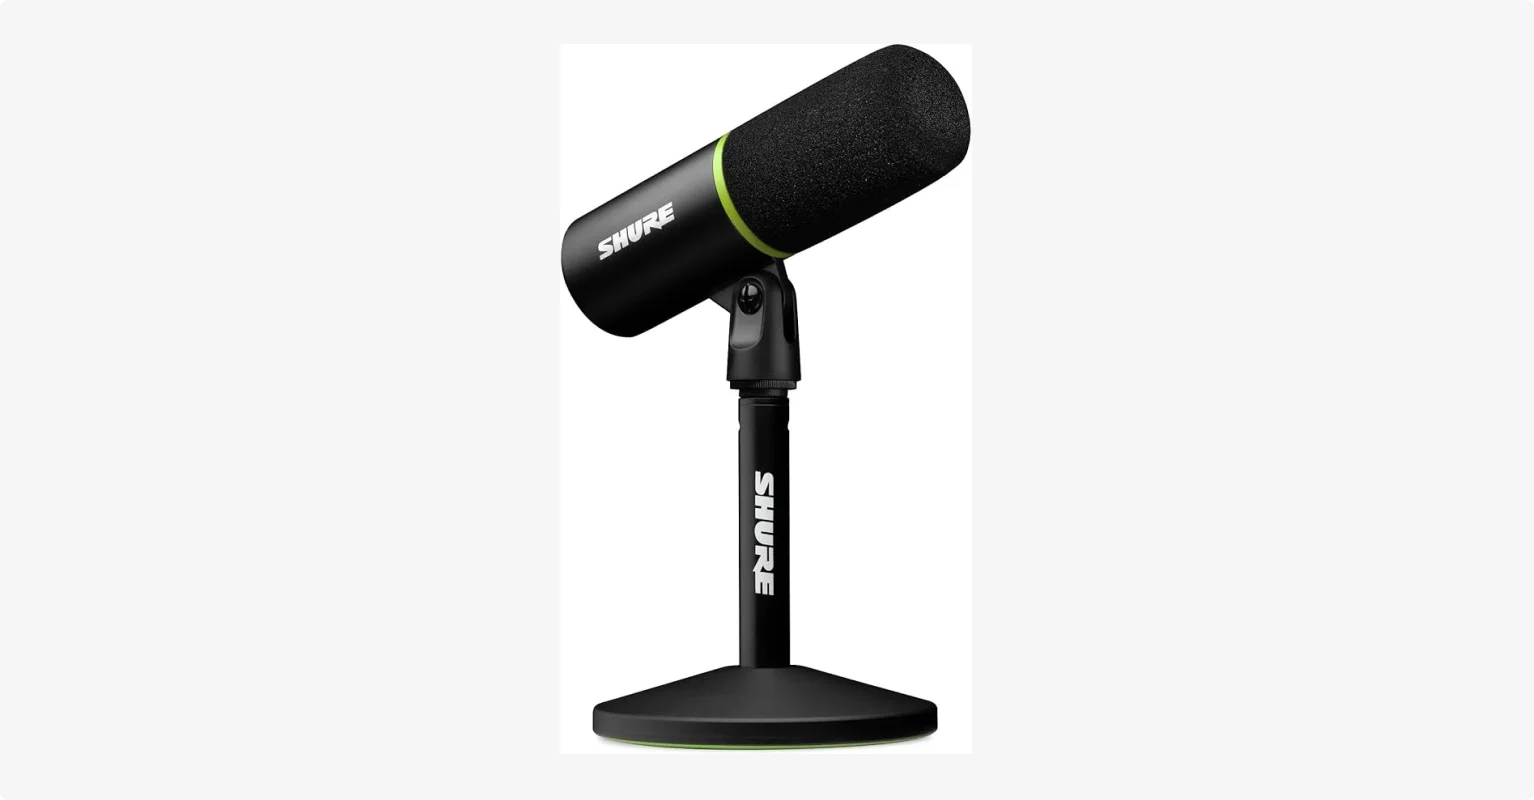
The Shure MV6's real strength is that it cleans up your sound automatically with its virtual pop filter and real-time denoiser. It automatically reduces harsh plosives and background noise right out of the box. I feel it's like having a mini audio engineer built right into the mic.
The MV6 is a USB-C dynamic mic that features 3.5mm headphone monitoring and 24-bit/48kHz recording. It also comes equipped with a small but sturdy mic stand, which usually could cost you an extra $30 or so.
Shure markets it as a gaming and streaming microphone, but I think its built-in sound processing makes it excellent for podcasters. You can even turn on automatic volume leveling or add live audio filters as you record.
Just keep in mind that the MV6 has a brighter sound than a classic broadcast mic, and that the denoiser is quite mild. If you need a microphone that offers both USB-C and XLR connections, look at the Shure MV7+ instead.
Here’s a full review where I tested the MV6:
Read more: Check out all the best USB microphones for podcasting and recording.
Microphone XLR upgrade consideration: RØDE PodMic
Price: $100
Connectivity: XLR
Type: Dynamic
Polar pattern: Cardioid

If you’re ready to move beyond USB, the XLR connection offers greater control over your signal chain. Plug an XLR mic into an audio interface, and you can manually set the gain, add processing later, and record with multiple inputs. The trade-off is cost and complexity since you’ll need an audio interface as well as an XLR cable.
For around $100 (often even less), I think the RØDE PodMic is a very affordable option. The sound is full and clear, especially for podcasts, and it holds up well against background noise. You can start with the USB-C/XLR version or go XLR-only.
Here’s what it sounds like:
Best audio interface: Focusrite Vocaster Two
Price: $250 (frequently on sale for about $100)
Mic inputs: 2 XLR inputs
.webp)
The Focusrite Vocaster Two is the interface I’d recommend for most podcasters because it’s built for spoken-word recording, not music production. It features 2 XLR inputs and 2 headphone outputs.
The standout spec is its 70dB of gain. This means it offers enough power to drive gain-hungry microphones (like the Shure SM7B) without needing a separate, expensive inline booster. This way, you can start with a cheaper PodMic now, then upgrade to a higher-end XLR mic later without replacing your interface.
Besides that, the Focusrite Vocaster Two automatically sets your gain levels and adds compression and EQ to make your voice sound cleaner. It even has dedicated bluetooth and TRS connections to record audio from your phone or camera. And, I love that it’s lightweight and portable enough to record on the go.
Read more: Check our deep dive on the best USB audio interfaces.
Best boom arm: RØDE PSA1+
Price: $130
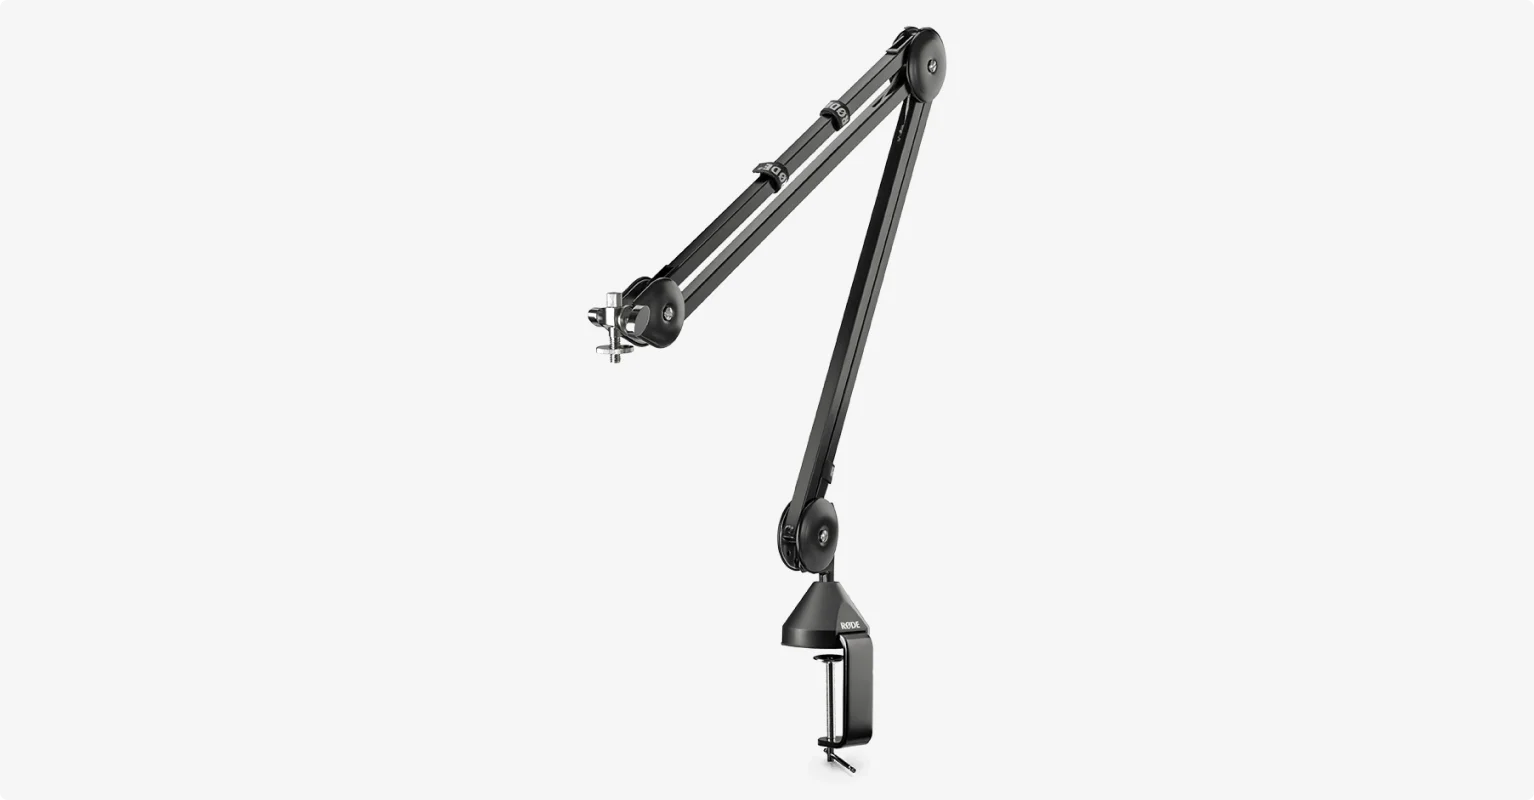
The RØDE PSA1+ is a professional mic arm that you can adjust smoothly and silently during recording. It has a long reach and is strong enough to hold heavy broadcast mics like the Shure SM7B without drooping.
A good boom arm like this can really improve your sound by keeping the mic close to your mouth and off your desk.
Best podcast headphones: Audio Technica ATH-m20x
Price: $60
Type: Closed-back, over-ear
Connection: Wired
.webp)
The ATH-m20xs are rugged but affordable podcast headphones, making them a top option on my list. They are closed-back, meaning they’re designed to prevent sound from leaking out and being picked up by your mic.
Also, their lightweight yet durable plastic build makes them comfortable for extended use. This is important, since you’re likely going to spend some time wearing them!
Best professional setup: $800+
A professional podcast setup maximizes your audio quality via 3 things: a better microphone, cleaner gain, and more control during recording.
Here’s what I suggest you buy to take the final step to pro gear:
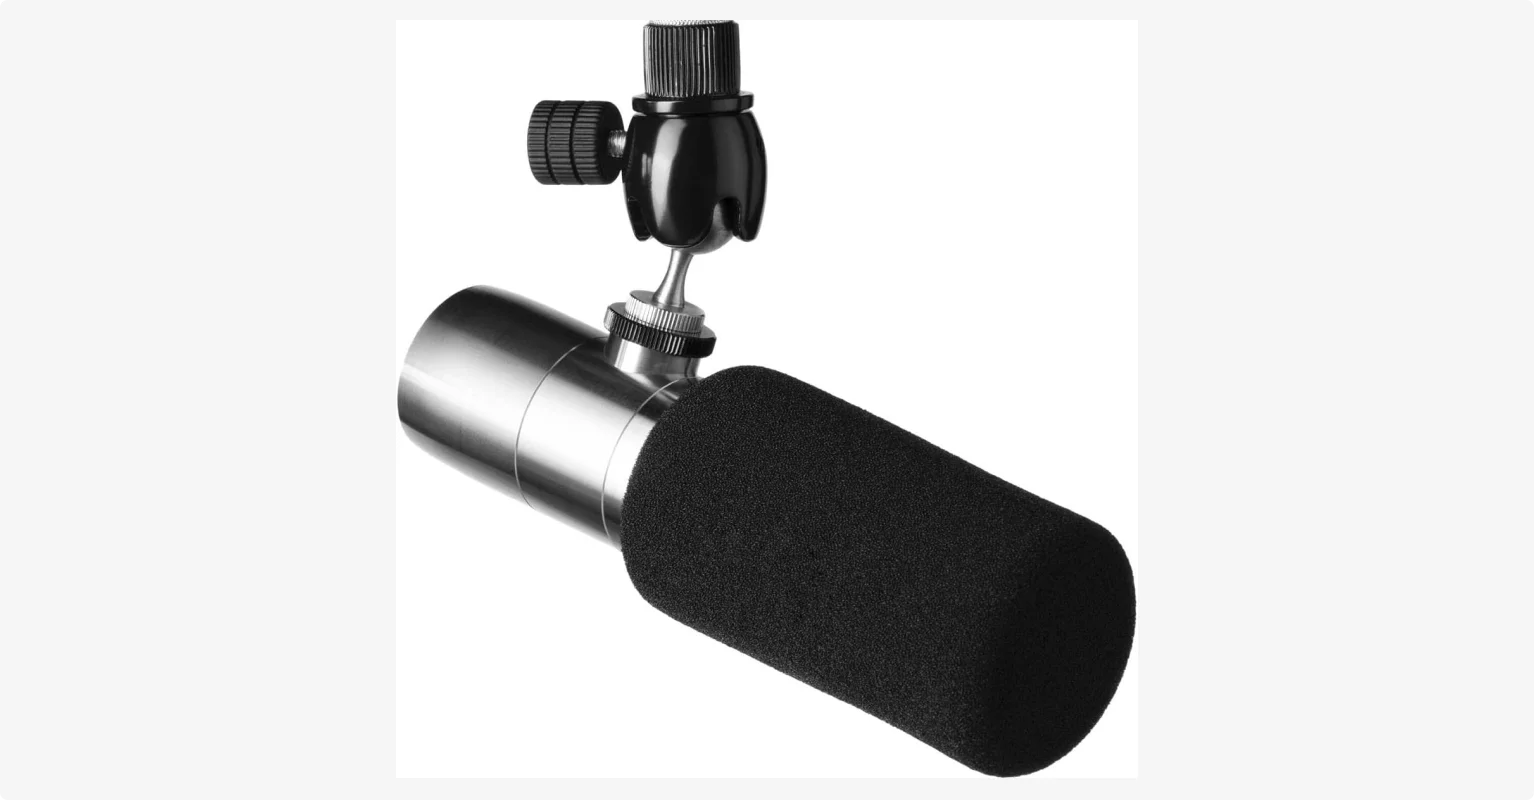
Best professional microphone: Shure SM7B / SM7dB
Price: $450 (SM7B) or $550 (SM7dB)
Connectivity: XLR
Type: Dynamic
Polar pattern: Cardioid

You've seen this microphone everywhere. The Shure SM7B is the go-to for many of the world's top podcasters, streamers, and musicians, and for good reason. This microphone ignores unwanted sound coming from behind it completely, making almost any voice sound incredible.
The switches on the back also give me more control before I even touch EQ. I can use the bass rolloff to reduce low-end rumble, or turn on the presence boost when I want to add some bright highs and color in my voice. The Shure also has internal shock isolation and strong plosive control. This way, you can make it work in a home studio where you still need to reject hum, desk vibration, keyboard noise, and room reflections.
The catch with the SM7B, though, is that it requires an audio interface that can deliver at least 60dB of clean, noise-free amplification. Without it, your voice will sound too quiet, even if you’re speaking directly into the mic.
But if you’re okay with spending an extra $100, you can purchase SM7B’s "bigger brother," the Shure SM7dB, which comes with a built-in preamp.
Here’s a sample of what the SM7B sounds like:
Top-tier pro mic alternative: Earthworks Ethos
Price: $399
Connectivity: XLR
Type: Condenser
Polar pattern: Supercardioid
I use the Earthworks Ethos for many of my recordings because it’s the best in sound clarity and detail. If you’re looking for a best-in-class mic, this one is a premium product through and through.
Although technically a condenser microphone, it’s engineered to have the noise rejection of a dynamic mic. The result is stunning: it sounds open and natural, but still captures every nuance of your voice.
That’s exactly why I like it, but it’s also why I wouldn’t recommend it for every room, as it can still pick up unwanted reflections and echo. Buy this microphone only if you record in a sound-treated space.
The Ethos also comes equipped with a ball joint mount instead of a traditional threaded screw joint. Instead of locking your microphone into a fixed angle, the ball joint lets me freely swivel and tilt the microphone in any direction. This lets me place the mic exactly how I want, especially when I’m adjusting the mic around a camera frame or boom arm.
Read more: Check our guide to learn the differences between dynamic versus condenser microphones.
Best pro audio interface: MOTU M2 or M6
Price: $200 (M2) or $450 (M6)
Mic inputs: 2 (M2) or 4 (M6) combo XLR/TRS inputs
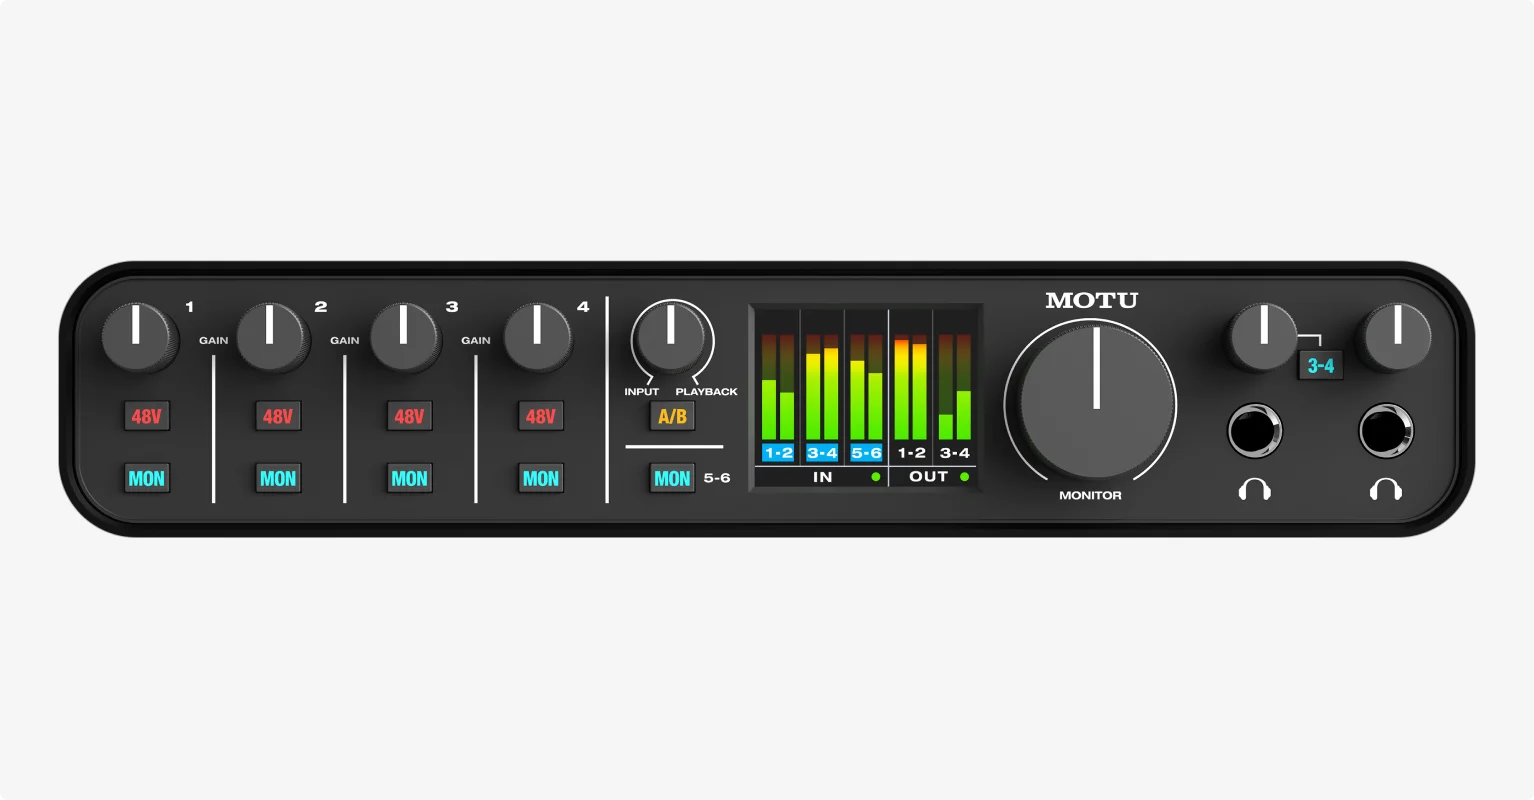
MOTU interfaces are the best of the best in the music industry when it comes to audio quality. They use high-end ESS Sabre32 digital-to-analog converters (DACs) that result in crystal-clear sound.
I also like that you can easily read your audio levels at a glance with the full-color LCD meters. They make it much easier to catch clipping and set levels properly before they ruin the recording.
The M2 has 2 mic inputs, but if you’re running a larger show, the M6 is probably better since it has 4.
Best mixer: RØDECaster Duo / Pro II
Price: $499 (Duo) or $699 (Pro II)
Mic inputs: 2 (Duo) or 4 (Pro II) combo XLR‑1/4″ jacks

In general, I would only suggest getting a mixer if you’re recording with in-person guests. This is because mixers help you connect and control several mics together with other audio sources. Many modern mixers can also record directly to an SD card, making them a complete standalone recording solution.
My top pick for a Mixer is the RØDEcaster series, which is a complete production studio. The Pro II has 4 inputs, while the more compact Duo has 2. Both feature advanced APHEX audio processing and enough clean gain for mics like the Shure SM7B.
There are also 8 customizable sound pads for music and sound effects, and the ability to record multitrack audio directly to a microSD card.
Best portable mixer: Zoom PodTrak P4
Price: $170
Mic inputs: 4 XLR inputs

The Zoom PodTrak P4 is a reliable portable option for multiple inputs, especially for its budget-friendly price.
It gives you 4 XLR inputs, 4 separate headphone outputs for your guests, customizable sound pads, and can even run on AA batteries. It’s just the perfect field recorder, hands down.
Read more: Check out all the best podcast mixers in our full guide.
Best acoustic treatment: GIK acoustics panels
Price: $80 to $90 per panel
A $70 mic in a treated room sounds better than a $500 mic in a kitchen. The easiest way to improve your acoustics is by recording in a room with lots of soft furnishings that absorb sound. For example, you can use carpets, heavy curtains, or couches. For an even bigger improvement, you can add a few acoustic panels to your walls.
I can’t recommend the GIK acoustics panels enough; you’ll see them in the background of all my videos (and in the picture below)! They are made from high-density, sound-absorbing materials like rigid fiberglass wrapped in acoustically transparent fabrics.
Just place a few of them at the key reflection points in your room, like on the walls to your left and right, and the wall behind your monitor. I also love that they come in different colors and patterns.
.webp)
Best equipment for video podcasters
If you’re recording a video podcast, you’ll want a good camera to ensure you (and your guests) look your best. My best advice is to start with the camera you already have, then upgrade only when your budget justifies the expense.
Budget video: Your smartphone
The best camera is often the one that’s already in your pocket: your smartphone. If you have a recent iPhone, Samsung Galaxy, or Google Pixel, you already own a fantastic podcast camera that can shoot 4K video.
With the Riverside mobile app, you can turn your phone into a professional-grade recording device, then sync the recording to your desktop for editing.
Add a basic tabletop tripod, like the Manfrotto PIXI, and you have a usable video setup for around $30.
Mid-range camera: Sony Alpha ZV-E10
Price: $800
Type: Mirrorless
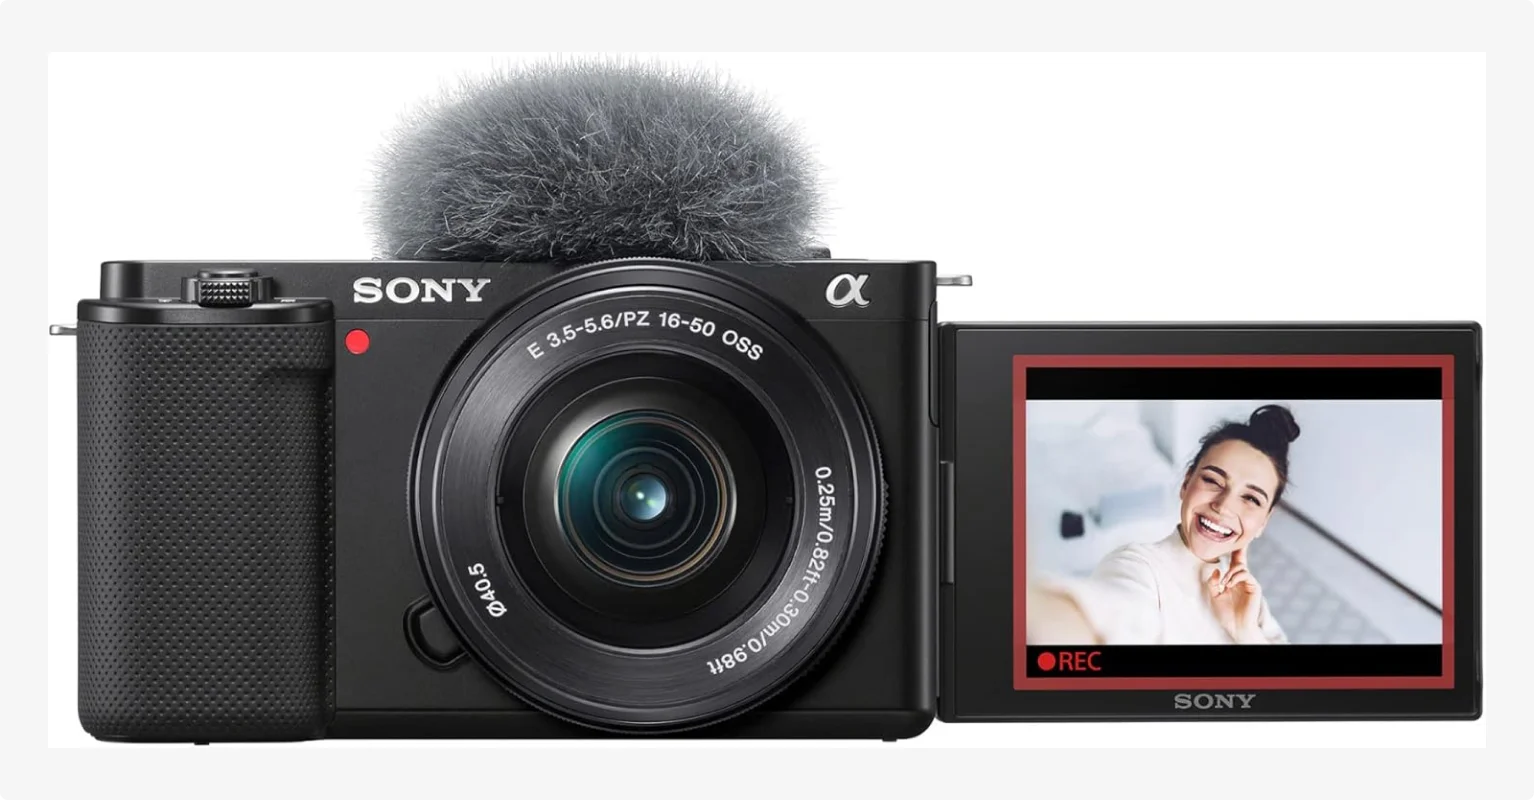
If you want to step up from a smartphone to a dedicated camera, the Sony Alpha ZV-E10 is the most reliable choice. It’s a full-frame mirrorless camera that can record 4K video at up to 60fps. It has an interchangeable lens system, giving you more flexibility in different scenarios. My recommendation is to invest in a Sigma 16mm f/1.4 lens for a natural blurred background look.
The ZV-E10 uses an APS-C sensor, which provides a professional look without the premium price tag of high-end cameras like the ZV-E1.
Connectivity options include USB-C, micro-HDMI, Wi-Fi, and Bluetooth for seamless integration with any streaming and recording setup.
Pro camera: Blackmagic Pocket Cinema Camera 4K
Price: $1139
Type: Cinema

For a truly professional podcasting studio, look no further than the Blackmagic Pocket Cinema Camera. It records in professional formats like Blackmagic RAW, which delivers cinematic image quality with incredible dynamic range. This gives you massive flexibility for color grading in post-production.
These cameras are designed for live production and are built to integrate with video switchers like the ATEM Mini. For a simple desk podcast, though, a Blackmagic is overkill. Only buy this if you have a permanent studio setup, as it requires lenses, storage, rigging, and continuous power to perform at its best. That can translate to a range of expenses you might not anticipate when you’re simply looking for better video quality.
Lighting gear
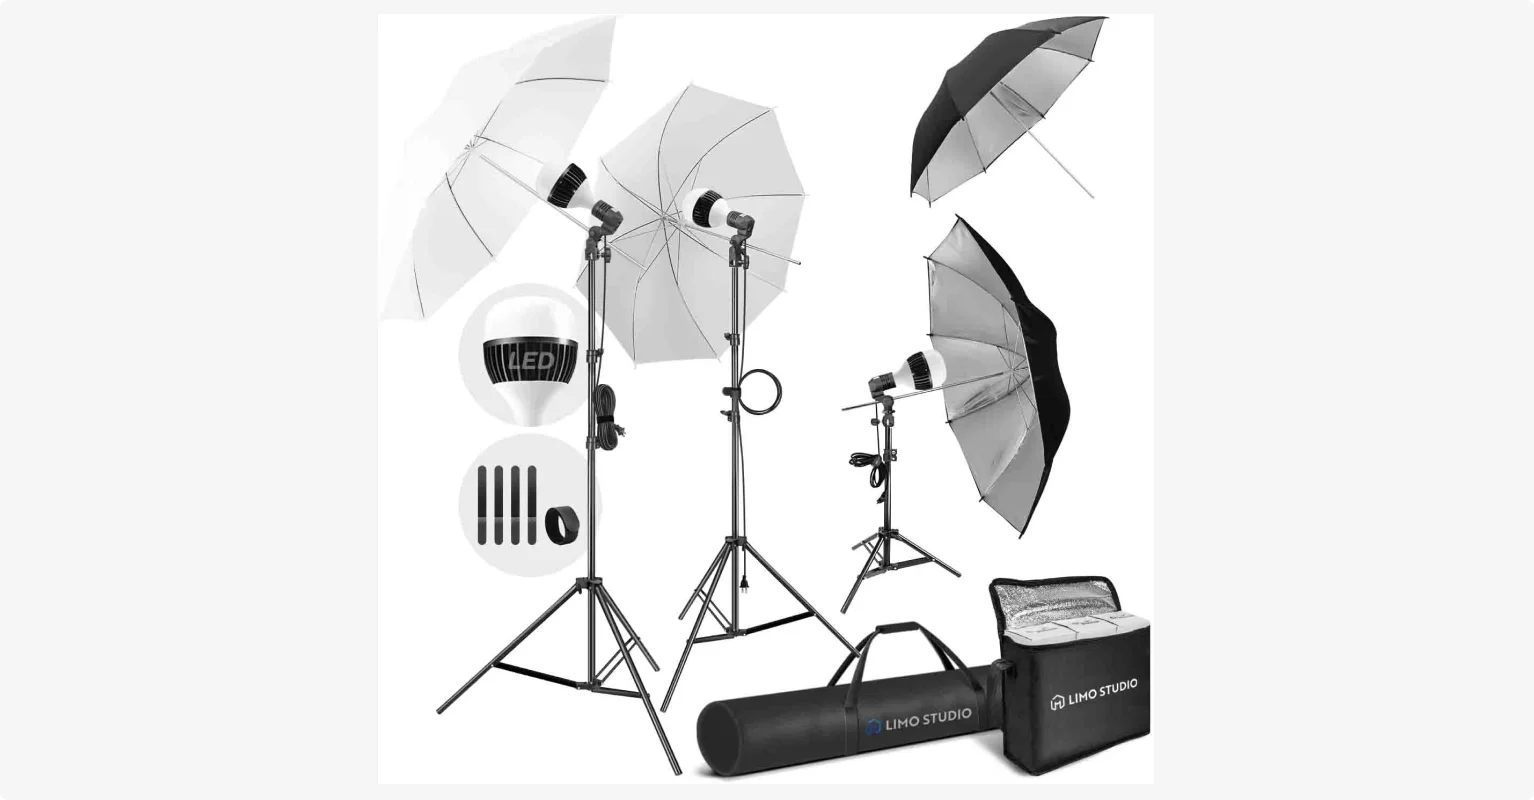
Good lighting is what separates a flat, amateurish shot from a dynamic, professional one. Start with a $20 LED panel clipped to your monitor to eliminate unflattering shadows.
Once you’re ready to upgrade, move to a 3-point lighting setup like Limostudio’s Continuous Lighting Kit. It includes 45W daylight-balanced (6500K) CFL bulbs for soft, natural light, and for around $75 to $100, it’s an affordable step up.
But don’t overthink it. I find one soft, well-placed light usually beats a mismanaged, expensive multi-light setup.
Best boom arm for video podcasts: Elgato Wave Mic Arm LP
Price: $100
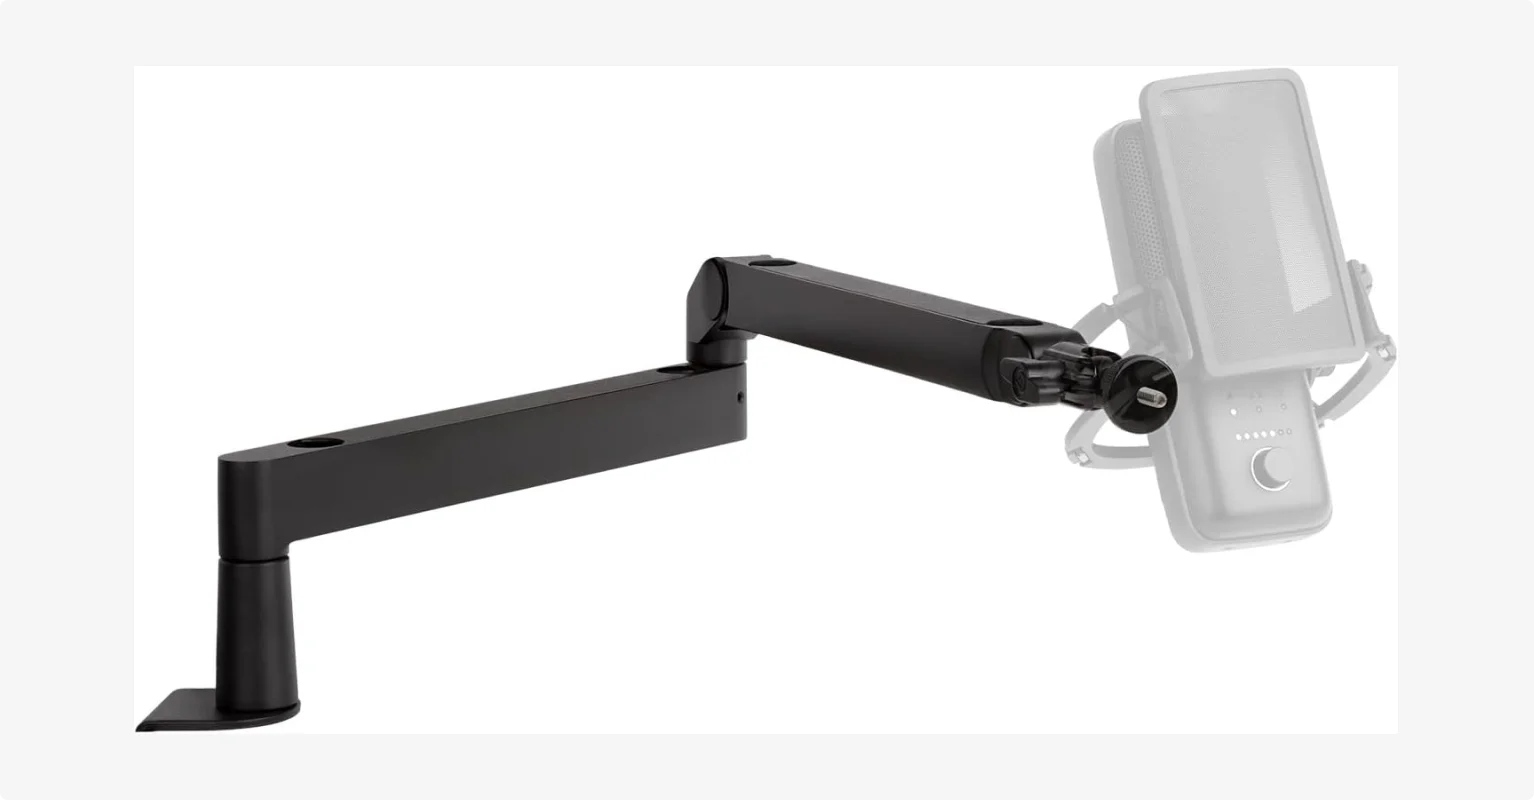
If you record video, a traditional boom arm can sometimes block your face or your shot. For this reason, I like the Elgato Wave Mic Arm. It’s a low-profile arm which is designed to sit below shoulder height, keeping it out of the frame while still placing your mic in the perfect spot.
Best podcast setups by recording style and budget
When choosing podcast equipment, I suggest you keep in mind your recording situation.
Different equipment works best in different setups. Check this table for a quick overview.
FAQs about podcast equipment
What equipment do you need to start a podcast?
The main equipment you need to start a podcast includes:
- A microphone or recording device (you can use your computer or phone).
- Headphones.
- A camera (if you’re recording video).
- Recording and editing software.
That said, if you want to produce a high-quality show, it's worth investing in some budget-friendly equipment. I also suggest enhancing quality with proper lighting and sound techniques.
How much does podcast equipment cost?
Podcast equipment costs can range from under $100 to several thousand dollars. You can start a podcast using a basic setup with a USB mic and headphones. But to improve your setup, expect to invest around $500 or more to get an XLR microphone, an audio interface, a boom arm, and a camera. At the end of the day, it's all about finding the right balance between quality and your budget.
Read more: How much does it cost to start a podcast?
Do I need an audio interface or a mixer?
You only need an audio interface or mixer if you are using a professional XLR microphone or want to connect multiple mics. If you are using a single USB microphone for a solo podcast, you can plug it directly into your computer without any additional hardware.
A mixer is only needed if you plan to use 2 or more in-person microphones, or need to manage multiple other audio sources live.
Can I record a podcast with just my phone?
Yes, you can absolutely start a podcast with just your smartphone. Modern smartphones, including iPhones and many Android devices, feature top-quality cameras. Just use a podcasting app like Riverside to record your audio and video in high quality, then edit your recording on your desktop.
What's the difference between a USB and XLR microphone?
A USB microphone plugs directly into your computer, while an XLR microphone needs an audio interface or mixer.
If you're just starting out and want something affordable and easy to use, a plug-and-play USB microphone is the best choice since it doesn’t require any extra gear.
XLR microphones are a solid upgrade if you’re after higher audio quality and want the flexibility to work with professional audio gear.
For the best of both worlds, start with a hybrid microphone like the Samson Q2U or Shure MV7, which have both USB and XLR outputs.
What microphone do most podcasters use?
Most podcasters use either the Samson Q2U as a beginner option or the Shure SM7B as a professional industry standard.
The Samson Q2U is incredibly popular for entry-level shows because its dual USB and XLR output allows it to grow with your setup. The RØDE PodMic, instead, is a strong value pick for XLR setups.
At the highest level, creators like Joe Rogan rely on the Shure SM7B for its pristine, radio-ready vocal isolation.
What is a microphone’s polar pattern?
A microphone’s polar pattern refers to where your microphone picks up sound. Here’s a quick recap:
- Cardioid mics pick up sound primarily from the front. They’re ideal for single-person or multi-person podcasts where each person has their own mic.
- Bi-directional mics pick up sound from the front and back. They’re best for two-person interviews, but you’ll want to record in a quiet space.
- Omni-directional mics pick up sound from all directions. They’re best for interviews and group recordings. But, you must record in a quiet environment to avoid background noise.
Read more: Check our guide on dynamic versus condenser mics.


.webp)


