.webp)


Key takeaways:
- Starting a podcast for free is entirely possible. With the right strategy, you can create a high-quality podcast without a budget.
- The right free tools make all the difference. Look for essential features like automatic transcriptions and easy publishing like Riverside.
- Creating and sharing your podcast consistently will help build your audience. Stay consistent, promote smart, and grow from there.
You don’t need fancy gear or a budget to launch a podcast.
In fact, starting a podcast for free is not that unusual or challenging. Tons of successful creators start with zero dollars making no compromises on quality.
In this fast guide, I’ll explain how to start a podcast for free in 10 steps. If you want something more in-depth, check out our full guide on how to start a podcast. Otherwise, let’s dive into the no-budget path to launching your show.
How to start a podcast for free: 10 steps
Ready to get started as a podcaster? Here’s how to do it without spending a dime.
Step 1: Plan your podcast
Before you hit the record button, you’ve got to dedicate some time to planning and ideation. Here are some actionable tips:
- Find your identity: You need to get clear on what your podcast is about, and who it's for. This will shape everything from your name to your episode ideas. Don’t forget to pick a podcast name that is memorable and relevant to your topic.
- Design a free cover image: Tools like Canva or Adobe Express offer free templates specifically made for podcast covers. Pick your brand colors and make it readable and catchy. Listeners do judge a book by its cover!
- Sketch out a few episode ideas: You don’t need a full season planned, but even roughly planning 5–10 topics or episode titles can help you build momentum.
Get your schedules aligned: If you're recording with remote guests or co-hosts, sync your calendars early. For recurring sessions, try to set aside the same day each week to keep things consistent. A free tool like Calendly will help you avoid the back-and-forth.
Step 2: Find a recording space in your home
Next, you’ll need to identify a suitable recording space. Don’t worry, you don’t need a fully sound-treated studio to record high-quality audio. You just need to be smart about where (and how) you record.
Start by choosing a quiet space. Smaller rooms help reduce echo, and soft furnishings like rugs, curtains, and pillows absorb sound. Turn off fans and AC units and avoid noisy areas like kitchens or rooms facing busy roads.
Take advantage of natural light to improve lighting. Just face a window while recording during the day or use a desk lamp with a white pillowcase over it during the evening.
Lastly, make your background match your brand, using the same colors as your podcast cover. Add some eye-candy like a poster or a luscious plant. But, don’t make your background look cluttered, or it will distract your viewers.
“You want your background to be clean and organized; otherwise, it can make the video feel chaotic and messy. A good question to ask yourself is ‘What can I take out of the frame rather than what can I put into the frame?’” - Bridget O’Rourke, YouTube creator.
Step 3: Sign up for your free podcast recording tool and host

Next, sign up and create an account with your chosen recording tool and podcast host.
Look for free recording software that provides high-quality audio (and video for video podcasts). Also, watch for recording limits on any free plan to ensure they fit your needs.
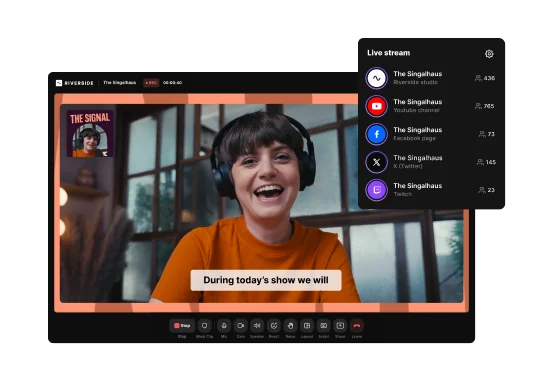
Signing up for a free account with a podcast maker tool like Riverside is super easy. Even with the free tier, you’ll get high-quality audio and video, separate tracks for each speaker, and a built-in text-based editor. Plus, you can kill two birds with one stone since Riverside integrates directly with Spotify. You can record, edit, and publish your episodes all from one place.
Riverside’s key features (all available for free):
- Local recording: Your podcast is always recorded directly on your and your participants’ devices rather than over the internet. This means that the internet connection won’t affect your recording resolution.
- Remote guests: Include up to 10 remote participants in your recording.
- Text-based video and audio editor: The integrated editor allows you to edit your podcast like a doc for fast, easy cuts.
- Chat-based editor: Just chat with Co-Creator to edit and repurpose your content in minutes instead of hours.
- Browser-based or mobile app: Record on the go from your laptop or mobile phone.
- Automatic transcriptions: Riverside's automatic transcription feature makes your content as accessible and repurposable.
- Magic Clips: Instantly generate short clips that could be shared on social media to expand your reach.
- Multicam: Use your phone as a second camera angle or connect multiple cameras to record more dynamic videos.
Step 4: Set up your equipment

Even if you have no budget, you can still get the equipment necessary to record a quality podcast.
Here’s what you need:
- Video: Use your phone as a webcam.
- Audio: Again, your smartphone’s mic can totally do.
- Sound-treating: Record in a small, quiet room with soft furnishings.
- Headphones: Wired earbuds are better than speakers.
- Software: Use a free dedicated podcasting software.
Modern smartphones feature powerful HD cameras, so you can capture quality video easily. Plus, you can use your phone to record using Riverside’s mobile app.
If you can afford a microphone, it’s the first worthwhile investment to make. But you can record surprisingly decent audio from your phone in a quiet room. Just prop it up somewhere stable, position your phone mic about 6–10 inches from your mouth, and avoid recording while holding the phone.
Instead of buying foam panels, use what you have to sound-treat your studio. Record in a small room with soft furnishings to dampen echo and reverb, like a bedroom with rugs and curtains.
Lastly, iIf you can’t afford closed-back headphones, even just a pair of wired earbuds will work better than speakers to prevent audio bleeding.
If you record using Riverside, all your files will sync to your desktop. Here, you can easily trim, clean up audio, and brand your recordings in the video editor.
Step 5: Record your first episode
When you’re all set up and ready to go, it’s time for the exciting part: recording your first episode. Sit back, relax, and enjoy the process—recording is incredibly straightforward with Riverside.
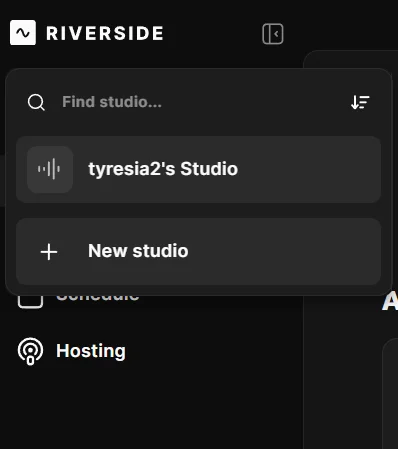
1. Create your podcast in Riverside
Click “+New studio” from your dashboard and give it a name.
You can choose whether you want it to be an “Audio only” podcast or not.
When you’re happy, click “Create.”
2. Invite remote guests or move on to recording
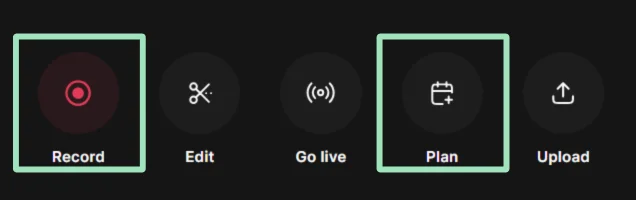
From there, you’ll arrive at your studio with several options. You can schedule a recording and invite guests or go straight to recording.
To start recording, click "Record." If you want to invite guests first and set up a time for your recording session, click "Plan."
You can invite remote guests by scheduling a session and inviting them to it or by sending them a link to your studio.
3. Start recording
When everyone has entered the studio and is ready, hit the red “Record” button at the bottom of your screen to start your session. Each participant’s local recording will progressively upload throughout your session.

This ensures high-quality audio and video, even if your internet connection is less than ideal. (It also means you won’t have to wait around for your content to upload after your session—such a drag.)
When you’re finished recording, hit the “Stop” button.
Don't forget to remind your guests not to close their browser windows until their files have been fully processed. This will ensure that your recording uploads properly.
4. Retrieve your recording
Once your session is over, you can retrieve your recording. As soon as the recording uploads, you’ll see a popup that prompts you to “View recordings.” This is where you’ll find your files. From here, you can download your recording or head straight to the Editor to prepare it for publication.
Step 6: Edit your recording
When you’re finished with your recording session, you’ll need to prepare your raw recording for publication. This doesn’t necessarily mean granular intervention. But most podcasts can benefit from at least some minor adjustments, including:
- Cutting tangents and filler words
- Cleaning up audio
- Adding an intro and outro
- Adding branding elements like captions, a logo and background
You don’t need to pay an expensive license to purchase a professional editor. Riverside’s editor is free and makes post-production quick and easy.
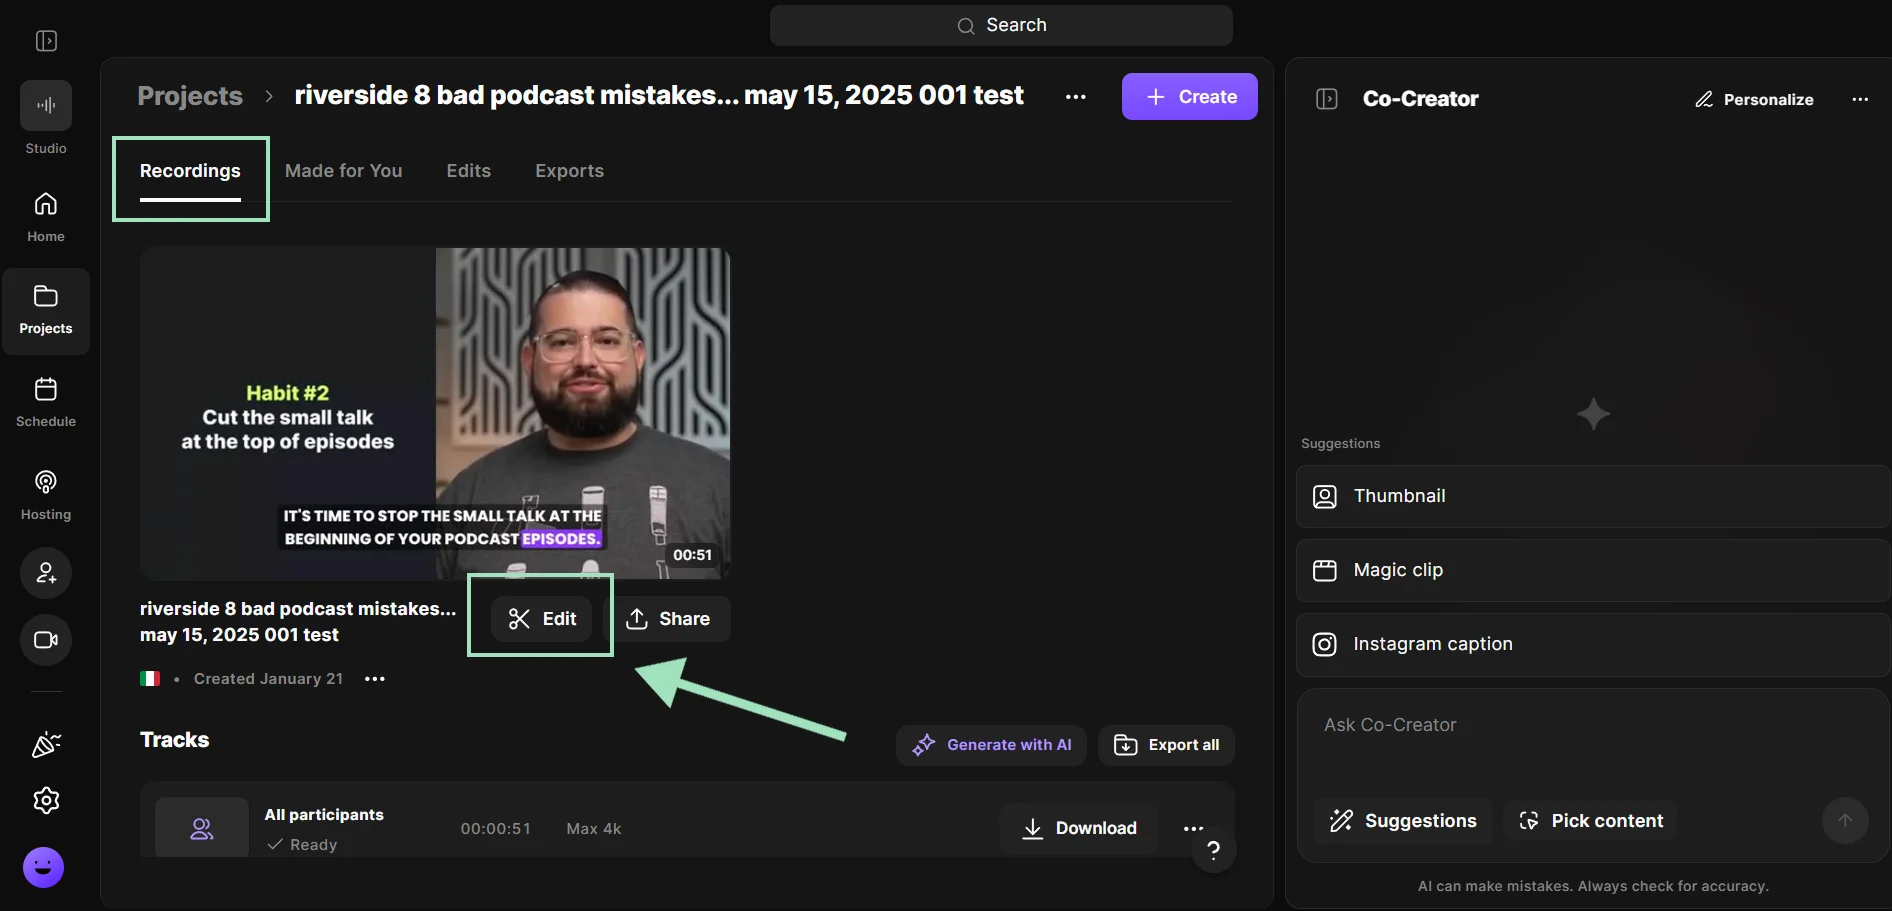
Open the recording you want toedit in the “Projects” tab, select “Recordings,” then click “Edit” to open the editor.
With Riverside, your content is automatically transcribed as it is recorded. Then, you can use the transcript to easily navigate and edit your recordings by adjusting the text. Any changes you make in the transcript automatically show up in the video.
You can also edit by just prompting Co-Creator, our chat-based AI editor. Ask your dedicated agent to enhance audio, generate clips, or even integrate b-roll into your recording. Co-Creator can also repurpose your content into blog articles, social posts, and even newsletter emails!
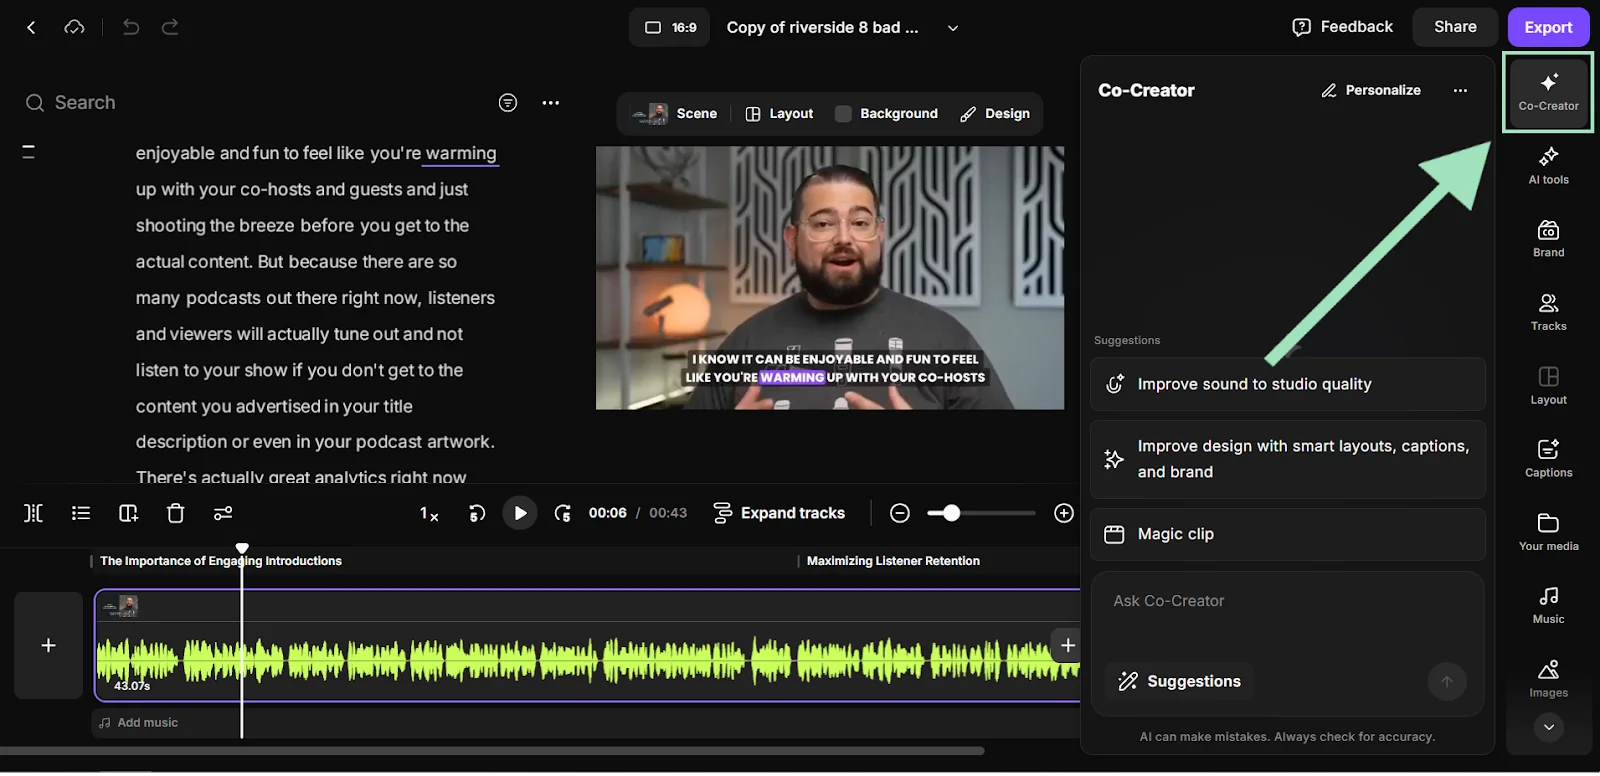
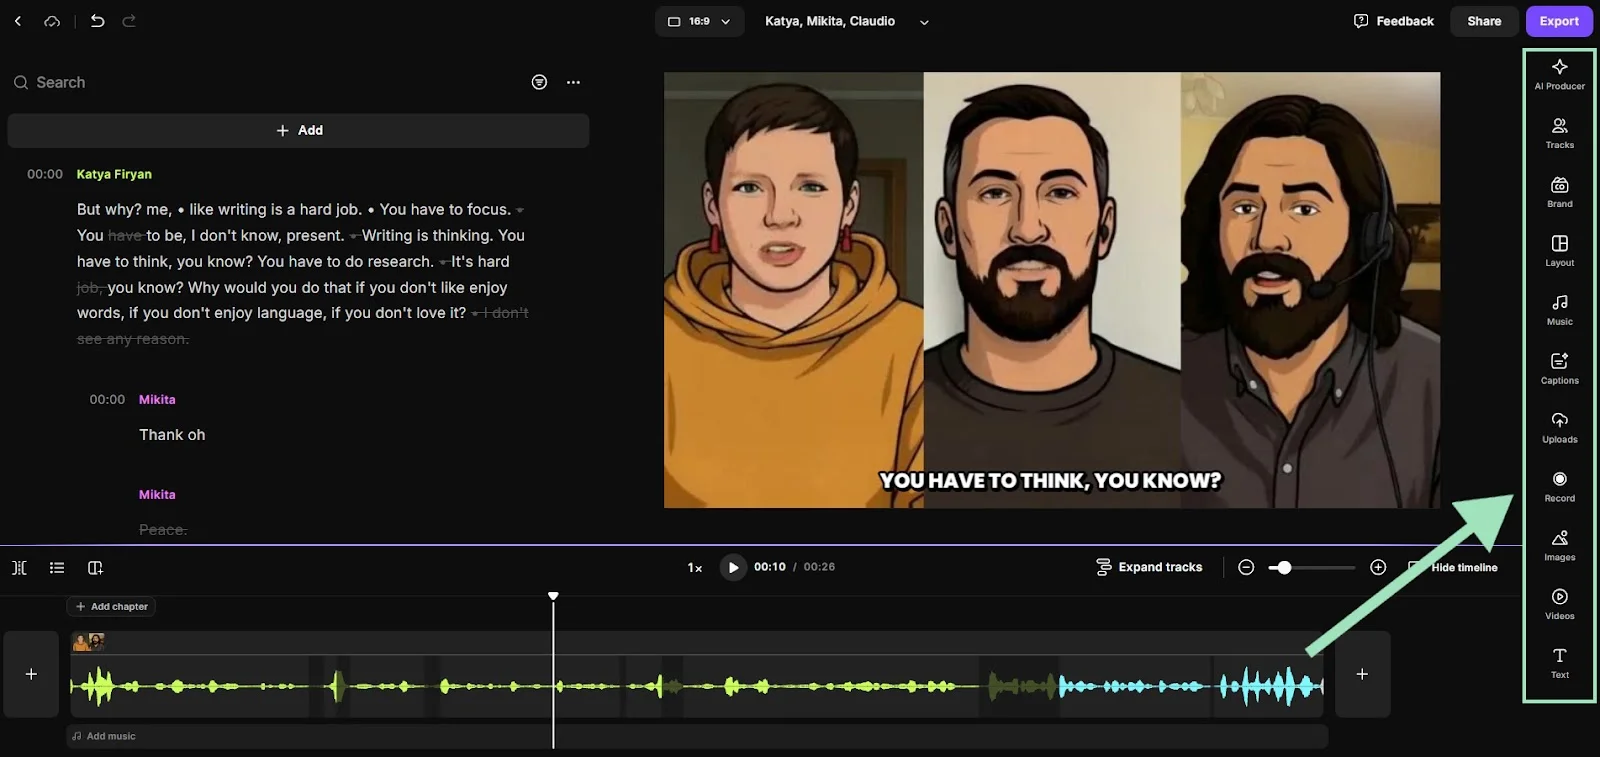
On the right sidebar, the editor also has tools to help you polish your audio, add captions, and customize your layout.
Step 7: Upload to your podcast host and distribute
When your podcast is ready to go, you’ll need to upload your recording to your podcast host for distribution. This typically involves uploading:
- Your audio file
- Episode title
- Podcast description
- Episode artwork (optional)
- Publish date - you can schedule it immediately or for a future date.
Your host will generate an RSS feed link, a unique URL that podcast directories use to fetch your latest episodes.
Some hosting platforms automatically distribute your podcast to Spotify, Apple, and other podcast directories, while others require manual submission.
Riverside makes it easy, too. Just click on the export, and share your recording directly with Spotify, Transistor, and Castos, or on social media platforms like Facebook, LinkedIn, Instagram, and TikTok.
.webp)
Step 8: Promote your podcast episode organically
Once your podcast is live, you’ll need to do some work to make sure people listen to and watch it. Here are some ideas to promote your podcast organically, even if you don’t have a marketing budget:
- List your podcast everywhere: Make sure your show is submitted to all major directories: Spotify, Apple Podcasts, Google Podcasts, Amazon Music, and more. Most platforms are free to submit to via your host.
- Share clips on social media: Use Riverside’s clip creator to automatically turn your podcasts key moments into shareable videos. These are perfect for promoting your podcast on social media platforms like Instagram, TikTok, LinkedIn, or YouTube, and you don’t need editing skills to generate them.
- Use podcast SEO to your advantage: Include relevant keywords in your episode titles and descriptions to improve searchability.
- Tap into your network: Ask friends, family, co-workers, and anyone you know to leave reviews and share episodes. Don’t be shy: a few personal messages can help you a lot in the beginning.
- Rely on word-of-mouth: Actively encourage listeners to recommend the show and subscribe to your channel. This is one of the most powerful ways to grow for small creators.
- Cross-promote your show: Invite other podcasters as guests will help you tap into their audience as they promote the episode too. It’s a win-win for everyone.
- Turn your transcript into a blog: Use Riverside’s automatic transcription to repurpose your episode into a blog post. Upload them on your podcast website to improve your SEO efforts and boost discoverability.
“Use your content to create content that creates even more content. From one podcast episode, you can generate blog posts, pull the transcript into Jasper or Distribution.ai, and break it down into new ideas. Then tools like ChatGPT and Canva help turn those into micro assets and visuals.” – Ross Simmonds, CEO & Founder, Foundation Marketing
Extra resource: Need new ideas? Download the social media promotion checklist contributed by Social Snippet.
Step 9: Monetize your content
Although this isn’t a necessary step, you can also choose to monetize your content to start making money from your podcast. This means that even if you decide to incur some costs to improve your podcast, you can offset these with a little income.
Your podcast host might offer integrated monetization features such as extra perks for premium subscriptions or dynamic ads.
Another simple way to get some extra money is to repurpose your episodes into video clips, then post them on YouTube as Shorts. Once you hit the basic monetization threshold, your channel can become an income stream on its own.
You can also set up a third-party Patreon account to accept donations from your listeners. You can also join free affiliate marketing programs like Amazon Associates.
Learn more: How to Make Money Podcasting: 12 Effective Ways
Step 10: Repeat
It’s a good idea to track podcast metrics to see what’s working. When you’ve got the process down, it’s just a matter of consistently repeating this workflow.
I recommend learning as you go. Figure out what’s working for you regarding content types, workflows, and any other part of the process.
Then, all you have to do is get a little bit better with each episode. And remember that you don’t need a big budget to get started (or be successful) as a podcaster. Many of the best-known podcasters had very humble beginnings!
Expert checklist: Not enough? Learn from the experts by downloading this checklist on how to launch a podcast from Creatively Contenting.
Bonus step: Mistakes to avoid
Now that you know everything you need to start your podcast for free, it’s time to learn about the common mistakes you want to avoid.
- Inconsistent schedule: Consistency is critical to retain your audiences. Pick a realistic schedule to build a habit without burning out.
- Inconsistent format: Your audience will tune in for the format they like. Pick one and stick to it. If you swap from interviews to a solo show, chances are you’ll lose some of them.
- Poor audio quality: Listeners will forgive bad video, but they will click off if the audio is bad.
- Over-investing in branding: If you’re just starting out, there’s no need to spend weeks on logos, trailers, music, and perfect cover art.
- Ignoring promotion: Publishing isn't enough if you don’t market your show. Use Riverside’s Magic Clips to automatically turn your episode into short, viral videos for TikTok and Reels.
FAQs on how to start a podcast for free
What are the best free tools to start a podcast?
If you want to use free podcast tools, try the following:
- For recording: Riverside’s free plan lets you record in HD quality, even from your phone, and you can invite up to 9 guests to record with you.
- For editing: Riverside is a great option here too, especially if you want an all-in-one platform. With text-based editing and automated tools it makes it easy to polish your podcast. If you want something more complex, then you can try Audacity, but this is audio-only.
- For hosting: Spotify for Creators is your best here. And if you’re recording and editing on Riverside, you can post directly through Riverside’s Spotify integration.
Other tools you might want to use include:
- Canva and Adobe Express for creating free cover art and thumbnails.
- ChatGPT and Claude.ai to brainstorm ideas and assist you with scripts.
- Riverside and Distribution.ai for easy content repurposing.
How long does it take to make money from a podcast?
There is no set timeline for how long it will take for your podcast to make money. This depends on audience numbers, popularity, and whether your niche and show appeal to potential advertisers and sponsors.
How can I start a podcast for free on Spotify?
To start a podcast for free on Spotify, just follow these steps:
- Record your episode. You can do that using Spotify for Creators since the platform is integrated with Riverside.
- Go to the export, and click on the “Publish on Spotify” to share your recording directly with Spotify.
That’s all you need to do! Spotify offers one of the best free hosting platforms available now. You can upload and store unlimited episodes and take advantage of some of the broadest distribution available.
How can I start a podcast for free on Apple?
To start a podcast for free on Apple, you need a hosting platform that provides an RSS feed, first. Although Apple Podcasts has some paid features, it doesn’t charge podcasters for being included on the platform.
Once you’ve uploaded your episodes on a free hosting platform, you just need to submit your RSS feed to Apple Podcasts. Your new episodes will appear on Apple Podcasts as you upload them to your host.
Note that you need to do that just once, as Apple Podcasts will pick up any future episode automatically from now on.
How can I start a podcast for free on Youtube?
To start a podcast for free on YouTube, follow these simple steps:
- Create a YouTube channel for yourself.
- Record and edit your content using a free recording tool like Riverside.
- Use Magic Clips to create short highlights for Shorts and boost discoverability.
- Upload both the long-form content and the shorts to YouTube.
- Use Riverside’s automatic transcripts to generate timestamped chapters, keywords and descriptions.
Just keep a consistent cadence and add each new episode to the same podcast, and you’ll build an audience on YouTube in no time.
What are the differences between free and paid podcast hosting services?
The difference is that free hosting services offer only basic tools, while paid hosts include a wider variety of features, usually for more experienced podcasters.
Free podcast hosting services usually come with limitations that paid hosts don’t have. They include:
- Caps on number of uploads, storage, and episode count.
- Limits on how long episodes stay available.
- Basic analytics.
- Limited monetization tools.
Paid podcast hosting services also offer extra benefits, such as:
- In-depth analytics.
- Dynamic ads and advanced promotion and monetization tools.
- Extra branding options like custom domains and podcast websites.
- Full ownership of your own content.
How can I improve my podcast's audio quality?
To improve your podcast audio quality for free, you can work on your recording environment and mic techniques. Here are a few quick tips:
- Record in a small room, and add soft surfaces like curtains, rugs, or even a blanket behind you.
- Avoid rooms with tiles and hard surfaces like kitchens or bathrooms.
- Speak 15-25 cm from the microphone, and don’t move around while talking.
- Close windows, and turn off fans and AC to minimize background noise.
- Record 30 seconds, then listen on headphones to check your audio levels.
- Use software that records locally like Riverside to avoid audio compression when your internet slows down.
Check our full guide on how to improve audio quality.


.webp)