Cut scenes for smoother camera switches
Place your own scene changes so camera switches feel natural, instead of relying on Smart Layouts.

Place your own scene changes so camera switches feel natural, instead of relying on Smart Layouts.
Smart Layouts can switch camera angles with one click, but sometimes it creates more scene changes than a conversation needs. In this video, Cristi Cotovan shows how he places scene changes by hand in multi-person interviews so camera switches follow the conversation instead of distracting from it.
He cleans up the episode first, then reads the color-coded timeline to see who is talking and for how long. He keeps the host solo during the intro, uses side by side for quick exchanges, and waits a sentence or two before cutting to a guest who starts a long answer. When it's time to switch back, he cuts just before the host speaks to leave a small buffer, keeping a one-hour, two-person episode to about 100 scenes. Fewer, better-timed switches keep viewers focused on the people talking rather than on the edit.
Remove filler words and gaps and adjust your framing before you cut any scenes. Then enlarge the timeline. Riverside gives each speaker their own color, so you can see who's talking, when, and for how long.
Place your playhead just before you introduce your guest and click New scene (or use the keyboard shortcut). In the first scene, deselect everything, go to Layout, choose the solo speaker layout, and switch it to yourself if it lands on your guest.
After the intro, use the side-by-side layout, and stay on it during quick exchanges where you're both talking on and off.
Don't cut the moment your guest starts talking. Let them get a sentence or two in, find a gap in the audio, and add a new scene there. Go to Layout, choose single speaker for your guest, and click Crop if you want to zoom in and reframe them.
When you're about to jump back in, add the scene break slightly before you start talking, so your guest finishes their thought with both of you on screen. Choose the one-on-one layout, drag the videos to change the order if needed, and double-click a video to reframe it.
Stay on whoever's talking and give each transition a small buffer. For a one-hour, two-person episode, Cristi ends up with about 100 scenes at most. Changing camera too often draws attention to the edit.
00:00 Hello, this is Christy. Today I would like to share with you my favorite workflow for cutting scenes in multi-track, multi-person interview podcasts. So this is something that you may have a different preference on and that's fine. Everybody has their own style. But when I cut the scenes, when I change camera angles, I think about it this way.
00:22 I will go through the timeline and I will look at the different speakers. After I've cleaned up my episode, removed filler words and gaps and, you know, adjusted the framing. But then I look at it and go, where do I need to change the camera? So when I use Riverside, Riverside has the AI tools and it has the smart layouts, which with one click will change the camera angles for you and create lots of scenes.
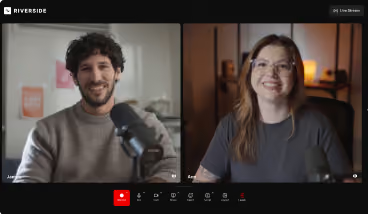
00:49 For me, sometimes that's too many scenes. And I like to have control over where the scenes change. where I show the guest, where I show myself or whoever the host is, and also side by side and other angles. So let me show you how I think about it. When you look in the timeline in Riverside at the bottom here, you can make this larger by the way, you see the different colors and that's when Riverside has identified the different speakers and it gives each one a different color.
01:21 So that makes it very easy to see who is down there. and who is talking when and for how long. So now that I'm looking at this there are no scenes in this edit. So if I want to start editing and cutting the scenes I'm going to say well how do I cut these when if I go in the timeline here at the beginning obviously this purple color is me.
01:43 So I'm doing the intro and maybe for this part I want to show myself full screen. I haven't introduced the guest yet. So. I can place my play head where my intro is ending just before I say, so here's today's guest and I will insert a scene right here. I can insert the scene using this button here, new scene, and it will add one exactly where the play head is.
02:06 I can also press a keyboard shortcut, which is S or forward slash. That's going to insert a scene. So in this scene that I just created here, you see the scene break is right there. I'm going to switch to the layout which shows me full screen. I'm not showing the guest yet. So if you are in a scene here you click on the you deselect everything and you go to layout and you go solo speaker like this.
02:33 It happens that it moves to my guest. That's not a problem. I will select and go here and switch to me. So no this is the part where I'm saying my intro now after that scene when we start here I have introduced my guest. It's both of us side by side. So now the thinking here is if we have a very quick exchange and we are both talking on and off, kind of exchanging little jokes or whatever, I want to stay with that part on both of us side by side.
03:04 And then that's the next decision. When do I need to go to the guest? So usually I will do that and probably you do too when the guest is talking for a while. So if you look here, Brett is introducing himself and then talking about what he does and all that stuff. So this is the green part where at some point I may want to just switch to him full screen and let him speak for a while.
03:31 So if you look in the timeline, I zoom in here, you see that's when he starts talking and for a while. But this is my preferred workflow. I don't switch immediately. I don't actually switch right here where I stop talking. and he starts talking. I don't really switch the scene right there. I actually prefer to let him speak for a while, maybe one sentence or two, and then change, usually looking at a gap in the audio.
04:00 So you see here, I'm finishing talking and he starts talking and I'm not going to insert the scene right here. I'm actually going to go all the way here and insert with a forward slash key. There is a scene right there. So in this scene, It's both of us. And in this one here, I switch to him. So I go again to layout and I press single speaker.
04:23 This time it's him on the screen. If I want to, I can zoom in and, you know, make him closer to the camera if I want to. I just go into the crop mode here and just zoom in just a little bit, maybe reframe, move him like this and done. So now. He's going to be talking for a while.
04:45 stands for developer and operations. So that's kind of the middle ground. So now he is talking and he goes on and on for a while, but how do I bring him back? Now this is the other workflow and I'm done with this. The long period of him talking, maybe I switch back to me or to both of us when I'm maybe laughing or reacting to his, what he's saying, but then I.
05:11 want to go back to side by side. Where do I go side by side? Well, again, if you look here, this is where I come in again. I start talking. I zoom in in here and again, I don't switch to both of us right there when I start talking. I actually switch just before, just before. So I allow him a little buffer to finish talking while we are both on the screen after he's been on the screen a long time by himself.
05:40 So. Let's go here. You see, I have a little bit of speech from Brett still going here and I will switch right here full press slash. And then in the scene, we go back to layout and we switch to one-on-one like this. Maybe you need to change the order. Just drag the videos around, just reframe them like this, double click and you reframe.
06:05 So look at this. Now he's talking and watch how it works. He's going to talk and he's going to continue talking when we switch to side by side. this kind of programs. Google has them where they sort of their ambassadors. That's sort of the general term. And then Docker called there as Docker captains for whatever reason. in this whole universe, you teach the people that run our world pretty much.
06:29 there you go. That is my workflow. I don't change scenes too often. I don't change a lot. Every episode, it's like a one hour long, probably ends up having like a hundred scenes maximum. And this is only because, and it depends on how often the people change, you know, speak between, you know, change who's talking.
06:54 But otherwise, if it's just like two people, usually it ends up around a hundred scenes throughout the episode. And I like to offer this smooth buffer between the scene transitions between the different angles. I don't want to change camera too often. It can become distracting. It can attract attention to itself. So I just let the people see on the screen, stay on the screen for when they're talking.
07:19 And then at the transition points, I like to allow for a little buffer for whoever starts talking. And there you go. That's how I break scenes in my multi-track episode. I hope this tip helps. And if you are In doubt as to how you could do it, probably this is a good point to start with this particular strategy and see how you go from there.
Use the Riverside MCP and a prompt series to turn one episode into show notes, titles, posts and clips.
USE CASES
Whether you're recording a podcast, hosting a live stream, or creating content for social, we've got you covered.
Got a process that works for you? Get featured by submitting your step-by-step flow. Help other creators save time, learn new tricks and improve their productions.


.webp)