.webp)


Looking to upgrade the quality of your videos? Using a DSLR camera instead of a webcam is a great idea. Most DSLRs have larger sensors and full manual controls, so you’ll usually get cleaner detail, better low-light performance, and natural depth of field.
DSLRs aren’t always plug-and-play, though, and there are a few different ways to connect them.
In this guide, we’ll show you how to use a DSLR as a webcam, plus a few quick checks to avoid common pitfalls (power, lighting, focus, overheating). Keep reading, so you can go live as fast as possible.
Disclaimer: Please see our help site guidelines to check the compatibility of any equipment with Riverside.
There are a few different ways to use your DSLR as a webcam. The best option depends on your camera model and what you’re using it for (streaming, recording, etc.).
Let’s take a look at the different options here, and the pros and cons of each one.
Using a capture card
Best for: Highest-quality video, live streaming.
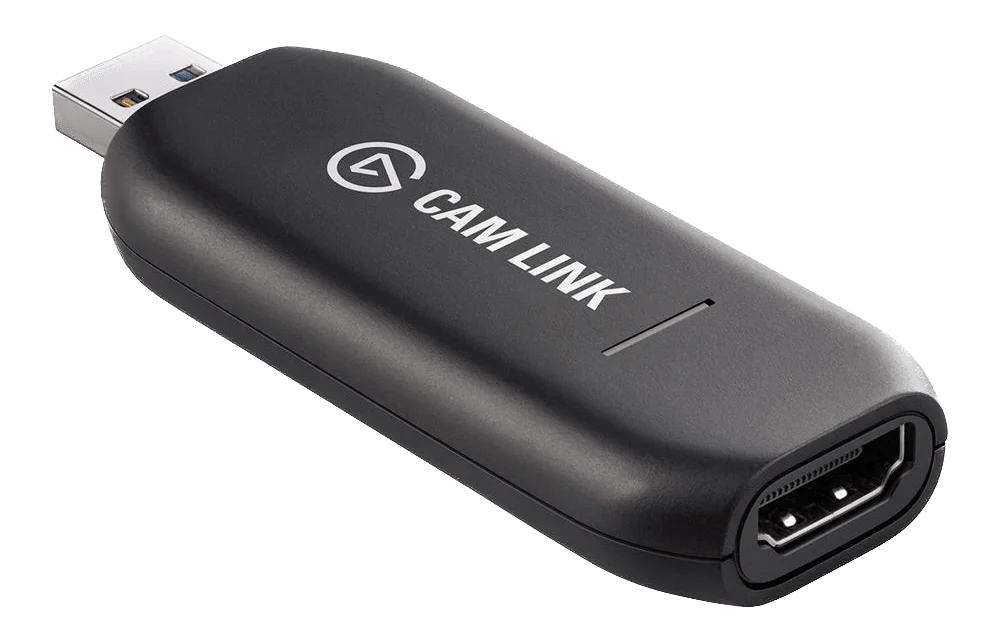
The most common and most versatile way to connect your DSLR is to use a capture card. These small devices take the HDMI signal from your camera and convert it into a format your computer reads as a standard USB webcam. In other words, the capture card “fools” your computer into thinking your DSLR is a plug-and-play webcam.
Note: We recommend using the Elgato Cam Link to record or live stream with Riverside.
Pros
- High-quality video: Provides sharper image quality and richer colors than a webcam, and can film in up to 4K, depending on the card.
- Wide compatibility: Works with most DSLRs and shows up as a webcam in apps like Zoom, Teams, YouTube Live, Twitch, Riverside, etc.
- Low latency: Processes video with minimal lag, which is important for live streaming or video calls.
- Stable and reliable: Generally the most dependable connection method.
Cons
- Extra cost: A good card will cost $80-100+. Cheaper options may stutter or drop frames.
- Setup complexity: You’ll need an HDMI cable and to configure some camera settings like disabling auto shutoff, turning off on-screen display, etc.
- Heat and power management:: DSLRs aren’t designed for long video use, and can overheat or shut off after 30-60 minutes (check the workarounds in the tips section).
How to use a DSLR as a webcam: Capture card method, step-by-step
Connecting your DSLR with a capture card is the sharpest, most reliable setup. Here’s how to do it.
First, you’ll need:
- HDMI cable
- USB capture card (ex: Elgato Cam Link)
- Power source (an additional battery, or USB power cord)
- External microphone (USB or XLR)
- Tripod
Step 1: Connect your DSLR to the capture card with the HDMI cable. Then, plug the capture card into the USB port on your computer.
Here’s a breakdown of the setup: DSLR → HDMI cable → Capture Card → USB → Computer
Step 2: Insert a fully charged battery or, better, use a dummy battery/USB power adapter. This prevents the camera from shutting off mid-session, especially if you plan to record for more than 30 minutes.
Step 3: Adjust camera settings:
- Switch to movie/video mode.
- Disable auto power-off (most DSLRs shut down after 30 minutes by default).
- Use manual focus, or use face/eye autofocus on newer cameras.
- Turn off info overlays (battery icons, etc.) for a clean HDMI feed.
- Turn stabilization off if you are using a tripod.
Step 4: Connect a USB or XLR mic to your computer. In Riverside, you can select the external mic as your audio input in the lobby.
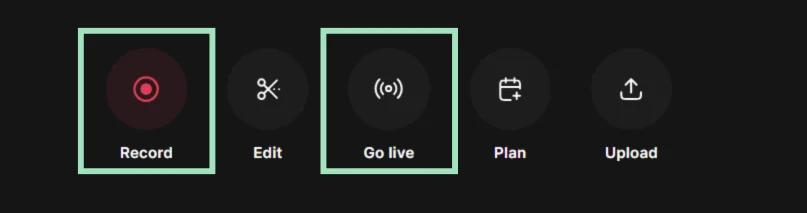
Step 5: Open your Riverside studio and, from your dashboard, click “Record” or “Go Live.”
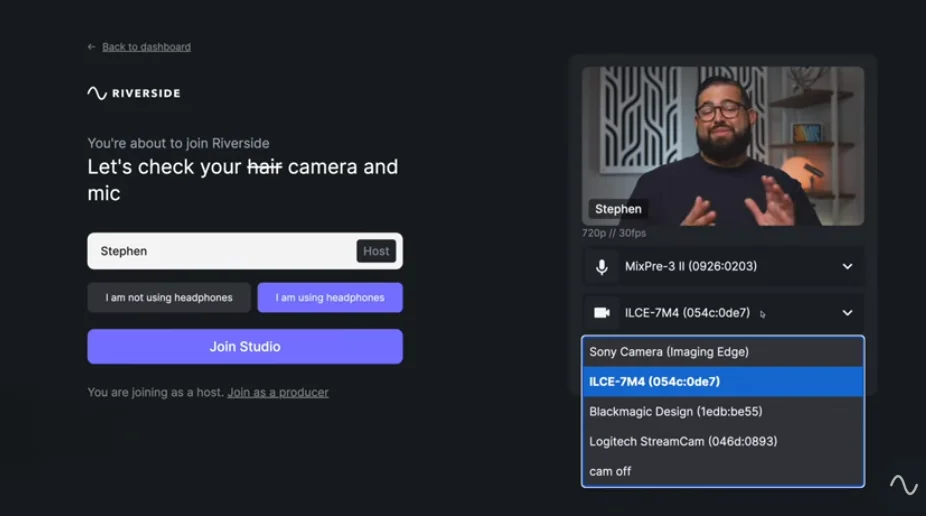
In the lobby, select your DSLR as the video input and your external mic as the audio input.
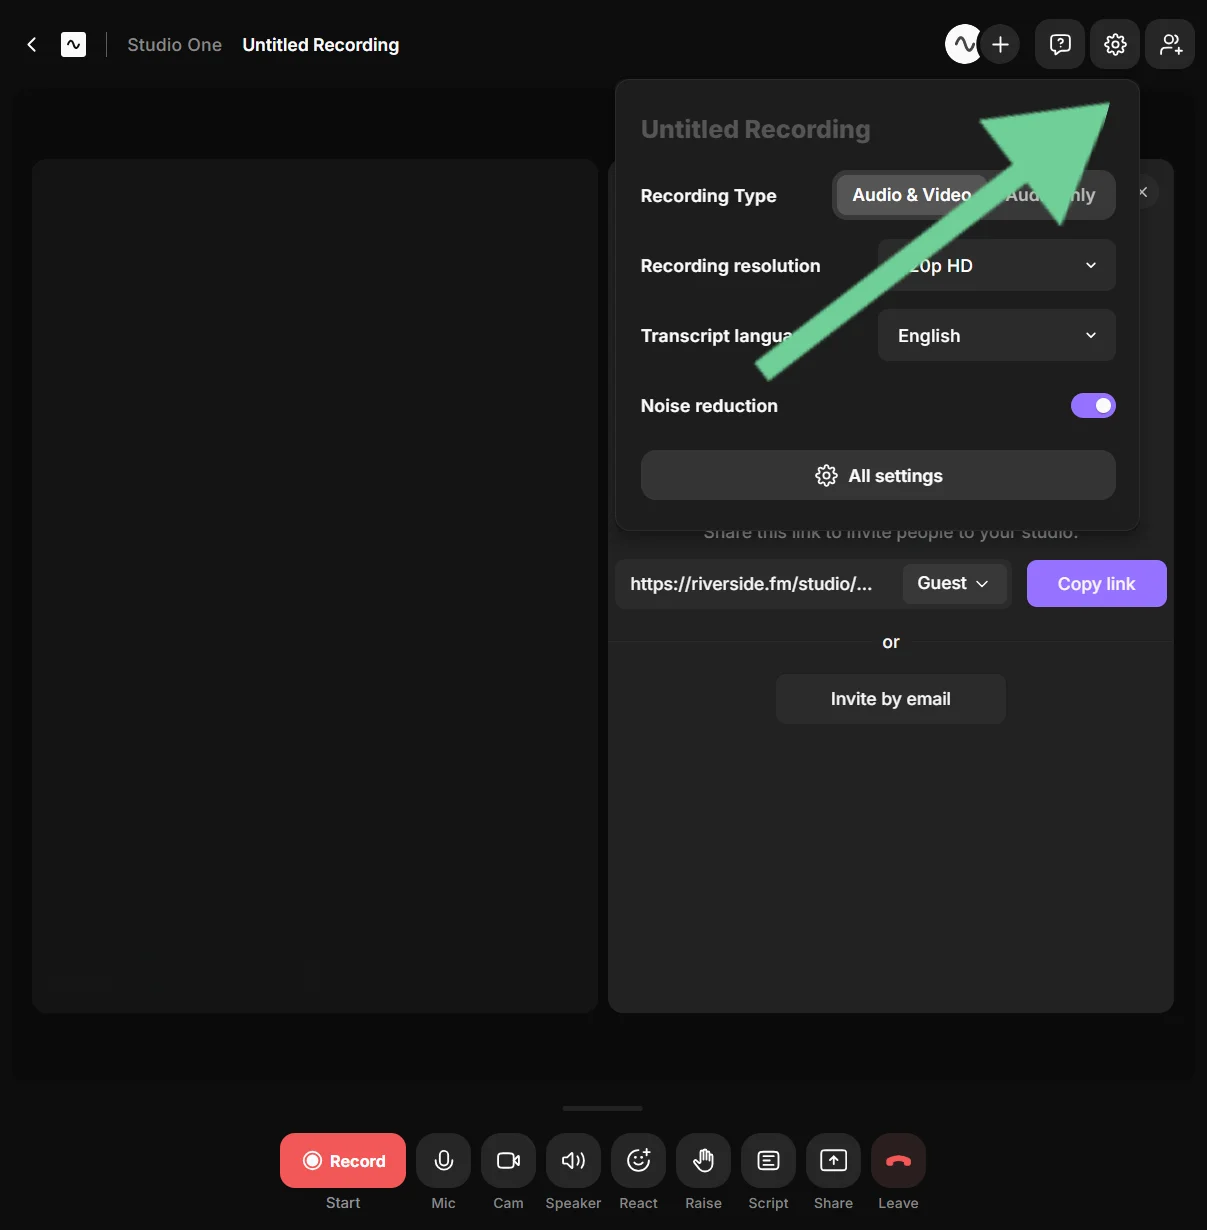
Step 6: Enter your studio and click the “Gear” icon to adjust your recording resolution. You can choose up to 4K if your capture card, camera, and browser support it.
Note: If your camera overheats, step down to 1080p for stability.
You’re set! Your DSLR now works as a high-quality webcam for recording or streaming.
How to use a DSLR for live streaming
For live streaming, the capture card setup is the most dependable. It has the highest quality picture and the lowest latency.
With Riverside, you can:
- Multistream directly to many channels at once, including Facebook, YouTube, Twitch, and any custom RTMP.
- Brand your studio with your logo, colors, and custom backgrounds.
- Switch layouts on the fly to spotlight speakers or screen shares.
- Add media like music, pre-recorded clips, lower thirds, and presentations using the media board.
Via USB

Best for: Video calls and simple recordings.
Many camera manufacturers now offer free webcam utilities you install on your computer. With these, you can connect the DSLR directly via USB, and your computer will recognize the camera as a video input. Some newer mirrorless cameras also act as native UVC (USB Video Class) webcams and work plug-and-play without extra software.
Pros
- Cheaper: No capture card needed.
- Easy setup: No HDMI cables or extra hardware, just a quick software install.
- Good enough quality: Better quality than a webcam, but lower quality than connecting via capture card.
Cons
- Lower resolution and frame rates: Most manufacturer utilities max out at 720-1080p.
- Limited compatibility: Some utilities don’t work with every video app (like Zoom, Teams), or they may be buggy. Mac vs. Windows support can vary.
- More latency: USB encoding software can add a slight delay and more compression than HDMI. It’s probably fine for meetings, but not ideal for live streaming.
- Camera limitations still apply: Many DSLRs may still auto-shut off after 30 minutes, overheat, or drain batteries quickly.
How to use a DSLR as a webcam: USB connection, step-by-step
If you’d rather avoid buying any extra hardware, you can connect your DSLR over USB. It’s a little less powerful than a capture card but quick and easy.
What you’ll need:
- USB cable that matches your camera port
- Power source (an additional battery, or USB power cord)
- External microphone (USB or XLR)
- Tripod
Here’s what to do step by step:
Step 1: Make sure your DSLR is supported by the manufacturer’s webcam utility. This software converts your camera’s video signal into a format recognized by most apps like Zoom and Riverside. It will appear as a regular webcam.
Common examples include Canon’s EOS Webcam Utility or Sony’s Imaging Edge Webcam.
Step 2: Download the webcam utility from the brand’s official website. Install and restart your computer.
Step 3: Use the camera’s USB cable to plug directly into your computer. Avoid USB hubs if possible and connect it straight into a main port.
Step 4: Turn on the camera and set it to Movie/Video mode. On some cameras, you might have to adjust your USB settings for USB streaming.
Step 5: Set up your audio. Most webcam utilities don’t transmit audio from your DSLR over USB. Connect a USB or XLR mic (with an audio interface) to your computer.
Step 6: Adjust camera settings:
- Switch to movie/video mode.
- Disable auto power-off (most DSLRs shut down after 30 minutes by default).
- Use manual focus, or use face/eye autofocus on newer cameras.
- Turn off info overlays (battery icons, etc.) for a clean HDMI feed.
- Turn stabilization off if you are using a tripod.
Step 7: Open your Riverside studio and, from your dashboard, click “Record” or “Go Live.”
In the lobby, select your DSLR as the video input and your external mic as the audio input.
You’re all set to record or live stream. Don’t forget to do a short test to make sure everything is working properly. You can also use Riverside’s webcam test and mic test.
Pro Tip: With Riverside, you’ll get studio-quality audio and video, then use AI to edit the recording seamlessly. Add captions, clean up audio, fix eye gaze and more, all with just a click.
Using wireless streaming apps
Best for: Filming on the go and action shots where cables are impractical.
You can also turn a DSLR camera into a webcam wirelessly by connecting your camera over Wi-Fi. If you have a newer DSLR, it may have Wi-Fi streaming functionality built in. This means the camera streams to an utility app that acts as a virtual camera or RTMP source.
If your DSLR does not have this functionality, a wireless HDMI transmitter can be paired with a receiver which will be plugged to a capture card on your PC.
Pros
- No cables: Less clutter means a cleaner desk and more flexible camera placement.
- Flexibility: Allows you to use your camera from places where a cable can’t reach.
- Quick remote monitoring: Many apps give remote control and live preview.
Cons
- Higher latency: Wireless causes more lag compared to wired setups.
- Lower image quality: Wi-Fi streaming tends to be more compressed, which means lower video quality.
- Less reliable: Your video is only as good as your network connection.
- Battery drain: Wireless streaming tends to eat through a camera battery very quickly.
Now that you have a sense of the different ways you can connect your DSLR to your computer or laptop, let’s go through each option step by step so you can set it up for yourself.
How to use a DSLR as a webcam wirelessly
Some newer DSLRs and mirrorless cameras can connect over Wi-Fi. Most manufacturer apps are built for remote control and wireless photo transfer, but some also let you use the live view as a webcam feed.
You can also use a wireless HDMI transmitter/receiver kit paired with a capture card for higher quality.
First, you’ll need:
- Strong Wi-Fi (preferably 5 GHz)
- Camera with Wi-Fi streaming support
OR
- Wireless HDMI transmitter + receiver
- HDMI cable
- Capture card (for wireless HDMI setups)
AND
- External microphone (USB/XLR)
Step 1: Confirm your camera companion app supports wireless live view streaming. Examples include Canon EOS Utility, Sony Imaging Edge Desktop, and Panasonic Lumix Webcam Software.
If you’re using a wireless HDMI transmitter, skip to Step 3.
Step 2: Install the manufacturer’s desktop app on your computer or laptop. Restart your computer if needed.
Step 3: If you’re using an HDMI transmitter, you don’t need a software driver. The connection will look like this:
DSLR → HDMI cable → Wireless HDMI transmitter → (wireless signal) → Wireless HDMI receiver → HDMI cable → Capture card → USB → Computer
Step 4: In your DSLR menu, turn on Wi-Fi or wireless connection mode. Look for “Remote Shooting” or “Live View”, although naming varies by brand.
Step 5: Connect your camera to your Wi-Fi network (use 5 GHz if available). Pair it with your desktop app.
Step 6: Launch your desktop app and launch “Remote Shooting” or “Live View” as well.
Step 7: Since most Wi-Fi feeds don’t carry audio, connect a USB or XLR mic directly to your computer.
Step 8: Adjust camera settings:
- Switch to movie/video mode.
- Disable auto power-off (most DSLRs shut down after 30 minutes by default).
- Use manual focus, or use face/eye autofocus on newer cameras.
- Turn off info overlays (battery icons, etc.) for a clean HDMI feed.
- Turn stabilization off if you are using a tripod.
Step 9: Open your Riverside studio and, from your dashboard, click “Record” or “Go Live.”
In the lobby, select your DSLR as the video input and your external mic as the audio input.
Pro tips for using a DSLR as a webcam
Using a DSLR as a webcam takes a little know-how, and sometimes troubleshooting. Here are a few tips to get consistent, professional-looking results:
Set up an additional power supply
Live video mode drains DSLR batteries fast, sometimes within 30–60 minutes. To avoid interruptions, use a dummy battery with an AC adapter, or check if your camera supports USB-C power delivery so it can charge while running.
Take care of lighting
When it comes to video quality, lighting matters. Use soft light that doesn’t cast shadows. Many streamers and podcasters rely on a simple three-point lighting setup.
Use a dedicated microphone
A DSLR setup will provide high-quality video, so make sure you have audio to match. DSLRs don’t usually send audio over USB or HDMI, so be sure to connect an external microphone before filming.
Take care not to overheat your camera
Some DSLRs can overheat during long sessions. To reduce the risk:
- Record in 1080p instead of 4K.
- Use an external fan.
- Keep the camera’s battery door open during filming.
- Use a dummy battery.
Optimize focus
If you’re sitting at a desk or moving minimally in your video, frame your shot and turn off autofocus to avoid “focus hunting” (when the camera keeps readjusting). If you move around, use face or eye autofocus. Test both to see which works best for your setup.
FAQs about using a DSLR as a webcam
How to use a DSLR as a webcam for Zoom?
If you want to use your DSLR as a webcam for Zoom meetings or webinars, you can use one of the methods above (capture card, USB, or wireless).
Once your camera is connected, launch Zoom, go to Settings > Video, and choose your DSLR under the Camera dropdown. Don’t forget to set your external mic in Settings > Audio.
How to connect a DSLR to a laptop for live streaming?
If you want to use a DSLR for live streaming, we recommend doing it with a capture card for the highest quality and lowest latency. Connect your DSLR to the card via HDMI, then plug the card into your laptop’s USB port
Once you set your DSLR to Movie/Video mode, you should be able to select it as your camera in Zoom, Riverside, OBS, or any streaming app. If your laptop has only one USB port, consider a powered USB hub to connect both your DSLR and microphone.
How to use a DSLR as a webcam with OBS?
Yes, OBS is a reliable tool for using a DSLR as a webcam. Just follow these simple steps:
- Connect your DSLR to your computer using one of the options above.
- Open OBS and go to Sources > Video Capture Device.
- Choose your DSLR input.
You can record or live stream directly from OBS, or use it to stream your feed to Zoom, Riverside, Teams, or other apps. Read more in our guide on how to record with OBS.


-(1).webp)

.webp)


