Recording a podcast on Zoom has its pros and cons. While it's a popular choice due to its familiarity and ease of use, it also comes with limitations. Think lower audio and video quality, no editing capabilities, and a heavy dependence on a stable internet connection.
If you’re considering Zoom for your podcast, this guide will provide step-by-step instructions to help you get started - and use the platform like a pro.
How to record a podcast on Zoom (step-by-step)
Zoom is a video conferencing app that’s free to download and easy to use. It’s designed primarily for conference calls - not podcasting - but its built-in video and audio recording features make it a popular choice among podcasters.
Here’s a step-by-step guide on how to use it to record your podcast.
Step 1: Sign up for a Zoom account
Sign up for a Zoom account. Their free plan lets you host meetings of up to 40 minutes.
Opt to download the desktop app rather than using their browser-based web app. This will give you access to all of Zoom’s features, including gallery and speaker view toggles, screen sharing, video filters, and virtual backgrounds.
Step 2: Sign in and schedule your Zoom meeting
Sign in to your Zoom account using your email and password.
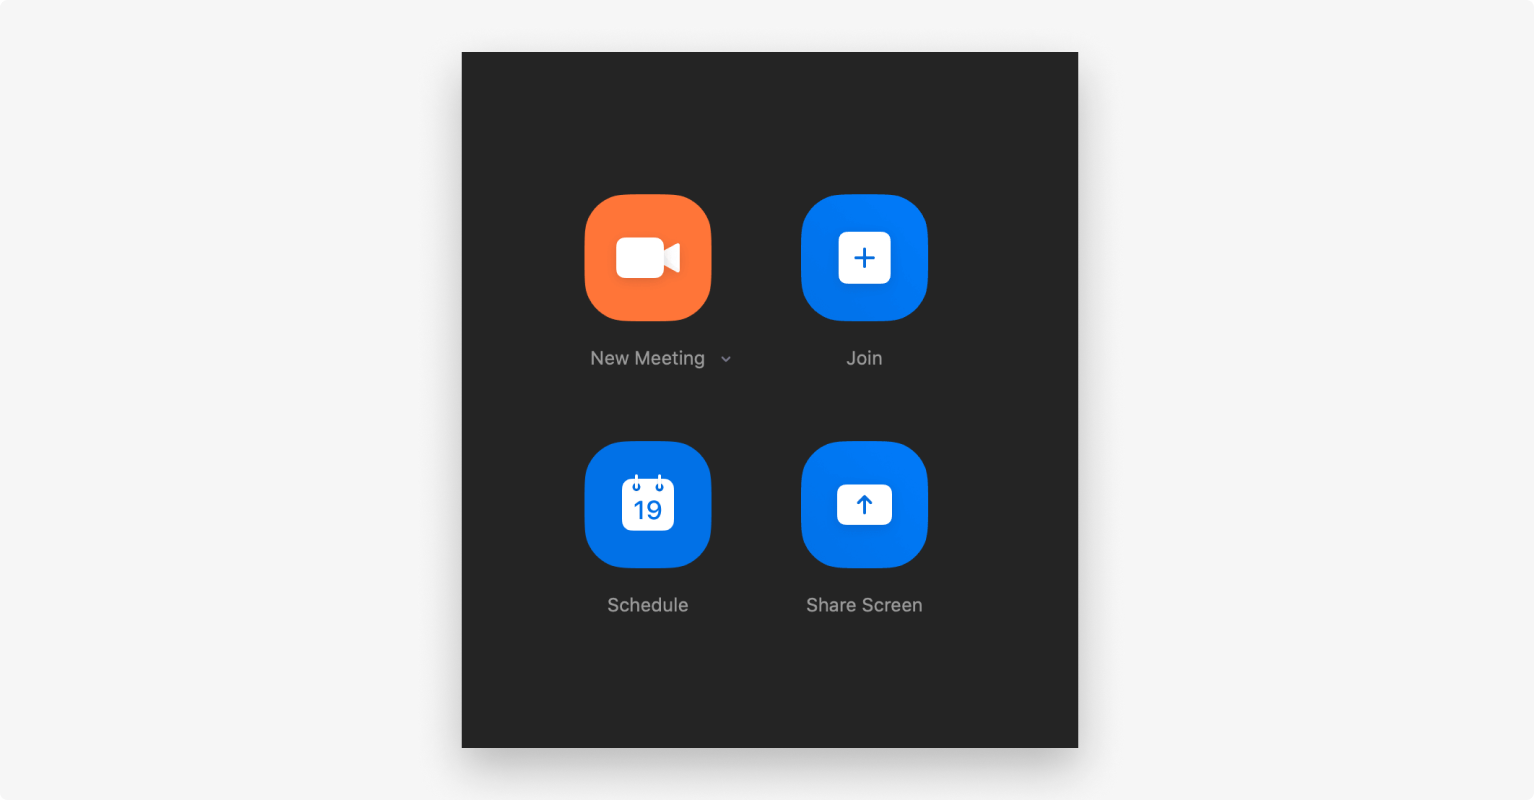
Hit “New Meeting” to start recording now, or “Schedule” to set up a recording for a later date. Give your meeting a name, set the date and time, choose whether or not it should repeat, and then hit “Save.”
Step 3: Prepare your podcast guests
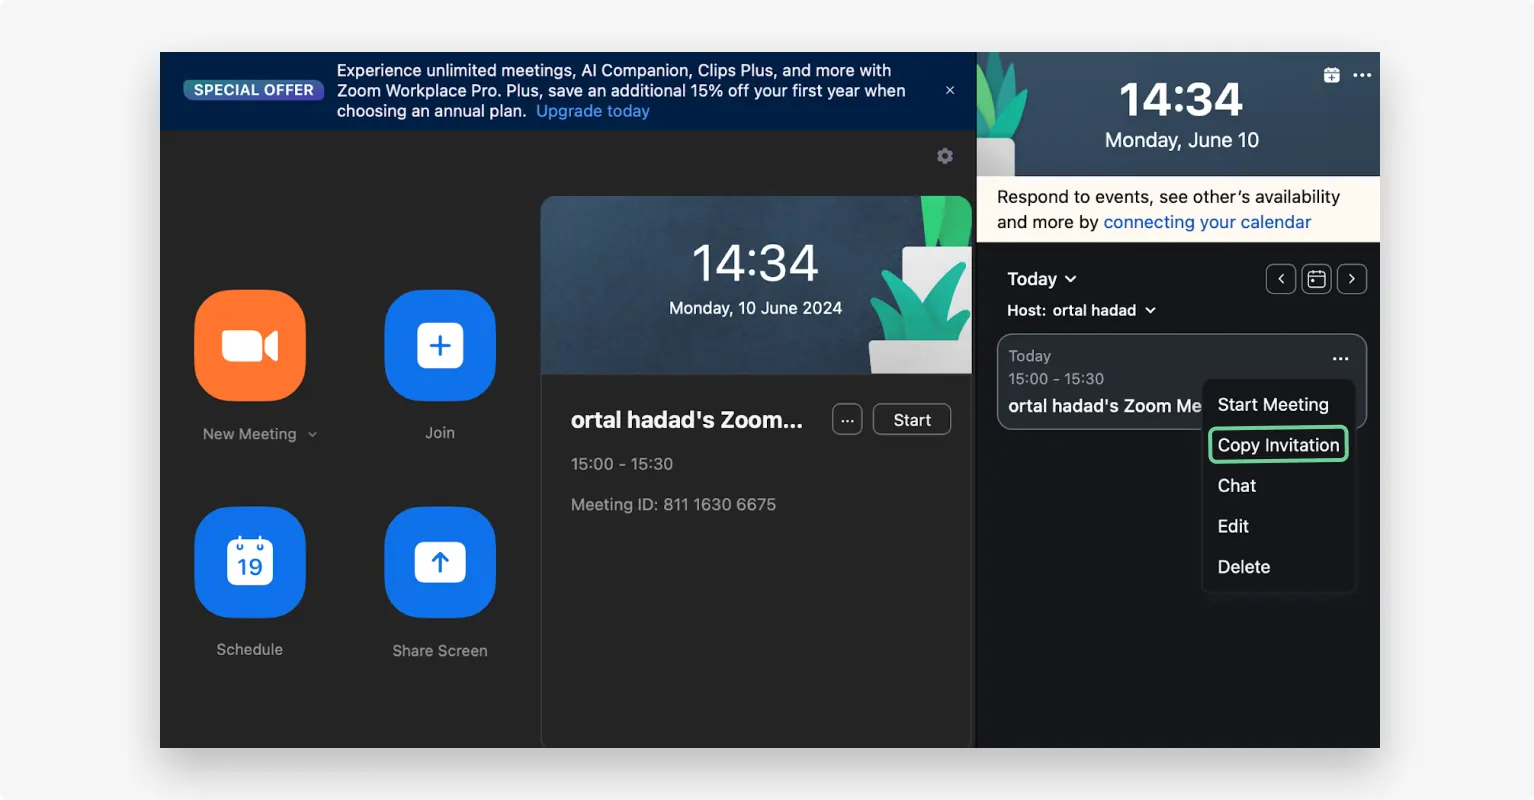
On the Zoom dashboard, click the three-dotted menu next to your meeting title and select “Copy invitation.”
Send the invitation via email to your guests, along with other useful instructions and recording tips. This might include:
- Encouraging them to record in a quiet space.
- Requesting that they wear headphones and use a podcast microphone if possible.
- Sending them your script or plan for the podcast so that they know what to expect.
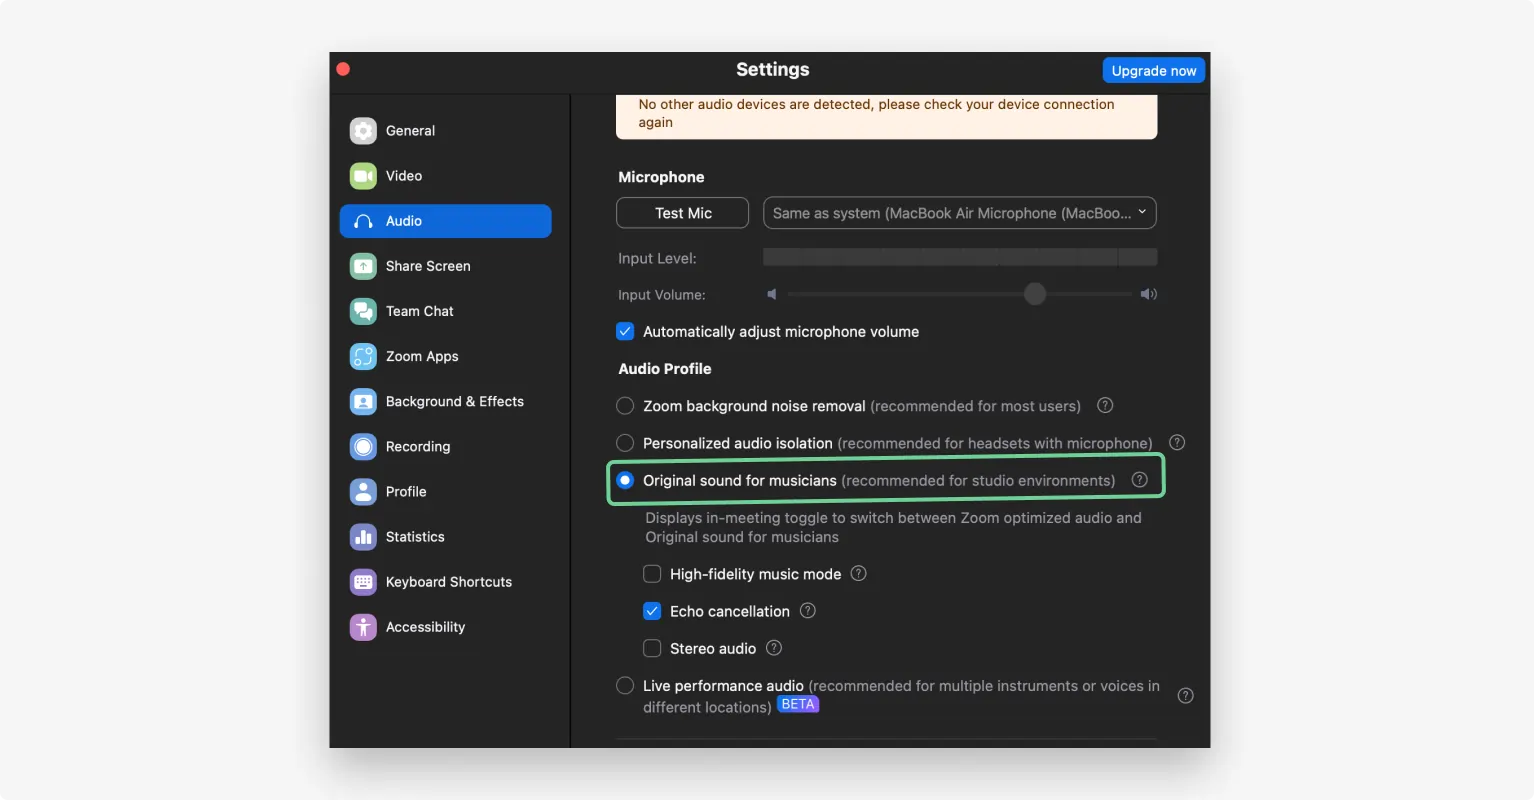
Step 4: Optimize your Zoom audio settings for best quality
When using Zoom for podcasting, we recommend you adjust a few audio settings for best quality. You’ll find these settings if you go to the gear icon and select “Settings” and then “Audio.”
- Record original audio: From the Audio settings, turn on "Original sound for musicians" to remove Zoom's automatic echo cancellation. If you’re using an external microphone and headphones, you may not need this setting.
- Uncheck “Echo Cancellation:” Under the same menu, deselect “Echo Cancellation.” It isn’t needed if you’re using an external microphone and headphones.
- Record separate audio tracks: In the “Recording” settings select “Record a separate audio file for each participant.” This will make editing and post production much easier and more straightforward.
- Turn on “High-Fidelity Music Mode:” This feature is intended for music recording, but it will enhance your podcast recording sound if you switch it on.
- Adjust microphone and speaker volume: Adjust the volume of your microphone and headphones for you and your guests. Be sure to disable “Auto volume” as this can cause inconsistent audio levels when Zoom compensates for quieter voices.
- Enable HD audio: This improves the overall clarity and richness of your voice.
- Choose between stereo or mono audio: You can choose to record your podcast in mono (single channel, easier editing) or stereo (two channels, for a more immersive sound with voice separation).
- Record separate audio tracks: From the recording section, enable the “Record a separate audio file for each participant” option. This will make editing easier as you’ll be able to edit each speaker's audio without effecting anyone else's.
Step 5: Test your setup with your guest(s)
Avoid nightmare scenarios by running a test recording with your guests before the real recording.
Make sure you and your guests have the correct microphone and speaker selected and ensure everyone is (ideally) wearing headphones.
Make sure you and your guests are recording in a quiet environment, and that any unwanted noises are removed.
This is also a good time to set up whether you want to record in Speaker View or Gallery View. Note that the video will record in whatever layout you see on your screen.
Give yourself enough time to troubleshoot and fix any issues that may crop up, such as guests not being able to hear each other. Basically, this is a bit of a dry run to ensure everything is working OK before the recording begins.
You can test your microphone and webcam using Riverside’s Test Microphone and Test Webcam tools.
.webp)
Step 6: Start recording your Zoom podcast
Now it’s time to start recording your podcast. Once everyone has arrived and you have carried out your necessary tests, hit “Record” in the "More" controls toolbar at the bottom of the window.

Be sure to monitor audio when using Zoom for podcast recording through its visual input level meter. You’ll find this under the audio settings. This will show if your microphone is picking up sound and how strong the signal is. This can help you catch and deal with audio issues during the session.
If you need to cough or sneeze, mute your mic - just don’t forget to unmute it when you’re ready to speak again!
Step 7: End the call and access your recording files
Once you’ve finished your recording, simply end the call and access your files so that you can download and edit the audio for your podcast episode. Where to find your files depends on whether you’ve chosen “Local Recording” (recordings are stored on your computer) or “Cloud Recording” (recordings are saved on the cloud).
- Local recording: After the session ends, Zoom automatically converts the files and saves them to your “Zoom folder,” which is usually located in “Documents” on your desktop.
- Cloud recording: Head to your “Recordings” located in “My Account,” select the correct meeting to view and download your files.

Note: Unlike in Riverside, Zoom’s local recordings aren’t captured directly to your device in real time, they’re streamed and then saved locally after the call. This means your recording depends on your internet connection, so any glitches or dropouts will affect the final recording.
When podcasting on Zoom you will be able to access and download the following files:
- MP4 for the full video recording (in both speaker and gallery view).
- M4A for each audio track (if a separate audio track was selected).
- .txt file if chat was used during recording.
Step 8: Edit your podcast
Zoom does not offer editing capabilities, so you will need to use external software to clean up, trim, and polish your podcast recordings before you publish. Here are a couple of options for doing that:
- Audio only editing: Audacity is a free, cross-platform audio editor for Windows and Mac. It allows you to remove background noise, trim unwanted sections, add music, and apply effects to enhance your podcast audio.
- Video and audio editing: Riverside is an all-in-one podcasting platform for editing (and recording) high-quality audio and video. Compatible with both Windows and Mac, it offers features like automatic transcription, text-based editing, and other handy tools designed to make podcast editing fast and easy.
Import your recorded files into your chosen software and follow these editing tips:
- Tidy up video and audio: Clean up the video and audio by removing mistakes, trimming unwanted sections, and cutting out unnecessary filler words.
- Remove background noise: Remove background noise that may be distracting for listeners. (You can do this with a click in Riverside.)
- Normalize volume levels: Ensure all guests are at a consistent volume throughout the recording, so no one sounds too loud or too quiet compared to others.
- Add music: Add in your intro and outro, and any other music or sound effects to enhance the listener experience.
- Include internal or external ads: Find places where it feels natural for an internal or external ad to play.
- Ensure your podcast episode flows: After you’ve done all your editing, listen to make sure the podcast episode flows and nothing feels out of place.
Step 9: Publish your podcast
Zoom does not offer podcast hosting, meaning you will have to use an external platform to distribute episodes to Spotify, Apple Podcasts, and Amazon Music.
- Free option: Spotify for Creators is a free option that’s great for beginners on a tight budget. Upload your podcast and episodes to the platform, and Spotify for Creators will distribute your podcast to podcast playing apps. If you record and edit from Riverside, you can share your work to Spotify directly from Riverside’s platform.
- Paid option: Distribute and house your podcast on Captivate for $19 per month. Get access to more advanced data on downloads and listeners, and use its range of features including dynamic show notes, monetization features, guest booking tool, and much more.
For more options, check out our list of the Best Podcast Hosting Platforms.
Is Zoom good for podcasting? Pros and cons
Zoom is easy to use, convenient, and has a free plan. But it also has some drawbacks for podcasters. Here’s a look at the pros and cons of using it to record your podcast.
Tips for improving your podcast on Zoom
Zoom offers limited features for podcasters, especially when compared to other options such as Riverside, which includes built-in editing tools specifically tailored for podcasters.
However, if you’re contemplating using Zoom for your podcast, here are some simple tips to improve the recording quality.
Use wired internet
It may seem “old school” but a wired ethernet connection is substantially more stable than Wi-Fi. This will reduce the risk of any lags, dropouts, or poor audio/video quality, which is important if you have multiple guests. (You could also consider a platform like Riverside, which uses local recording to ensure the highest quality audio and video, regardless of your internet connection.)
Have a backup recording
Because Zoom is so dependent on internet connection, it's essential to always have a backup recording. The best way to do this is for all guests to record locally on their own device. If Zoom crashes or the recording fails, you can stitch together the separate local recording from each device. Learn more in How to Record Video Locally on Zoom.
Mute background apps
Make sure to close or mute apps that use your microphone, camera or internet (Slack or Teams for example). This helps to prevent distractions and reduce CPU load for better performance. It also minimizes annoying notification sounds or unexpected interruptions in the background.
With Riverside’s Magic Audio, these interruptions or sounds can be automatically filtered out. This way you get top-quality audio even if someone forgets to mute a notification.
Speak one at a time
Before hitting record, coach your guests about avoiding cross-talk, and giving everyone the time and space to finish their point before speaking. There may be long pauses in the recording as a result, but you can easily cut these out later to keep the flow of conversation. (Riverside has a feature that allows you to clean up pauses and filler words with just one click!)
Keep episodes under 40 mins (or upgrade)
If you're using Zoom's free plan, be sure to plan your episodes to stay within the 40-minute limit. Let your guests know about the time restriction in advance, and keep an eye on the clock to make the most of your session. Or, you can use Riverside. We’ll let you record as long as you’d like for free!
FAQs on recording a Ppodcast on Zoom
Can you record a podcast on Zoom?
Although Zoom isn’t specifically designed for podcasters, it’s a convenient way to record both video and audio content for your podcast episodes. If you’re concerned about higher quality audio and video, or want tools designed for making a high-quality podcast, we recommend Riverside.
Can you podcast on Zoom for free?
Yes, using Zoom for podcasting is free, as long as your sessions stay within the 40-minute time limit, and you don’t need advanced features such as cloud recording or extended storage.
Does Zoom record separate tracks?
You can record separate audio tracks with Zoom. Recording separate video tracks on Zoom requires complicated technical workarounds. Or, you could use Riverside - we do it automatically.
What happens if my meeting hits 40 mins?
If you’re using the free plan to record a podcast on Zoom, you’ll get a warning 5 minutes before you hit the 40-minute limit that your call is about to end. When you reach the time limit, the meeting automatically ends, the window closes, and everyone is disconnected. You can restart the meeting by clicking the same link, but there’s a 10-minute cooldown period before you can join again.
How to convert Zoom audio to WAV files?
Zoom saves video files as MP4 and audio-only files as M4a, but you can use Riverside to convert them into WAV files. Simply login to your Riverside account, and upload the MP4 or M4a file from Zoom. Once it has been processed you’ll be able to download the file as a WAV file.
What quality is Zoom audio for podcasts?
Zoom audio can be recorded in up to 48 kHz, but the overall quality depends on the quality of your internet connection. Zoom also compresses audio, which can further reduce quality. With Riverside, you can record in up to 48 kHz locally, without compression. So, you’ll get professional-grade sound quality regardless of your internet connection. You’ll also get simple editing tools to help make your audio sound even better!
How to record audio on Zoom for podcast?
Want to only record audio and not video in Zoom? All you need to do is go to “Settings,” navigate to the “Recording” section, and enable “Record an audio-only file.” When you hit “Record” during your meeting, only your audio will be recorded and saved as an M4a file.


.webp)