


Key takeaways:
- Zoom video recordings are limited to 720p on most paid and free plans, and up to 1080p on Business and Enterprise plans.
- You can improve Zoom video quality by enabling HD recording in Zoom’s settings.
- A better camera and lighting can also make your video look more crisp.
- With high-quality video recording software like Riverside, you can record in up to 4K.
Tired of blurry Zoom video recordings? You’re not alone. It’s possible to get higher quality records in Zoom, but it does take a little setup and know-how.
In this guide, we’ll show you how to improve your Zoom video quality, as well as some other tools you can use for high-quality video recording.
Let’s do this!
How to increase Zoom meeting video quality: 4 ways
Ready for higher-quality Zoom recordings? Here are 4 things to try.
1. Get your setup right
No matter what platform you’re using to record, the first thing you can do to improve video quality is put together a decent setup. You don’t need a professional studio, but we do recommend:
- A decent camera: A webcam works, but choose one that records in at least 1080p (Zoom’s max resolution). A 4K webcam can further enhance your video thanks to larger sensors and improved low-light performance. See our picks for the best webcams to learn more.
- Proper lighting: Good lighting makes your video look instantly sharper. Face a soft, diffused light source. A window can work, but a ring light or simple 3-point setup is more reliable. See our guide to video lighting for more tips.
- A dedicated microphone: For clear, professional sound, use a USB microphone instead of your webcam’s built-in mic.
- A clean backdrop: A tidy background with no distractions won’t improve video resolution, but it will make your video look better. Avoid virtual backgrounds as these can degrade performance, leading to lower quality video in Zoom.
2. Enable HD recording in Zoom
If you’re on a paid Zoom plan, you can enable HD recording for higher resolution.
- By default, most Zoom meetings record at 720p.
- Business and Enterprise plans allow 1080p recording, Zoom’s highest available resolution.
To enable 720p or 1080p HD, follow these steps:
Step 1: Opt for HD recording
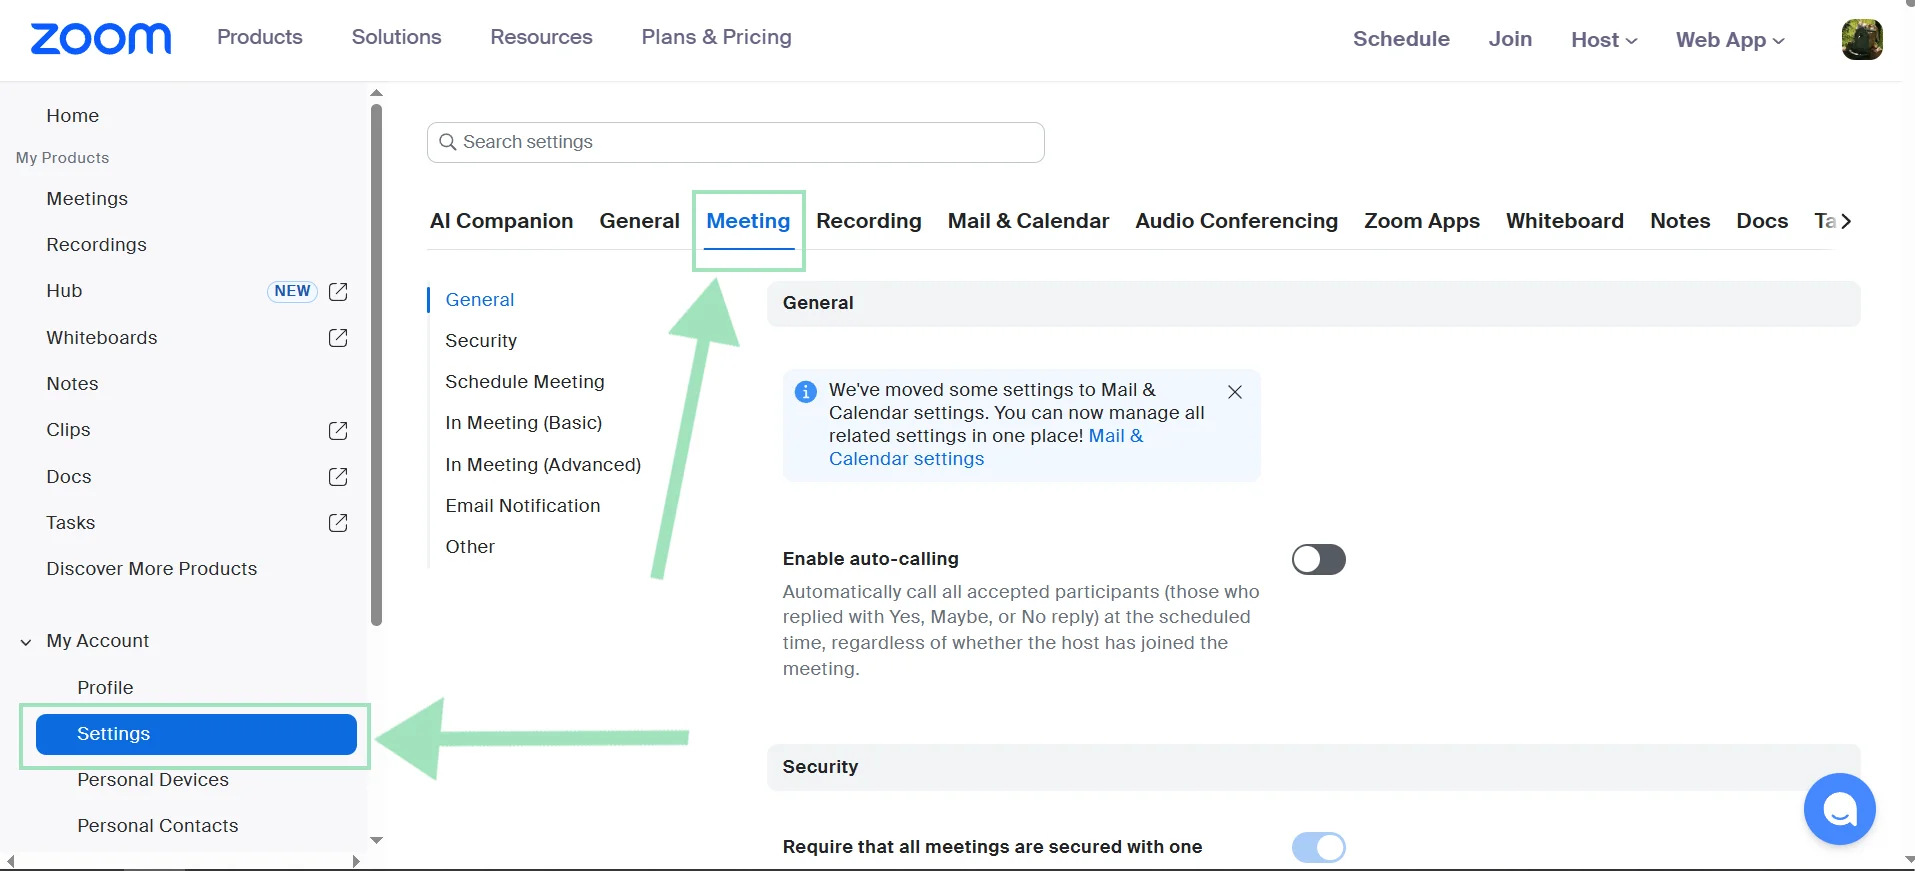
Log into the Zoom web portal and go to “My Account > Settings” in the left-hand menu. Next, select the “Meeting” tab.
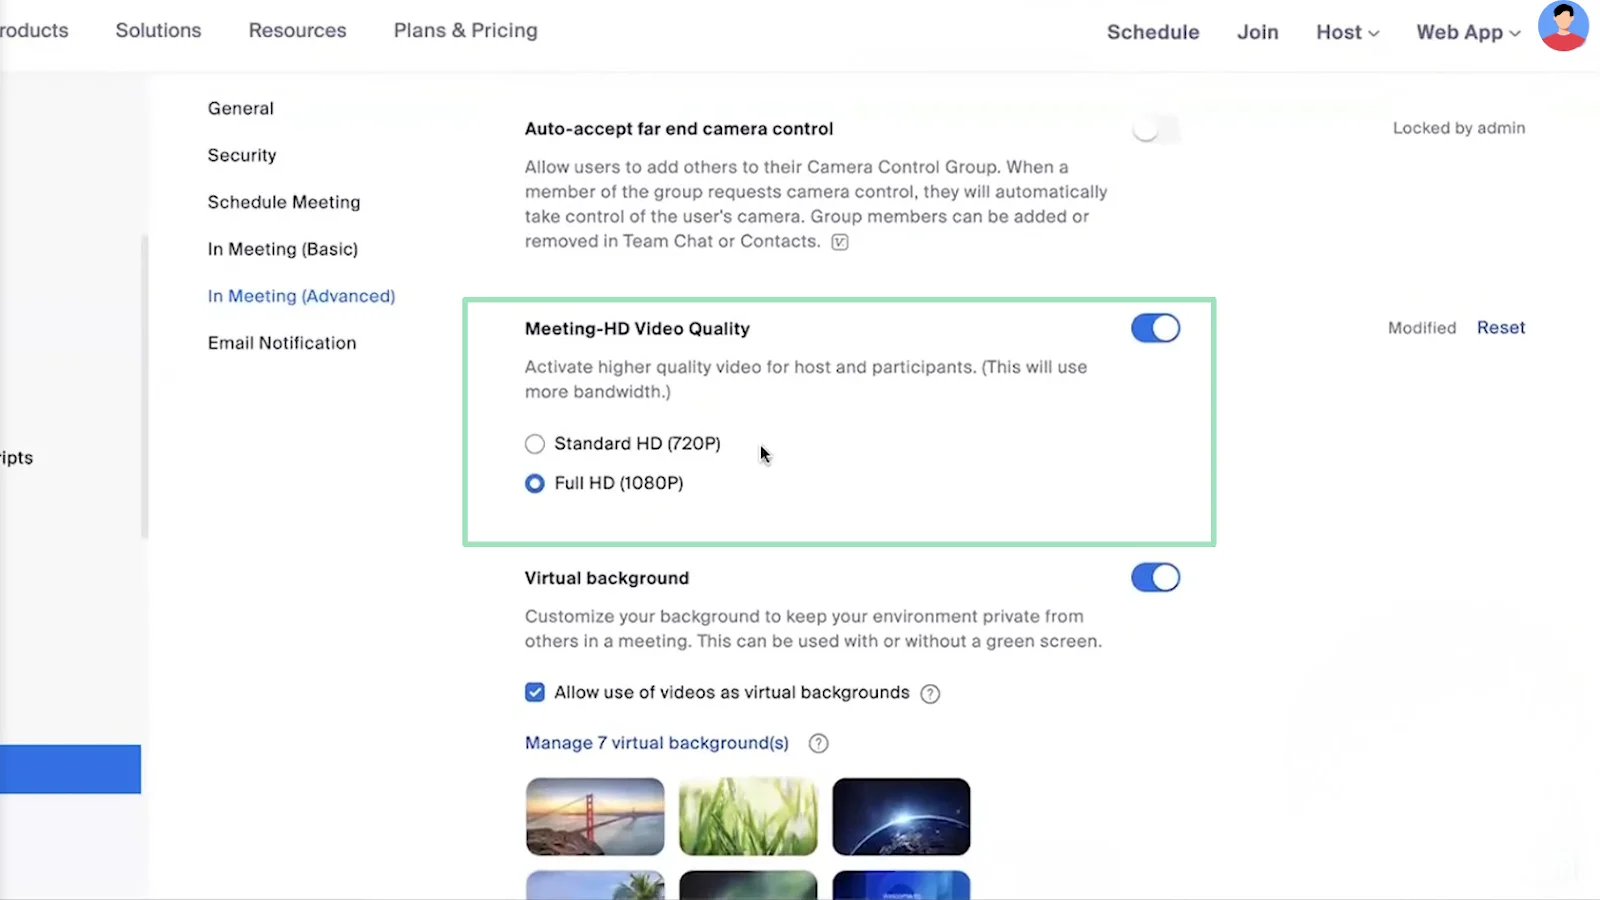
Select the “In Meeting (Advanced)” submenu and then scroll all the way down to the setting called “Meeting-HD Video Quality.” Select 720p or 1080p video.
Note: The options available here depend on your Zoom plan.
Step 2: Opt to record locally
Zoom supports 1080p resolution only when recording locally (to your computer). Even 720p is generally more reliable when saved locally rather than to the cloud.
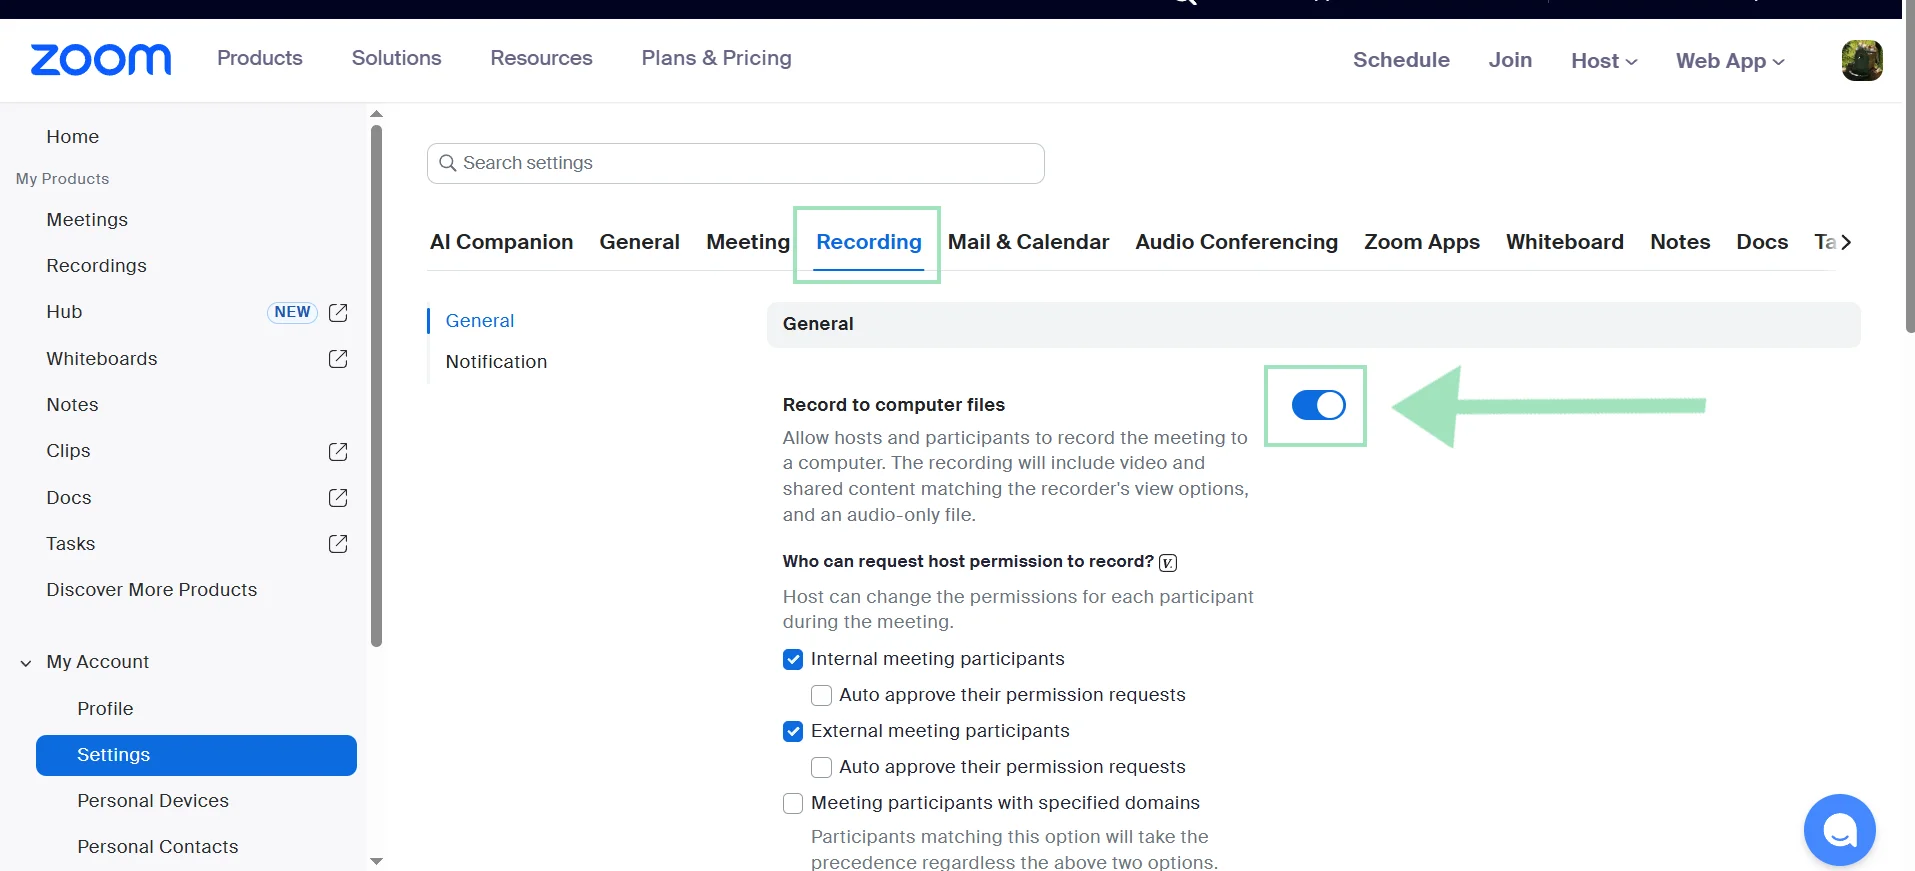
To enable local recording, log into the Zoom web portal and go to “My Account > Settings,” then “Recording.” Enable “Record to computer files.”
Step 3: Contact Zoom (for paid plan support)
Zoom doesn’t always enable HD recording by default. If you don’t see the option for 720p (Pro plan) or 1080p (Business/Enterprise plan), contact Zoom Support and submit a technical request.
Let the help team know your plan type and that HD recording isn’t available in your settings. Oftentimes, Zoom can enable it within a few hours.
Read: How to Record Zoom Meetings
3. Preserve your camera’s native aspect ratio
Zoom’s “Maintain original ratio” setting prevents your camera feed from being stretched or artificially cropped to fit Zoom’s layout.
To enable it, open the Zoom desktop app (unlike the steps above, this setting is found in the desktop app, NOT the Zoom website), click your profile picture, and select “Settings,” then “Video & effects.” Ensure that “Original ratio” is selected.

Note: You’ll see an HD setting here too, but this one affects the live camera feed during your meetings, not your recording quality. Still, make sure it's toggled on.
4. Use high-quality recording software
Zoom is primarily designed for real-time communication, not recording. By choosing recording software like Riverside, you can get much higher quality recordings automatically.
Unlike Zoom, Riverside doesn’t heavily compress videos during recording. It captures video locally in up to 4K (and audio at 48kHz), delivering consistent, professional-quality results every time you record. That means even if someone’s connection is unstable, the final recording stays sharp.
You also get:
- Separate tracks: Separate audio, video, and screen share tracks for every participant make it easier to edit your recording. (Zoom only provides individual audio tracks.)
- Progressive uploads: Files upload to the cloud as you record, ensuring they’re safe and ready right after your session. (Zoom makes you wait.)
- Easy guest invites: Guests can join your video from their browsers by clicking a link, no downloads necessary.
- Scheduling: Riverside integrates with calendars, ensuring everyone makes it to the meeting.
- Layouts: Pick grid, speaker view, or dynamic layouts that switch focus with the conversation. (Zoom only provides a couple of static layouts.)
- Full editing capabilities: Use an AI-powered editing suite to polish your video, and add captions, music, and B-roll. (Zoom only lets you trim your video.)
Why is my Zoom video blurry? Troubleshooting tips for better video quality
Use the latest version of Zoom
Zoom frequently improves video encoding, HD handling, and recording stability. So before recording, check that you’re using the newest version of the Zoom app. Older versions can quietly limit resolution, introduce glitches, or disable newer HD features.
You can do this by logging into Zoom, clicking on your profile picture, and selecting “Check for Updates.”
Get a proper lighting setup
Good lighting can instantly make your video look clearer and more professional. Face a window or light source so your face is evenly lit. If that’s not possible, set up a soft desk lamp or ring light just behind your camera.
Ensure high-quality internet
Even with all the right settings, weak internet will tank your video quality. If you can, plug into Ethernet, as it’s always more reliable than Wi-Fi.
If you’re stuck on wireless, stay close to your router and close other apps that use bandwidth. During an important meeting, it can also help to ask housemates or colleagues to pause big downloads or streaming. That extra bandwidth often makes the difference between a sharp feed and a pixelated one.
Avoid virtual backgrounds
It’s best to avoid virtual backgrounds on Zoom if recording quality is a concern. These settings use real-time processing power. That extra load can force Zoom to lower resolution or increase compression, especially on older computers.
Instead, use a clean, simple background. The less your computer has to process, the better your video will look.
Keep things simple
The more participants and visual effects involved, the more aggressively Zoom compresses the video.
For the best possible recording quality:
- Use Speaker View.
- Keep participant count smaller when possible.
- Turn off visual effects.
- Close unnecessary apps to reduce CPU strain.
Regardless of your settings, Zoom dynamically adjusts resolution based on meeting conditions. Even with HD enabled, it may downgrade quality to keep the call stable.
Don’t forget audio quality
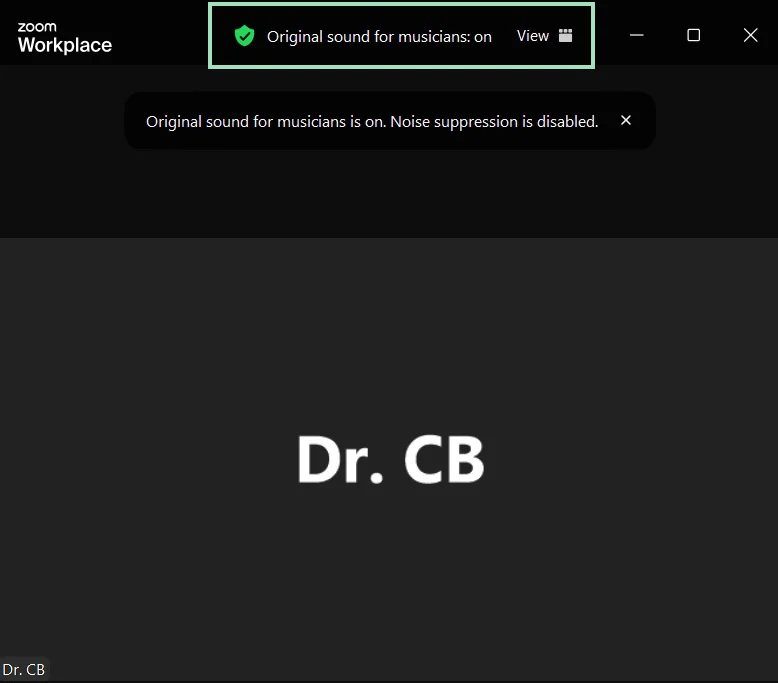
By default, Zoom tries to clean up your voice with noise suppression and echo cancellation. When you enable Original Sound, Zoom stops applying automatic filters and captures more of your mic’s raw signal. For anyone recording music, interviews, or podcasts, that usually means richer, cleaner audio.
Here’s how to turn on Original Sound:
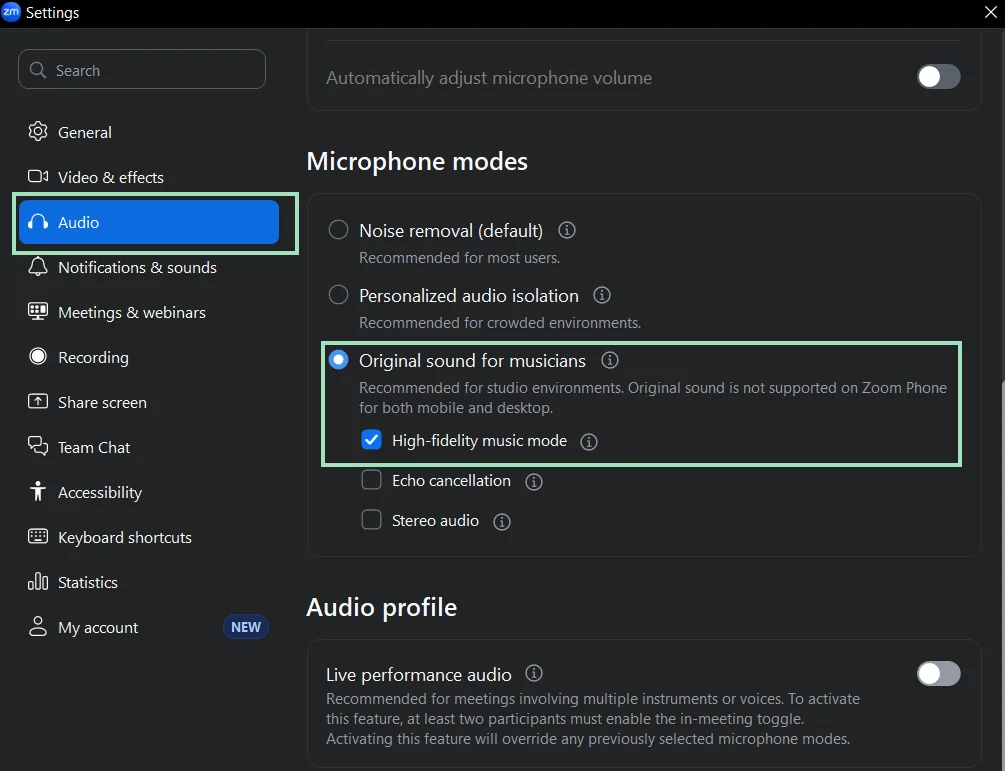
- Open the Zoom desktop app and go to “Settings” → “Audio.”
- Under “Microphone modes,” choose “Original sound for musicians.”
- Check “High-fidelity music mode” if your mic and computer can handle it (this disables most of Zoom’s processing).
Once you set this up, you’ll see a toggle in your meeting window labeled “Original Sound.” Enable it whenever you want unprocessed audio.
Note: If you’re in a noisy room or using laptop speakers, this setting might actually lead to more background noise in your recording. Using a microphone and headphones can help here.
Learn more: How to Improve Your Audio Quality on Zoom with 7 Easy Tips
FAQs about Zoom video quality
What are the recommended camera settings for Zoom?
The recommended camera settings for Zoom are 1080p and 30 frames per second. It’s also best to use manual exposure if your camera allows it.
Zoom can transmit in up to 720p by default, and up to 1080p on higher level plans. But using 1080p gives Zoom more image data to work with, which can make the video look clearer. As for frame rate, 30fps balances smooth motion and stability without increasing bandwidth and CPU load.
Why does Zoom reduce video quality?
Zoom reduces video quality to keep your meeting from lagging or freezing. If your internet is slow, your computer is busy, or there are many people in the meeting, Zoom reduces resolution and compression so the call stays smooth. It always prioritizes clear audio over sharp video, so when bandwidth is limited, video quality is the first thing to drop.
Does Zoom support 4K?
No, Zoom does not support 4K. It maxes out at 1080p, and that’s only available on Business and Enterprise plans. If you want 4K video, try Riverside. It records separate track audio and video in up to 4K.
How do you change the resolution of a Zoom video?
You can’t change the resolution of a Zoom video once it’s recorded, but you can increase resolution prior to recording by turning on HD settings in Zoom. You can do this by:
- Turning on HD video (live feed): Open the Zoom desktop app → Profile picture → Settings → Video & effects → Check HD.
- Enabling HD recording (if available): Go to the Zoom web portal → Settings → Meeting → In Meeting (Advanced) → Enable Group HD (720p or 1080p).
- Recording locally: Cloud recordings are usually capped at 720p. Local recordings have the best chance of reaching 1080p. To enable local recording, go to the Zoom web portal → “Settings,” then “Recording.” Enable “Record to computer files.”
Is it possible to convert a low quality video to high quality?
No, you can’t convert a low quality video to higher quality. If a video was recorded at low resolution (like 360p or 480p), the missing visual information is gone. You can improve how it looks slightly by using AI enhancing tools and color correction, but it won’t look as clear as video that’s actually recorded in higher resolution.
What are the best alternatives to Zoom for video conferencing?
The best alternatives to Zoom for video conferencing depend on your specific needs. If video quality is a concern, we recommend Riverside. It works much like Zoom, but is actually easier to use and records in up to 4K.
You also get lots of other tools that Zoom doesn’t have, like video editing, livestreaming and multistreaming capabilities. You can check out other top picks in our list of the best video conferencing software.


-p-800.webp)

